NordahlLunden NLH170NG Goshawk-SAR - SAR Helicopter
Vehicle, Air, Rescue, Exploration, Technical, Creative, Land, Fire, Mechanical, Advanced, v1.4.18
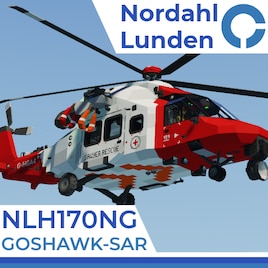
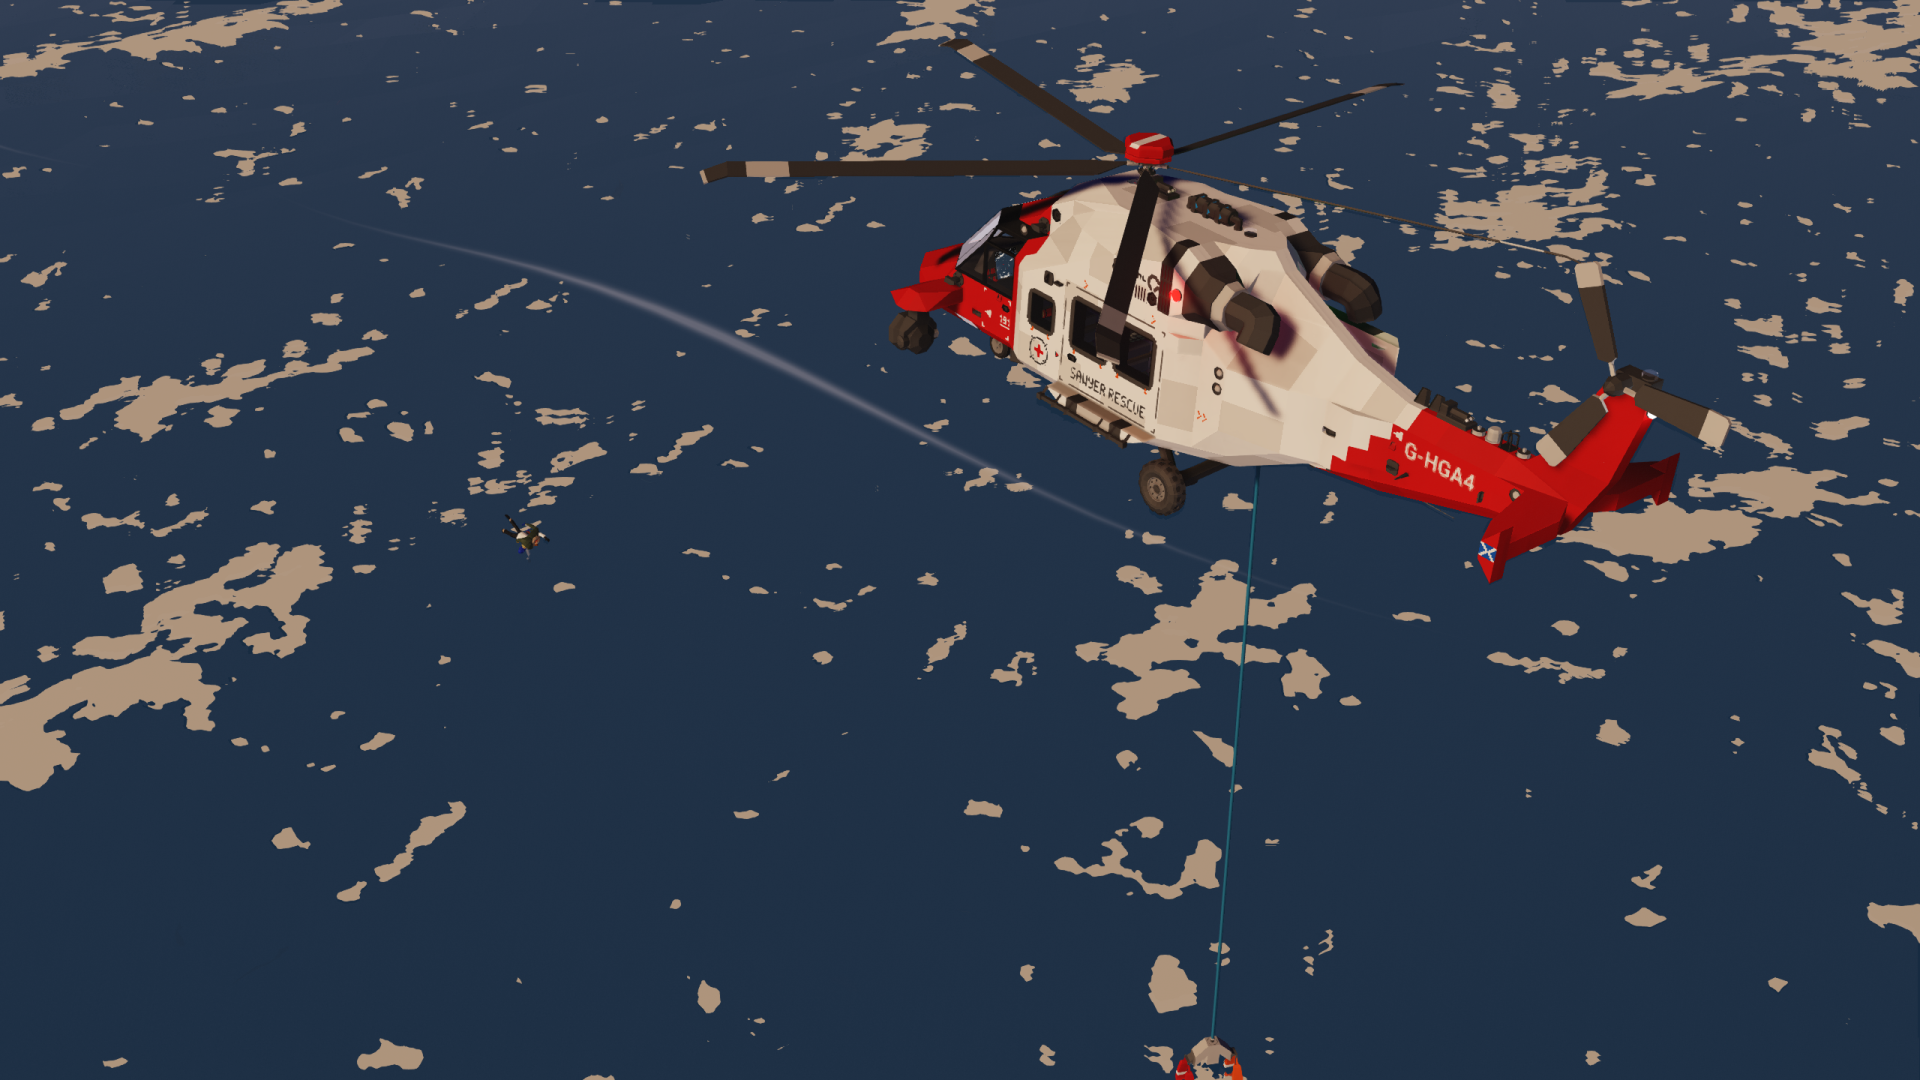
The NordahlLunden NLH170NG Goshawk-SAR is a Search & Rescue helicopter manufactured by NordahlLunden SE. This helicopter was specifically designed for Search & Rescue duties, boasting high survivor capacity and excellent fuel economy, as well as the ability to hover in place even in the strongest of winds.
Our products: NordahlLunden SE collection
Specs & Features*Clear...
Розробник: qwop
Дата створення: 18 Jan, 2022 @ 9:15am
Оновлено: 14 May, 2022 @ 1:49pm
Підписників: 24176
Розмір (розпакований) : 0.716 MB
Our products: NordahlLunden SE collection
- Length overall: 17.0 m
- Top speed: 265 km/h
- Range at 265 km/h: 2850 km
- Max flight time at 265 km/h: 670 min / 11 hours and 10 min
- 7140 liter fuel tank
- Crew: 1-3
- Survivor capacity: 9
- Fits in every hangar, even the small hangar at Coastguard Outpost TT
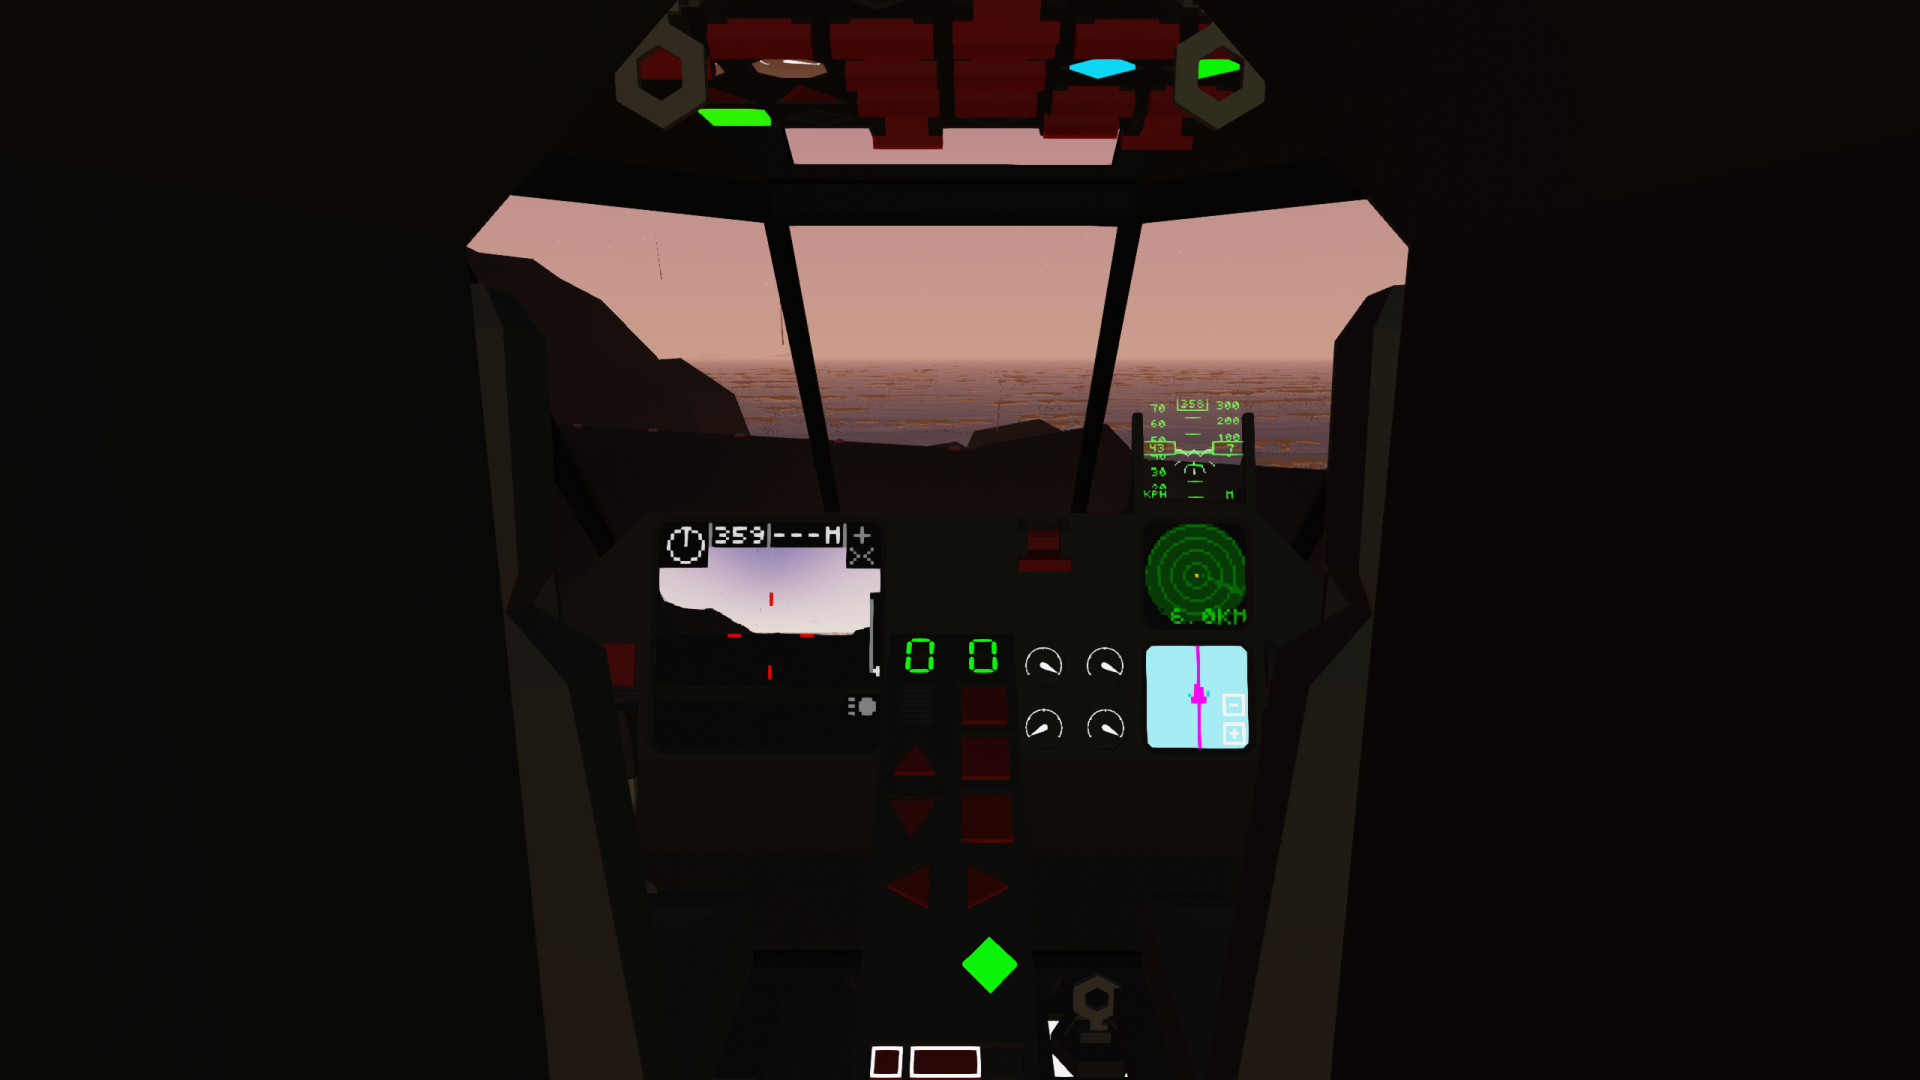
- Superb cockpit visibility
- The incredibly efficient NLP-HT4 engine, allowing for excellent range and flight time
- Search Radar with 6 km range
- GPS Navigation Map
- GPS Autopilot
- Automatic Position Hold System
- Beacon Locator
- VHF Radio
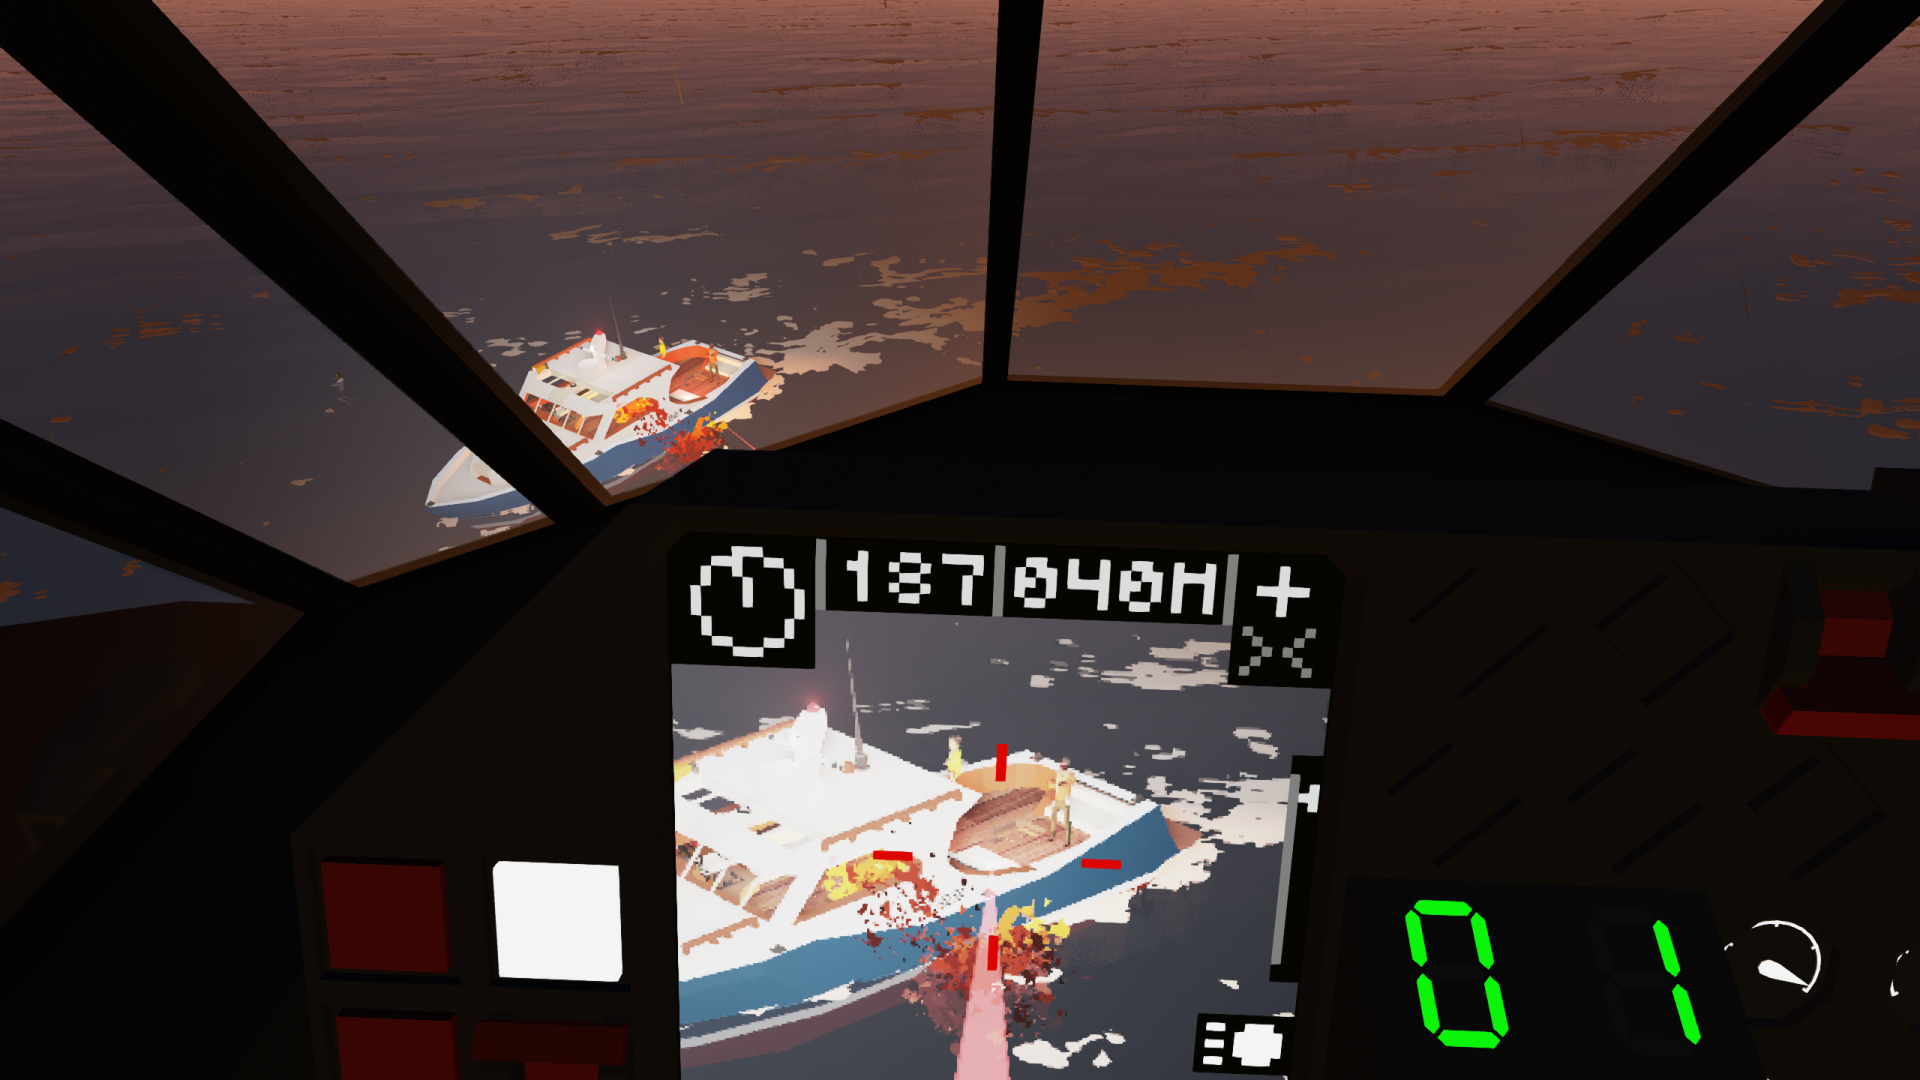
- AISC-31 – Search Camera & Search Light (Skyblaze)
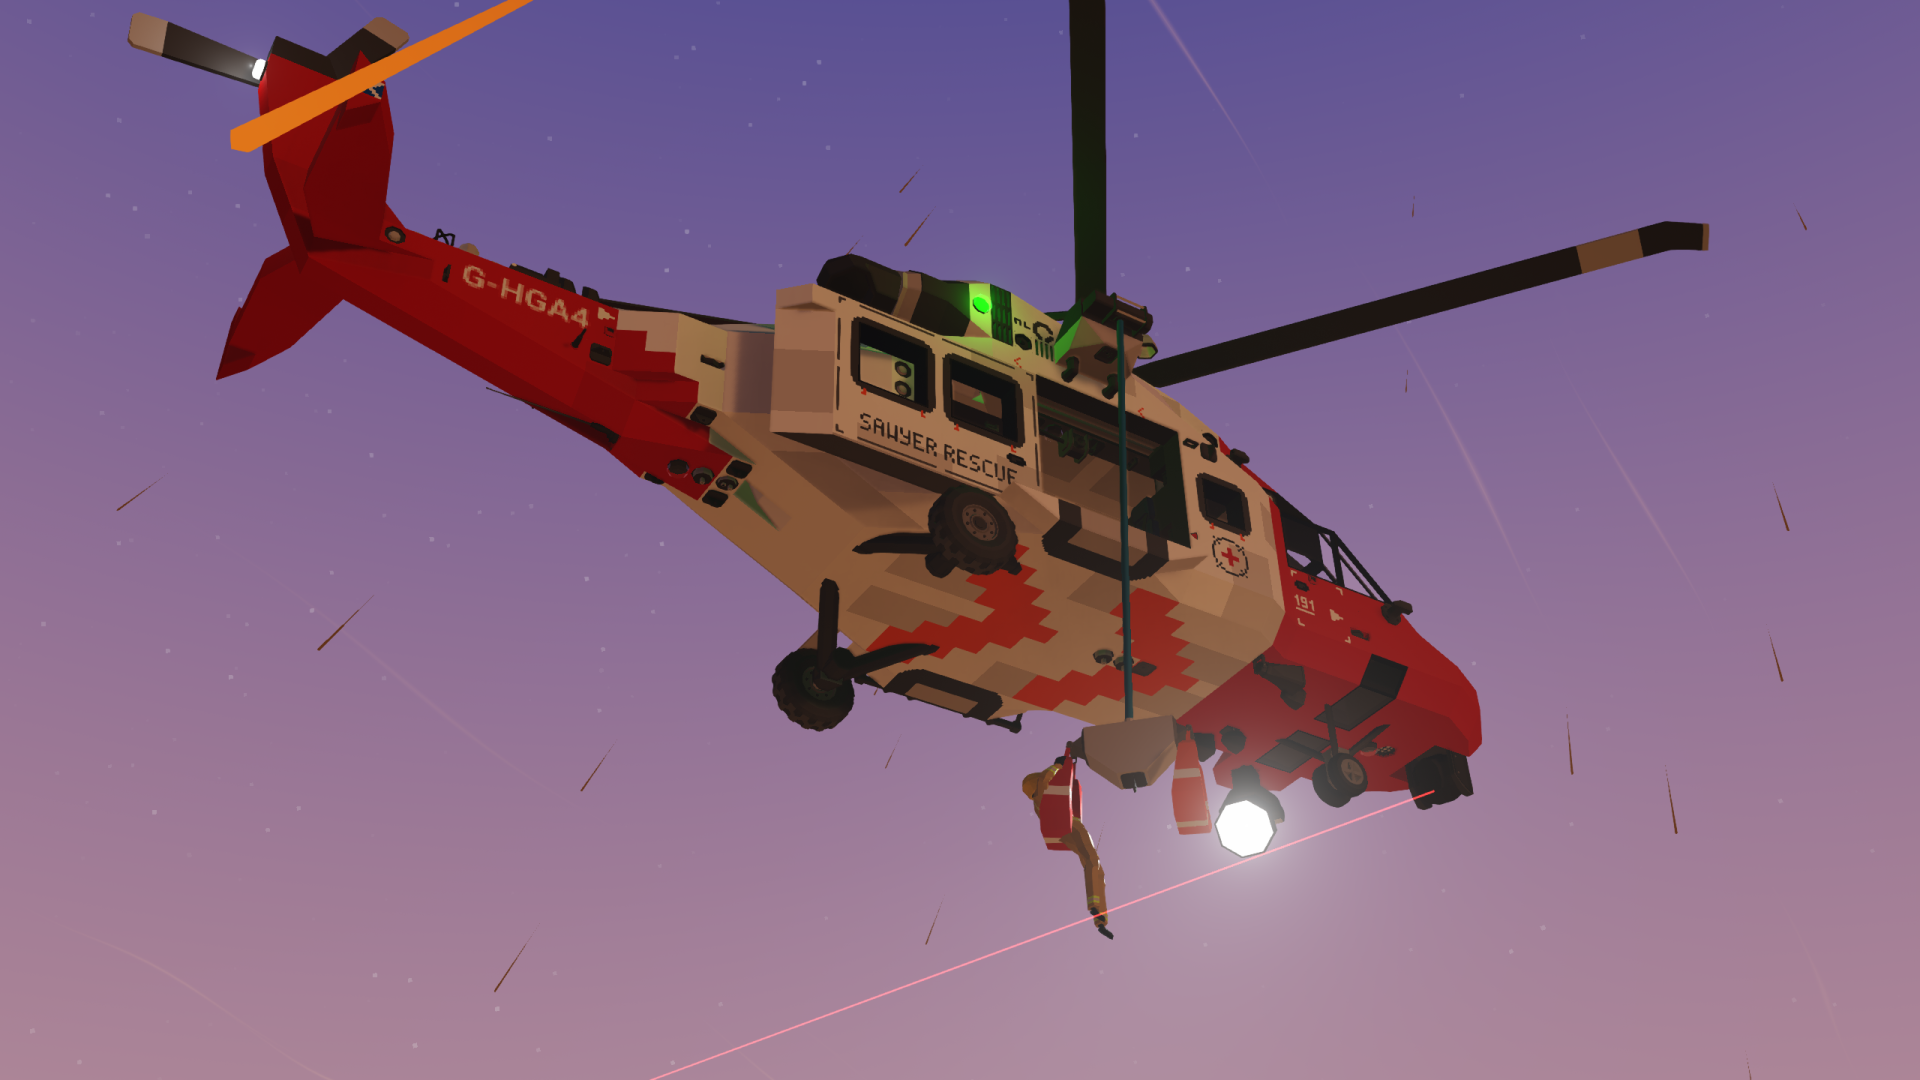
- Winch with winch controls and safe re-entry system
- Remote Control of the helicopter
- Get into the Captain’s seat.
- If EXTERNAL POWER AVAILABLE is on, turn on EXTERNAL POWER.
- BATT 1 and/or BATT 2 BUS on (it is recommended to use both).
- GEN, VHF RADIO MASTER, and RADAR BUS on.
- WINCH MASTER and GPS MASTER on.
- AISC-31 MASTER and AVIONICS BUS on.
- LIGHTS: POSITION, WHITE STROBE, RED STROBE on.
- When playing solo: Authorize Remote Control on, and carry the controller above the Captain’s seat at all times. Set the remote control to channel 1.
- ENG MASTER and ENG IDLE/FLIGHT on.
- If EXTERNAL POWER is connected, turn off EXTERNAL POWER and disconnect it.
- ROTOR BRAKE off.
- Wait for RPS to stabilize just below 5 RPS.
- Parking Brake off (below Captain’s seat).
- The helicopter will hover in place when giving no inputs to the flight controls.
- When attempting to hover in place in high winds, ALWAYS point the nose of the helicopter INTO the wind. This allows the helicopter to hold position even in 100% wind, and allows you to use the winch safely. DO NOT ATTEMPT to point the helicopter WITH the wind while attempting to hover in place in high winds.
- All units are in metric. km/h, meters, etc.
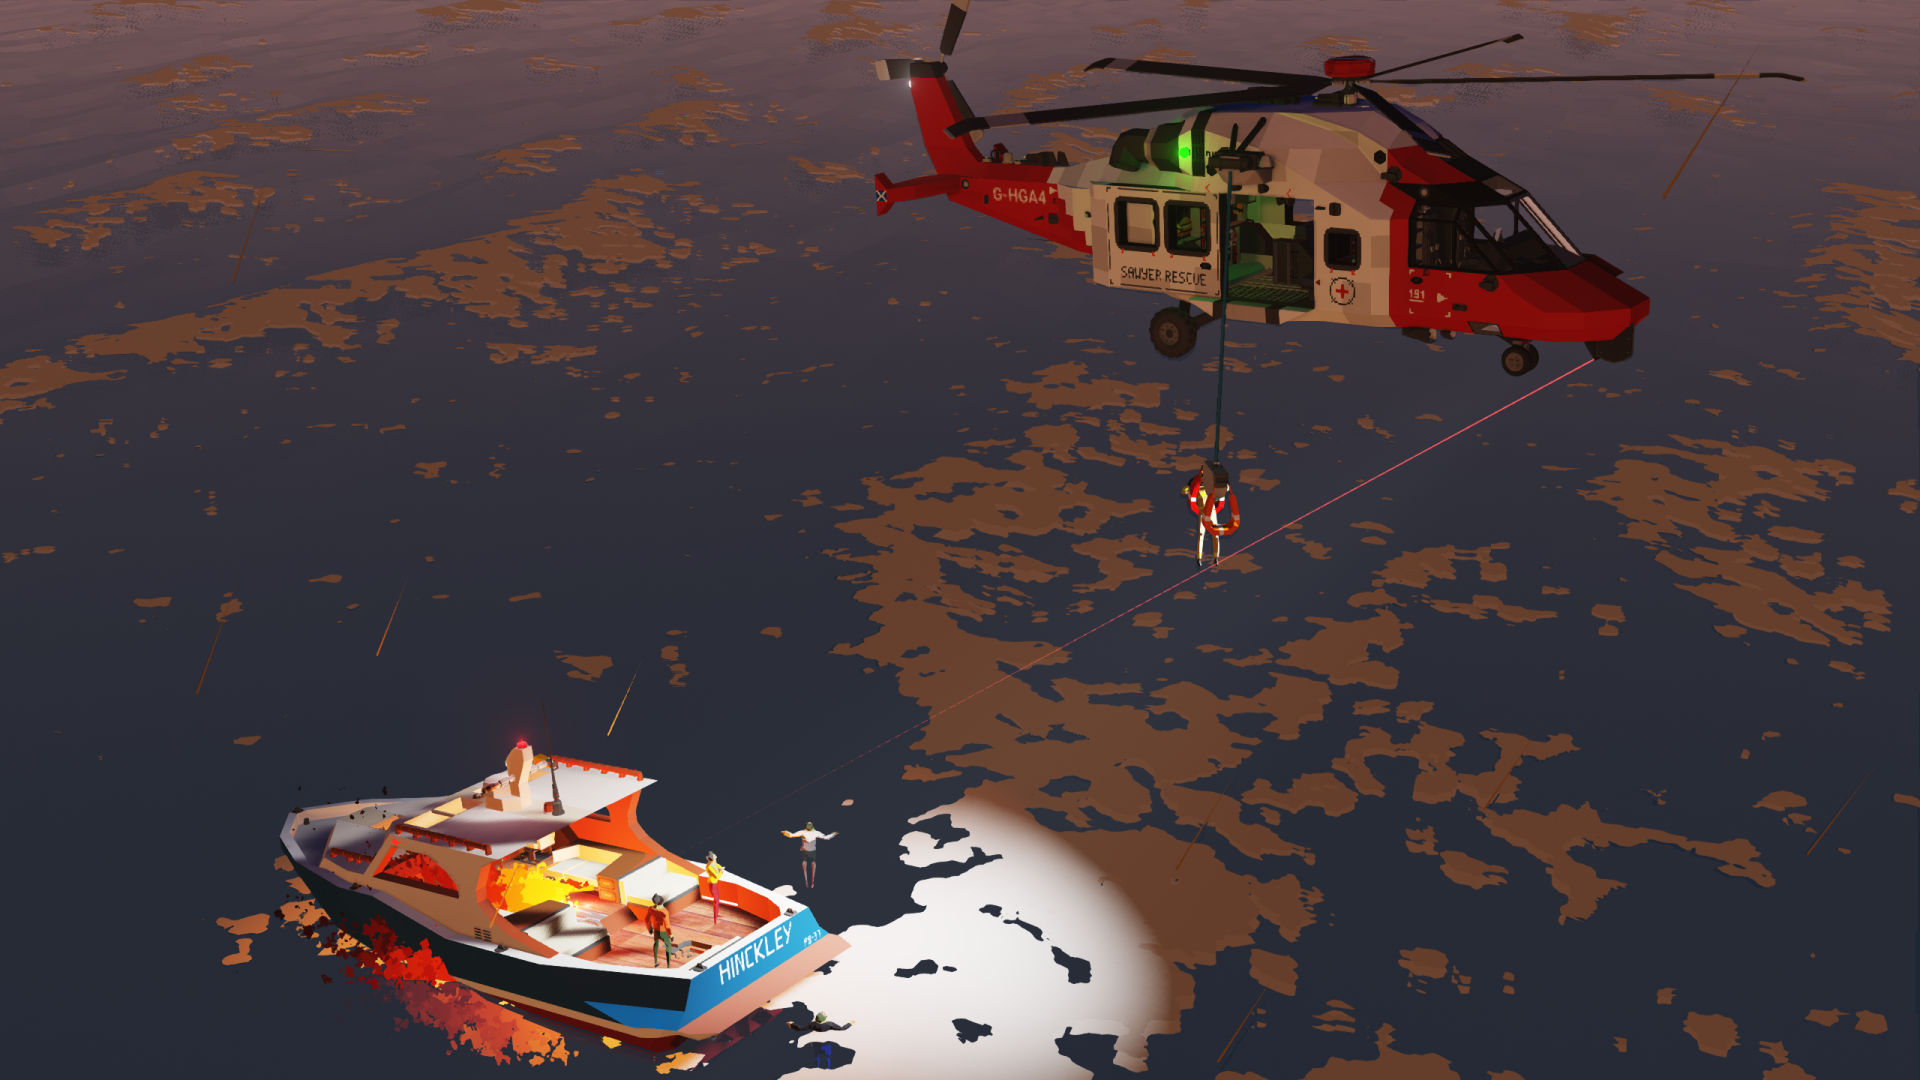
How to use the winch & guiding harness
- Get into the guiding harness and winch yourself down.
- Place the casualty in the survivor harness.
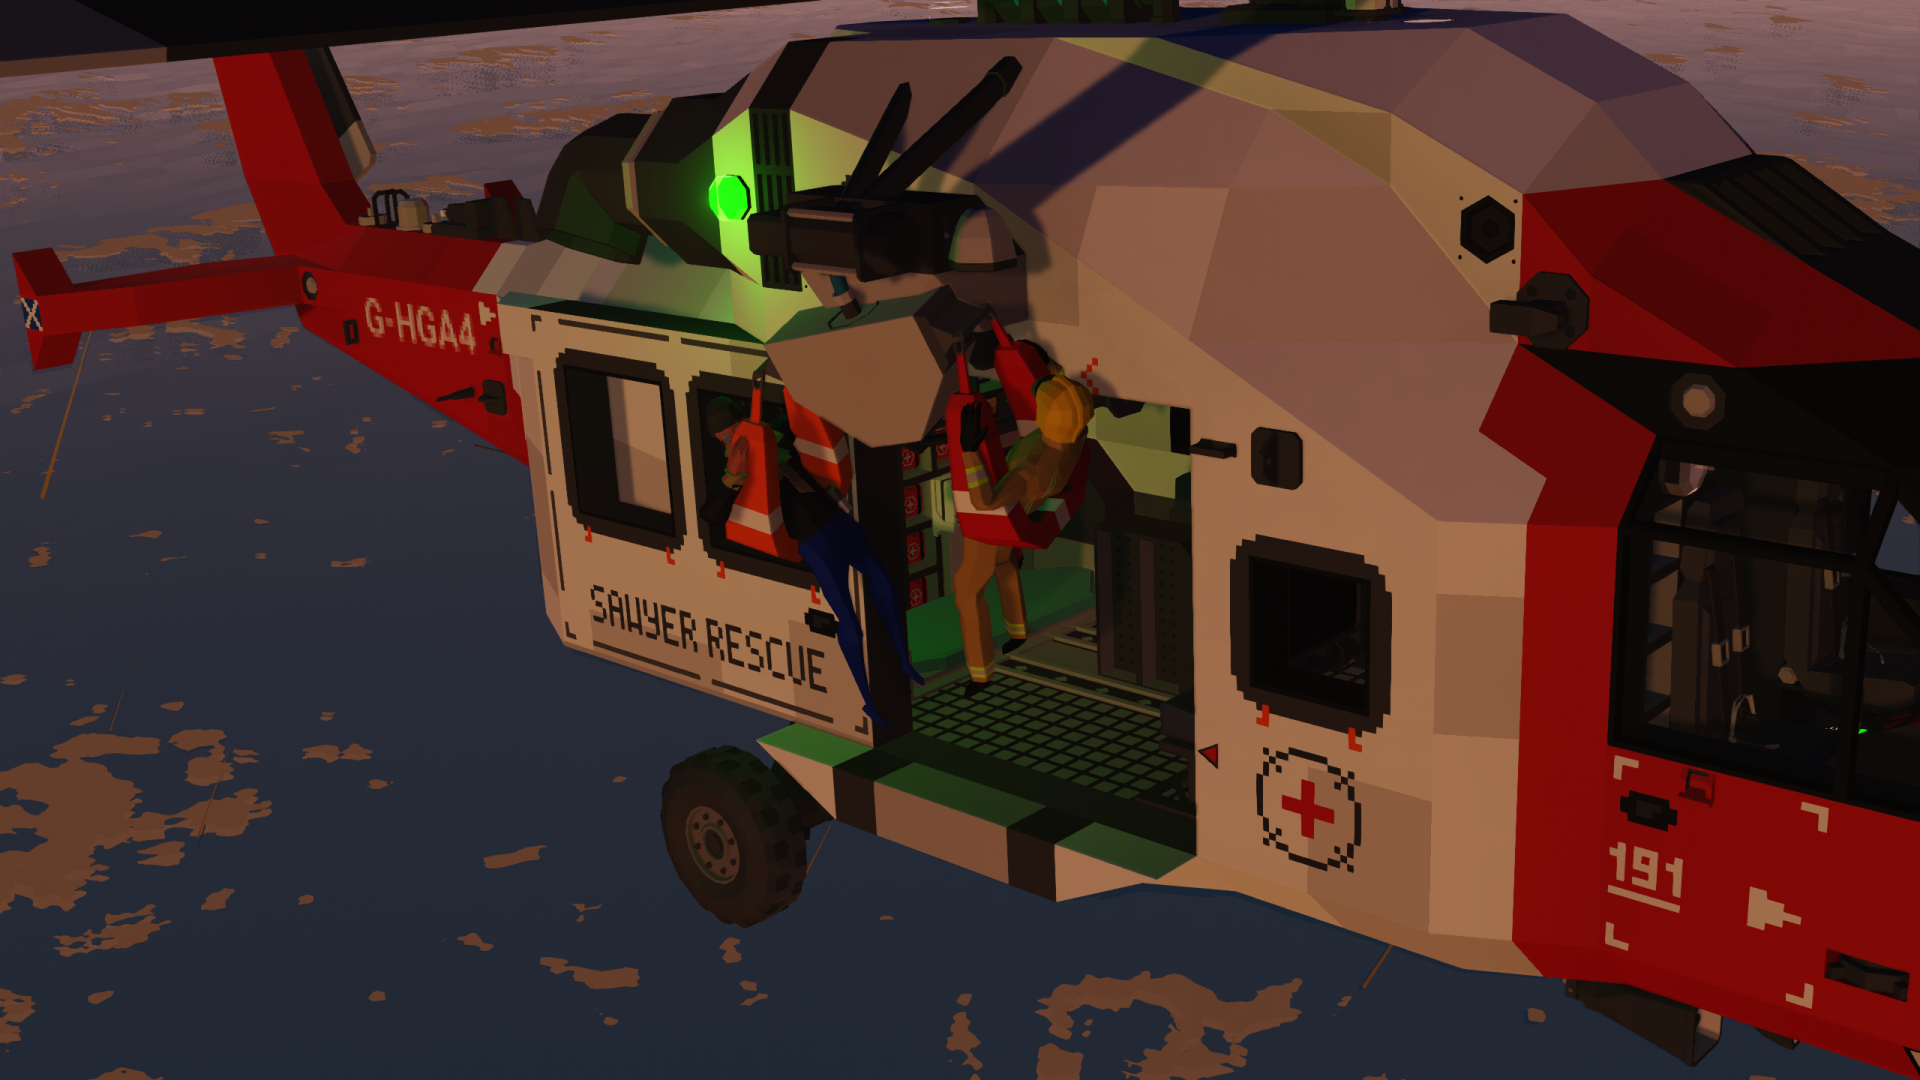
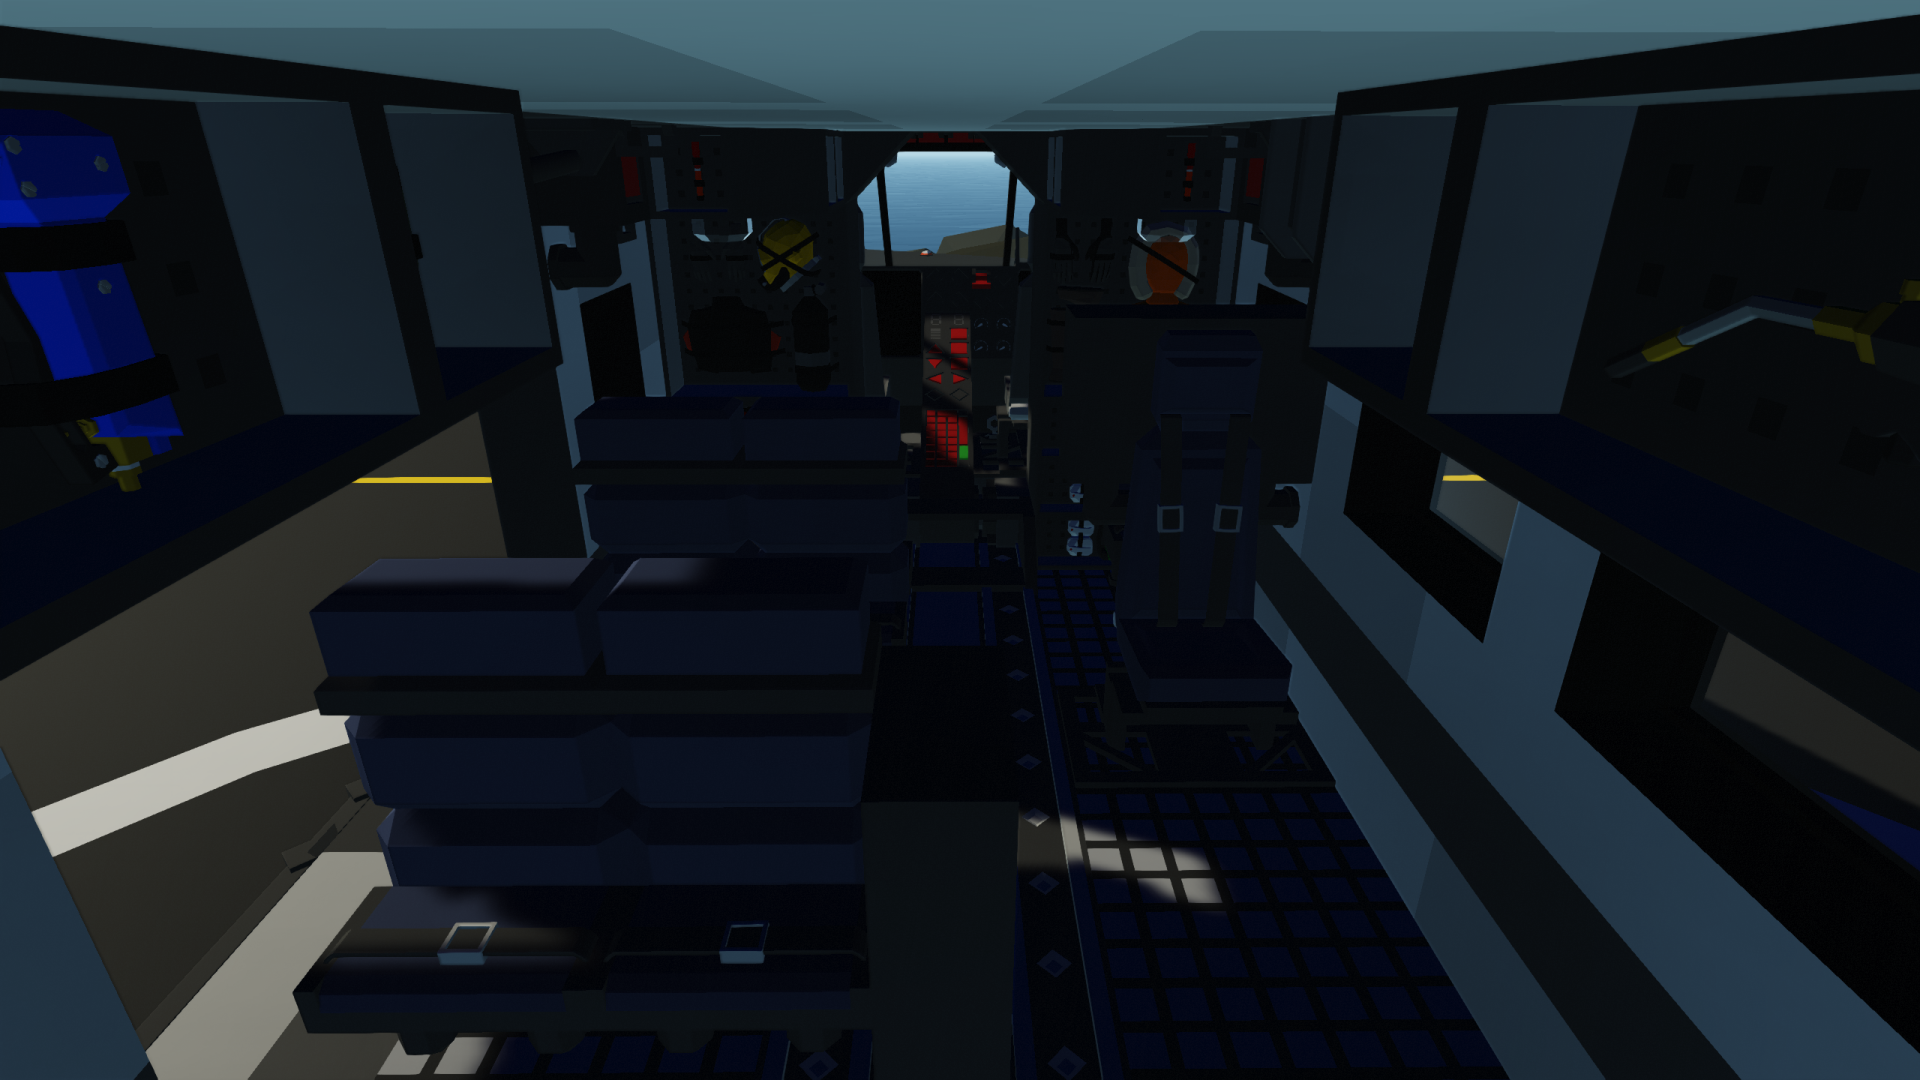
- Get into the guiding harness and winch yourself back up until you can reach the small winch, the equipment inventory containing rope, and the rope anchor on the harnesses, like in this screenshot. If you cannot reach the small winch and/or the rope, try playing around with the winch up/down until you can. If you really can’t manage to get yourself into this position, you can always get out of the harness as you would in any other helicopter. Avoid this if you can though, because it is risky.

- Equip the rope. If the large slot in your inventory is already full, you can place the item that is already in your inventory in the large equipment slot next to the rope.
- Connect the rope to the rope anchor and the small winch.
- Winch yourself all the way up with the MEDIUM WINCH above you. This is the same winch you used to winch yourself down to your target and back up to the helicopter, NOT the small winch.
- Gently pull yourself into the cabin with the small winch. When you feel that the small winch is not pulling you in any further, stop pulling.
- You should now be in a position similar to the one in the screenshot below.

- Now, simply get out of the harness while walking into the cabin.
- Place the casualty into one of the seats and DISCONNECT THE ROPE FROM THE SMALL WINCH. Put the rope back into the equipment inventory.
You can skip this process and attempt to get into the cabin directly from the guiding harness. This is, however, very risky. It is HIGHLY recommended that you follow the steps above.
Sky’s Advanced 1x1 HQ Artificial Horizon [heading number] – Sky
Simple Radar display LUA Script [Forward Looking LUA Radar 2] - Sakyamoney
Modified ZE Gyro – Uran_Wind
If I forgot to credit anyone, please let me know.
Found a bug / defect? Join the NordahlLunden discord below, message me on discord directly: qwop#4597, or place a comment.
 [discord.gg]
--
I hope you enjoy this creation! Consider leaving a positive rating if you do :).
YOU CAN MAKE ANY CHANGES YOU WANT FOR YOUR PERSONAL USE, BUT YOU ARE NOT ALLOWED TO RE-UPLOAD THIS CREATION OR A MODIFIED VERSION OF THIS CREATION WITHOUT MY EXPLICIT PERMISSION.
Як завантажити моди?
Натисніть на кнопку вище та завантажте обраний мод з файлового сховища.Як встановити мод?
Див. секцію "Як встановити".Чи безпечний завантажуваний файл?
Моди перезаливаються нами з оригінального джерела, без жодних змін. Ми лише запаковуємо їх в звичайний архів. Додатково можете перевірити архів на наявність загроз за допомогою будь-якого антивірусу або онлайн-сканеру на кшталт virustotal.com. Також рекомендуємо робити резервні копії ваших сейвів, про всяк випадок.
For vehicle mods
- Download the .zip archive containing the vehicle mod files.
- Locate your game's root folder.
- Navigate to
rom\data\preset_vehicles_advancedand extract the files there. - Rename both files to something recognizable, ensuring they share the same base name but different extensions.
- Launch the game and go to the Workbench's Presets tab to see the new vehicle mod.