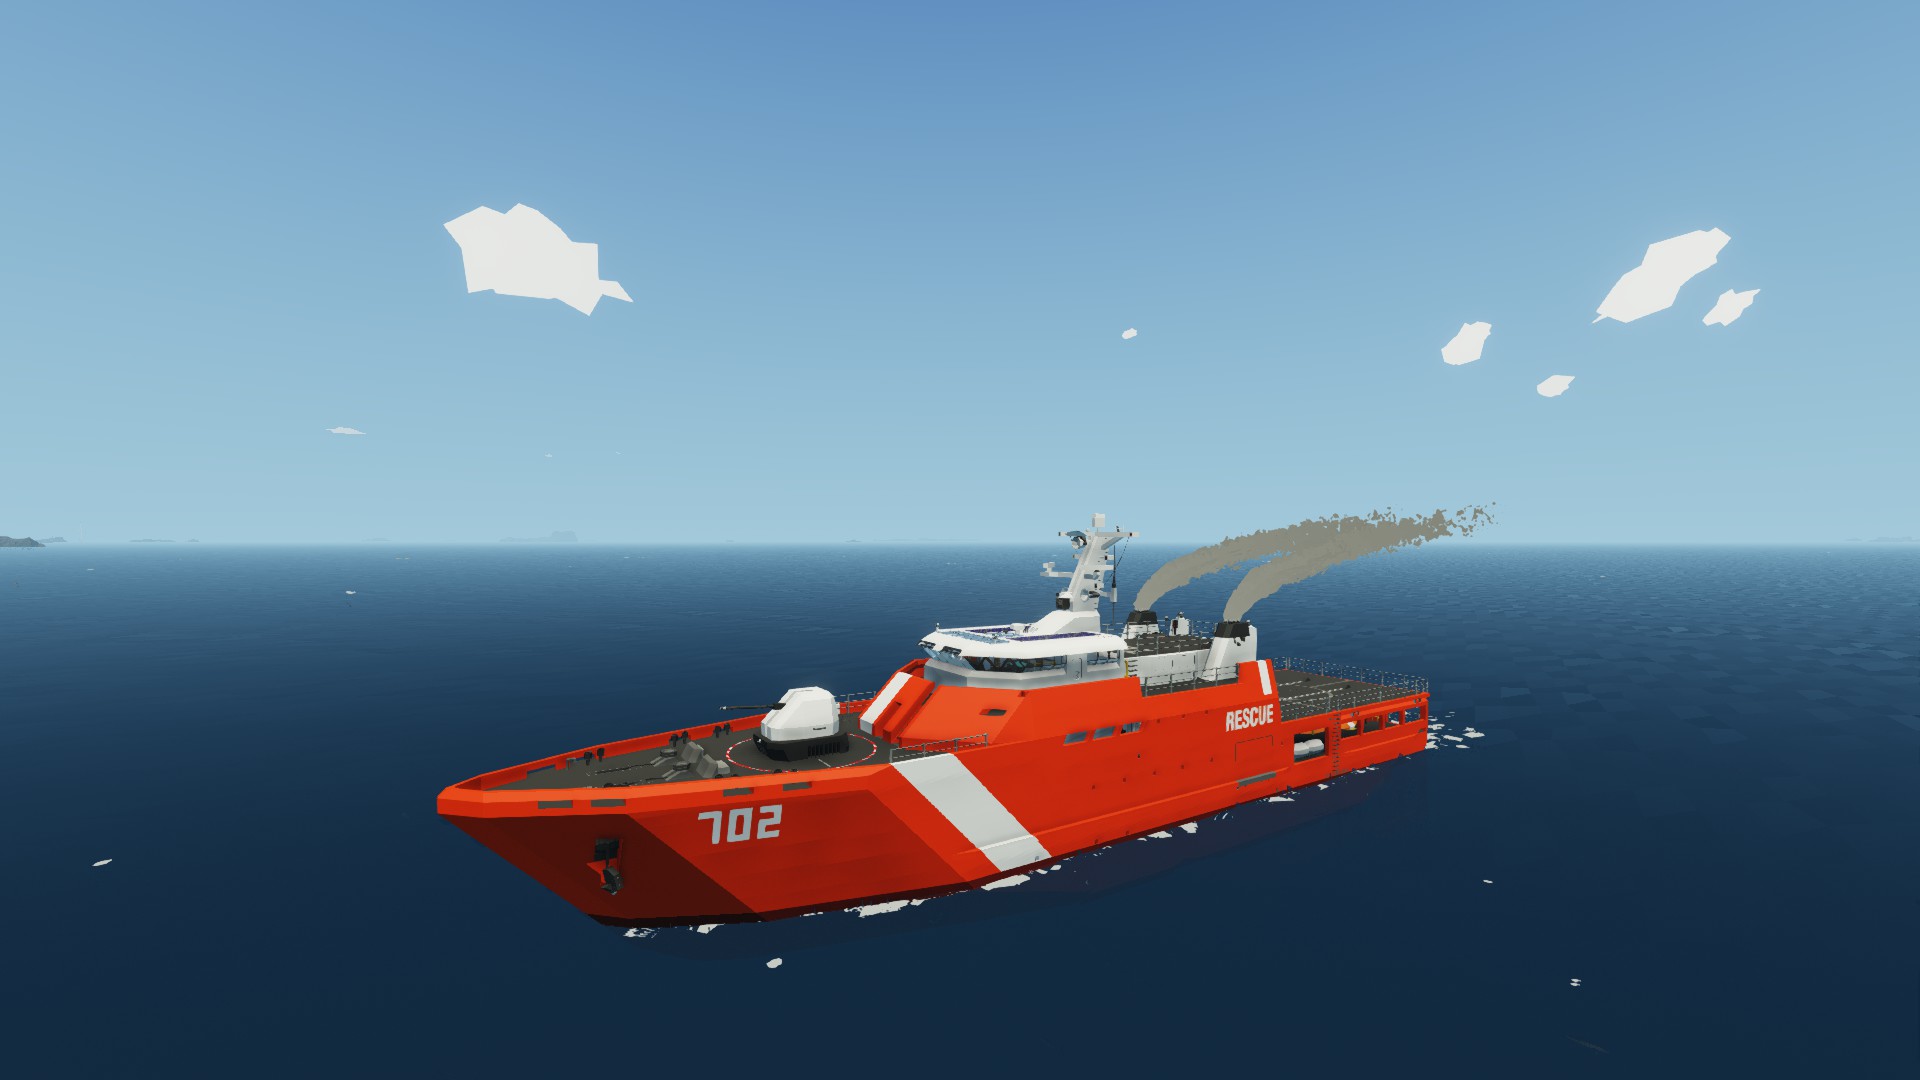
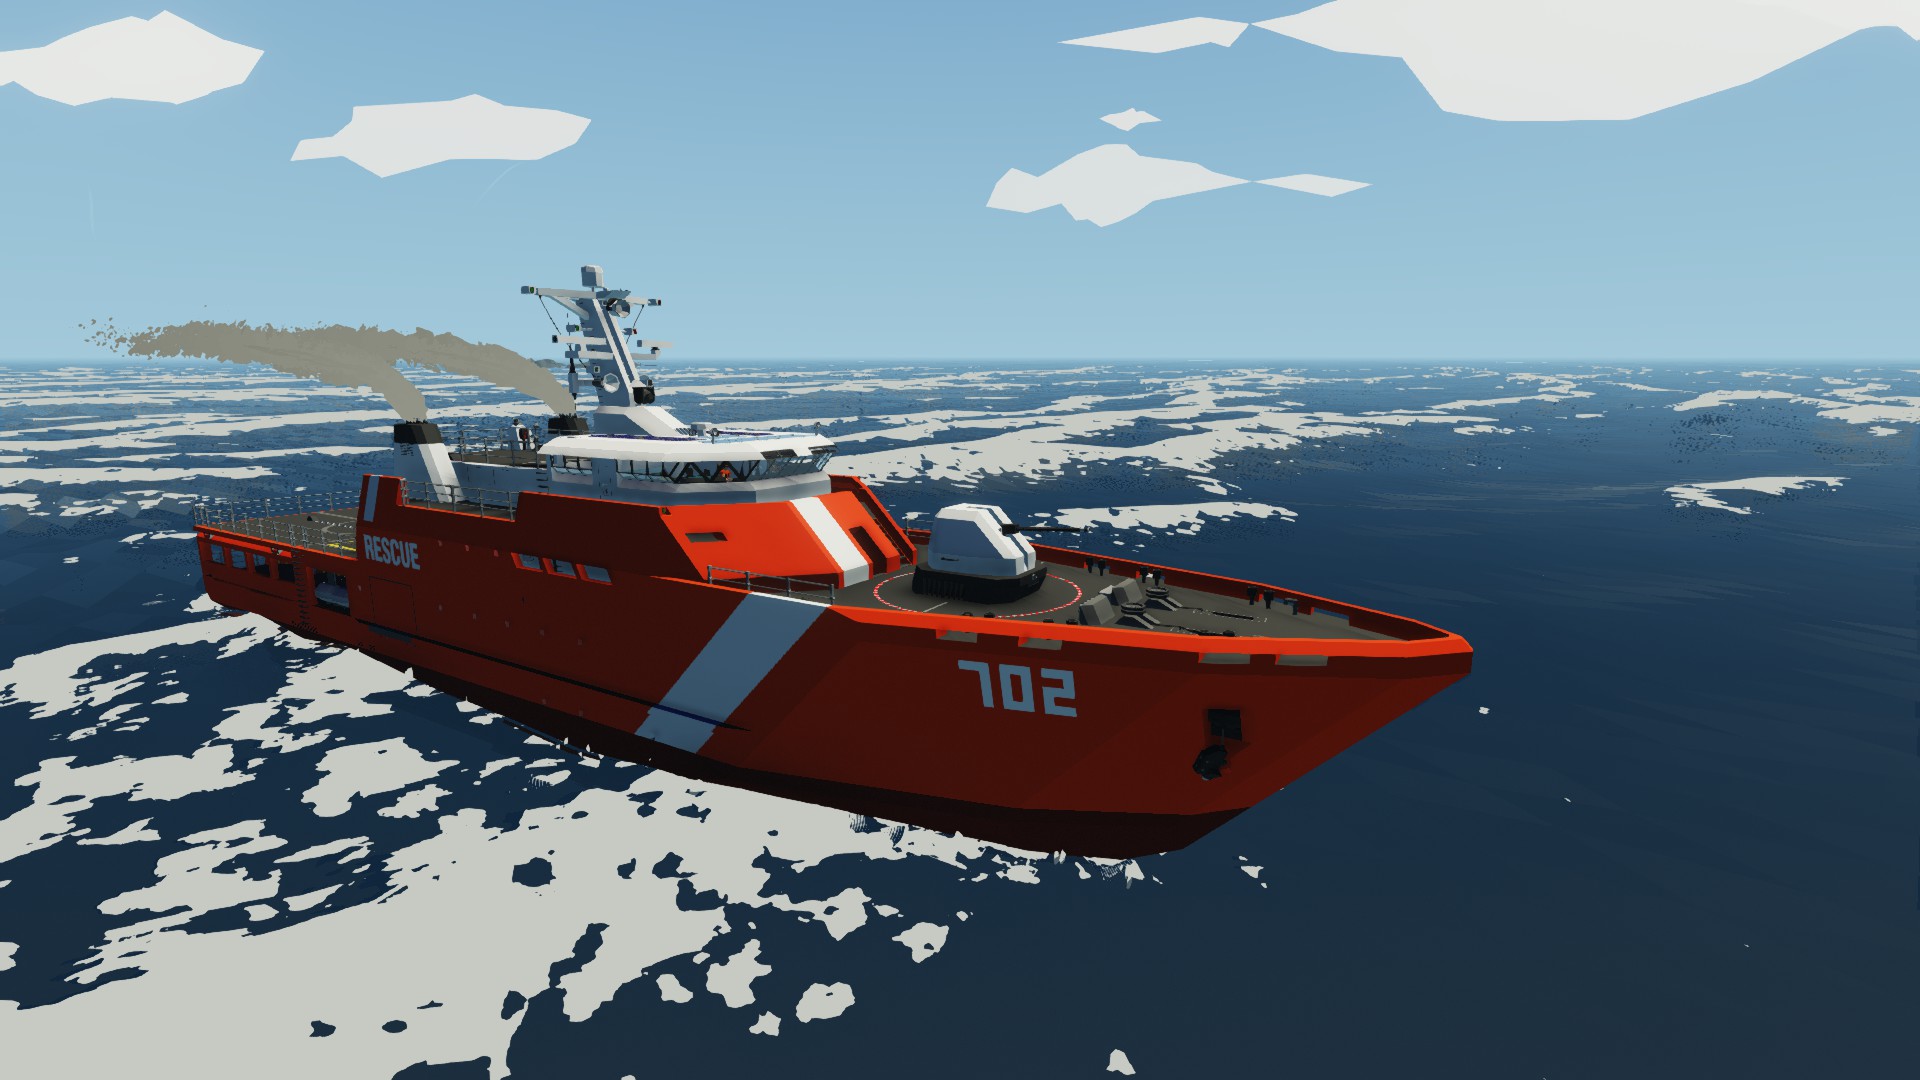


OPV Condor Mk.I
Vehicle, Rescue, Sea, Multi-vehicle, Exploration, Delivery, Fire, Advanced, v1.0.34
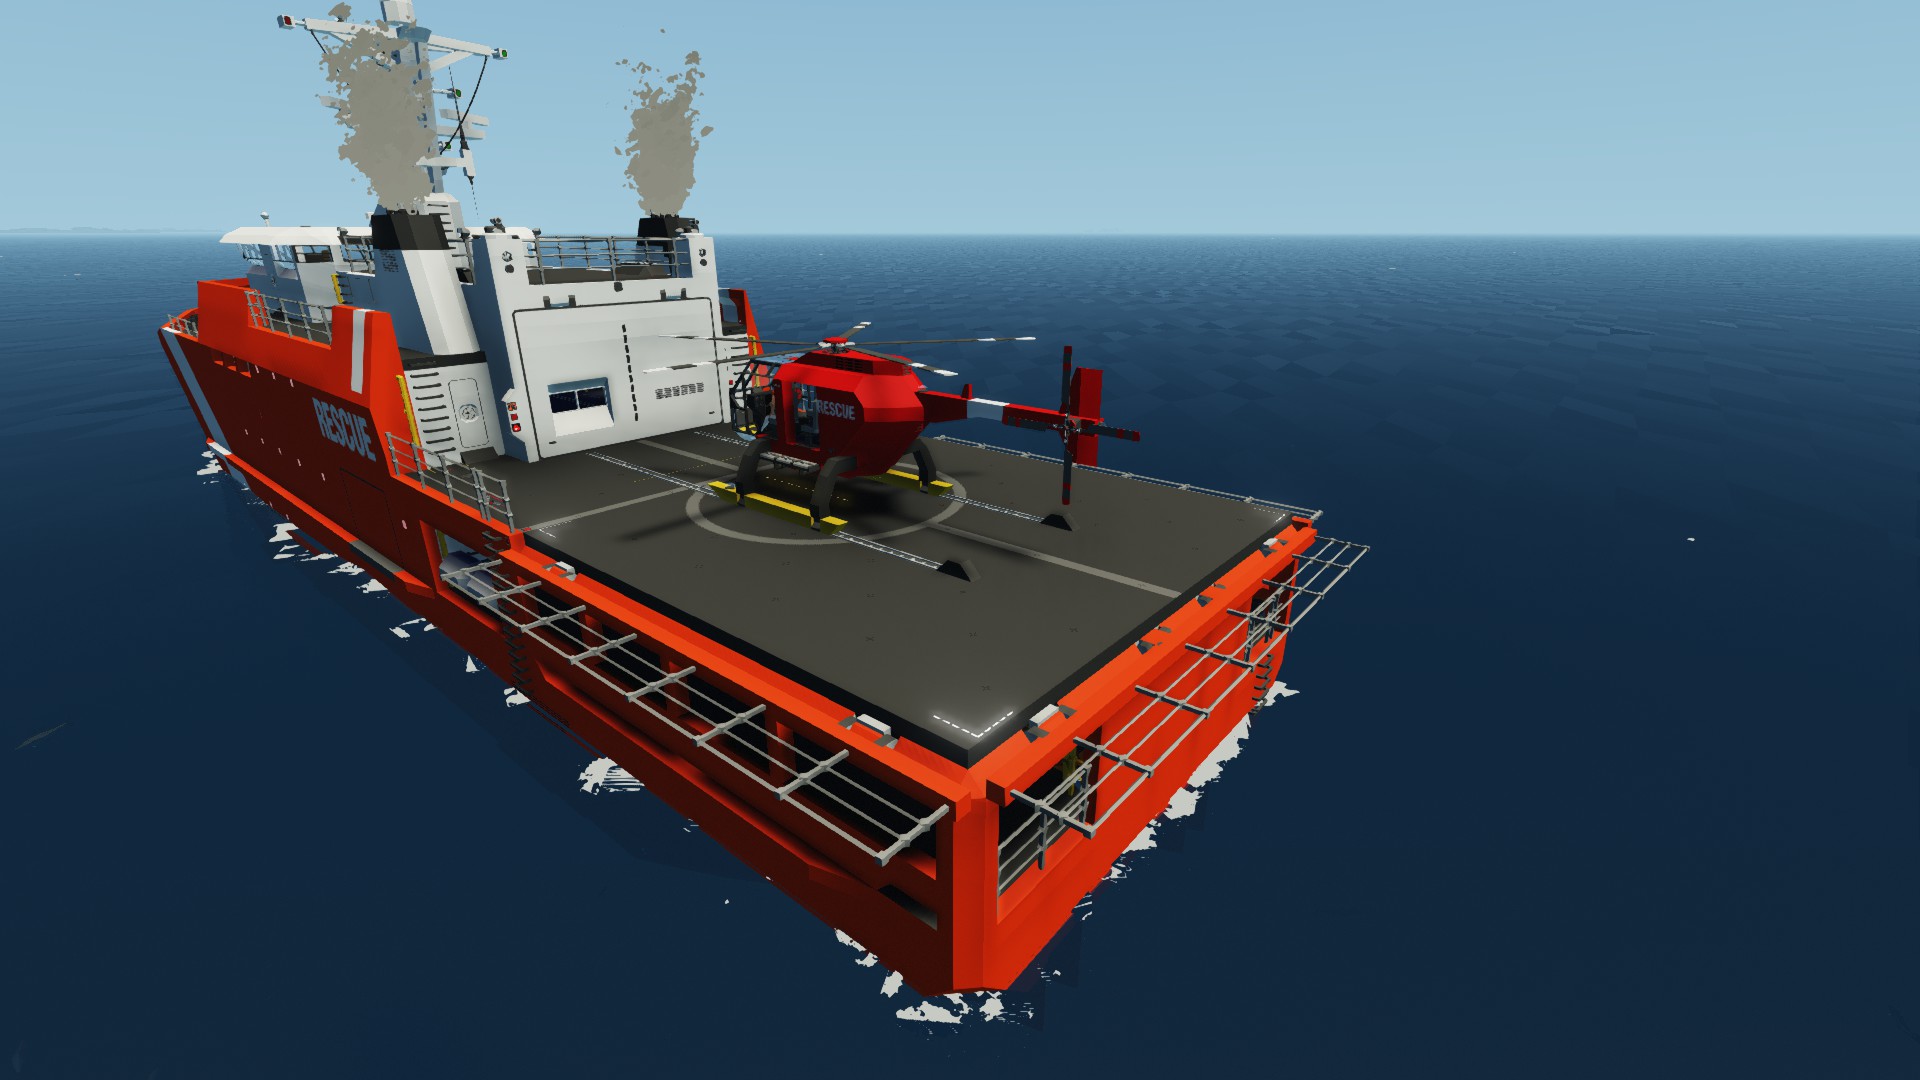
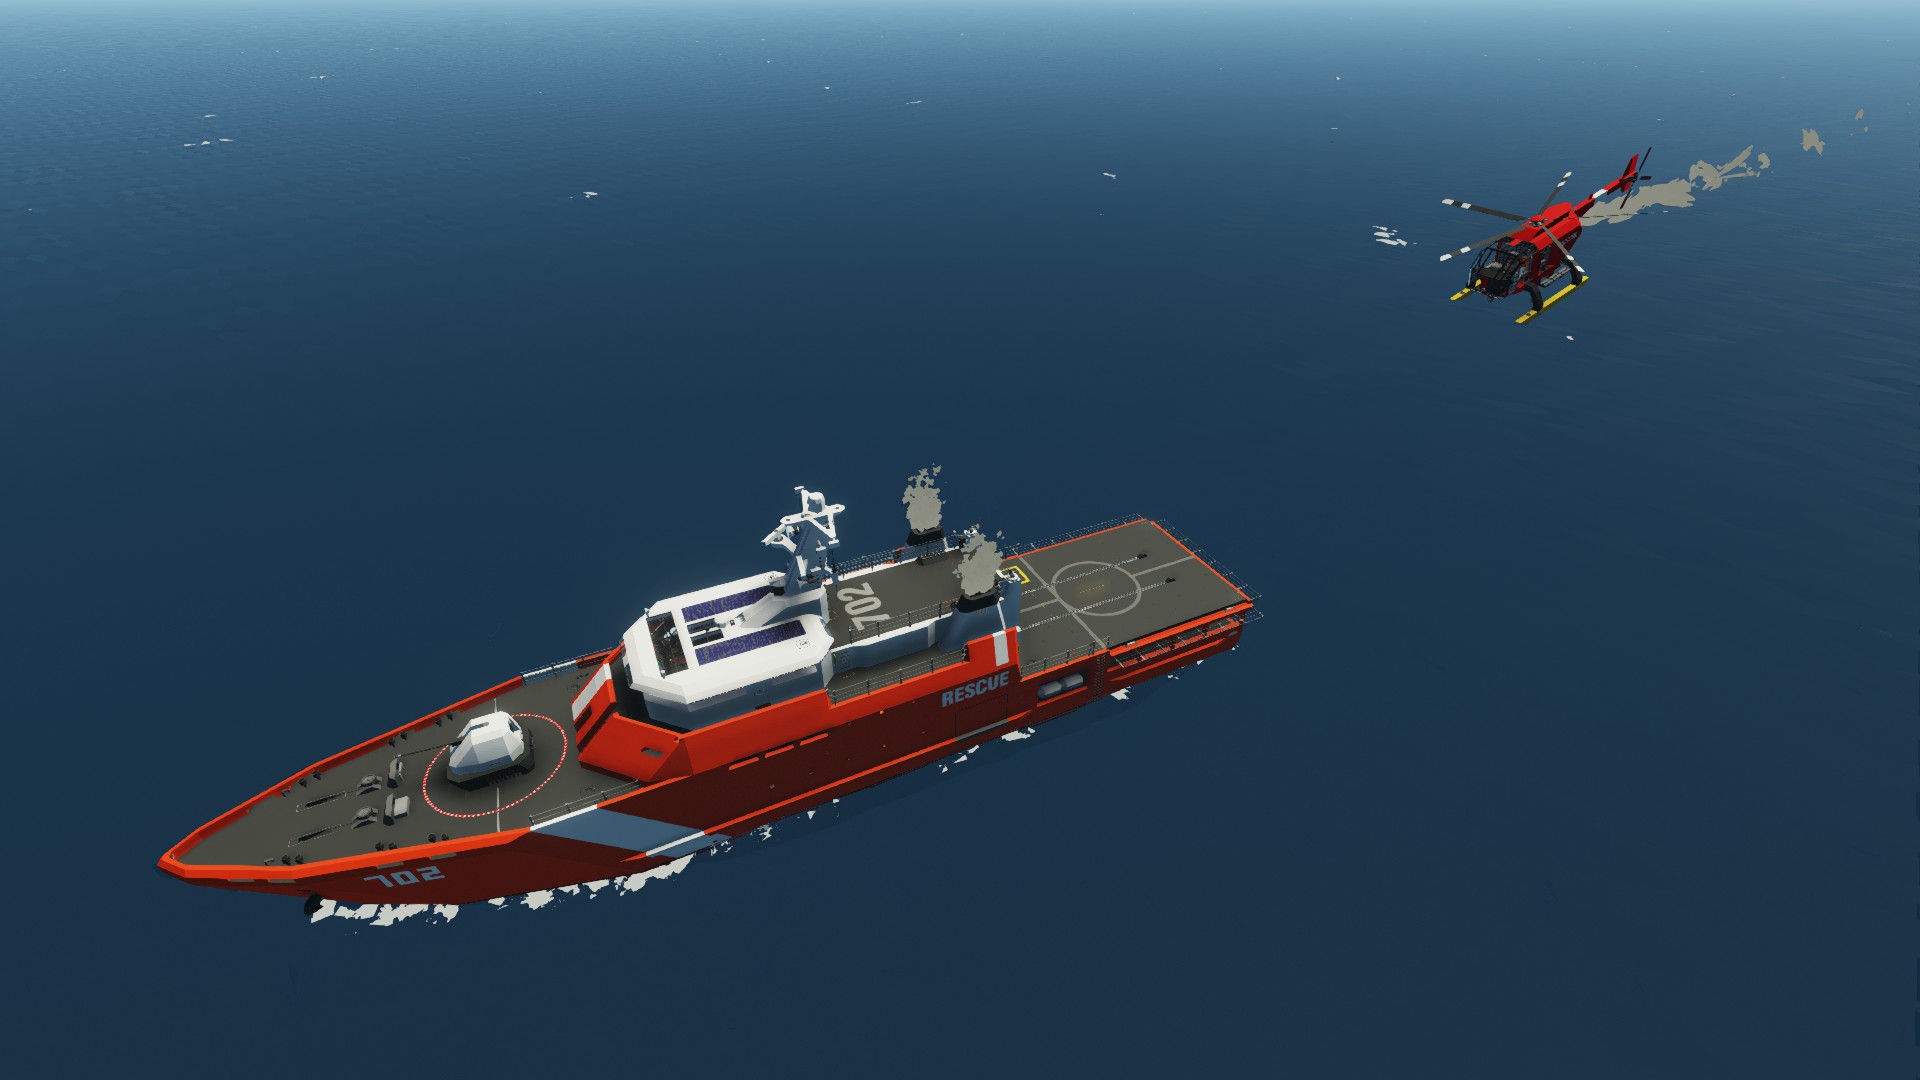
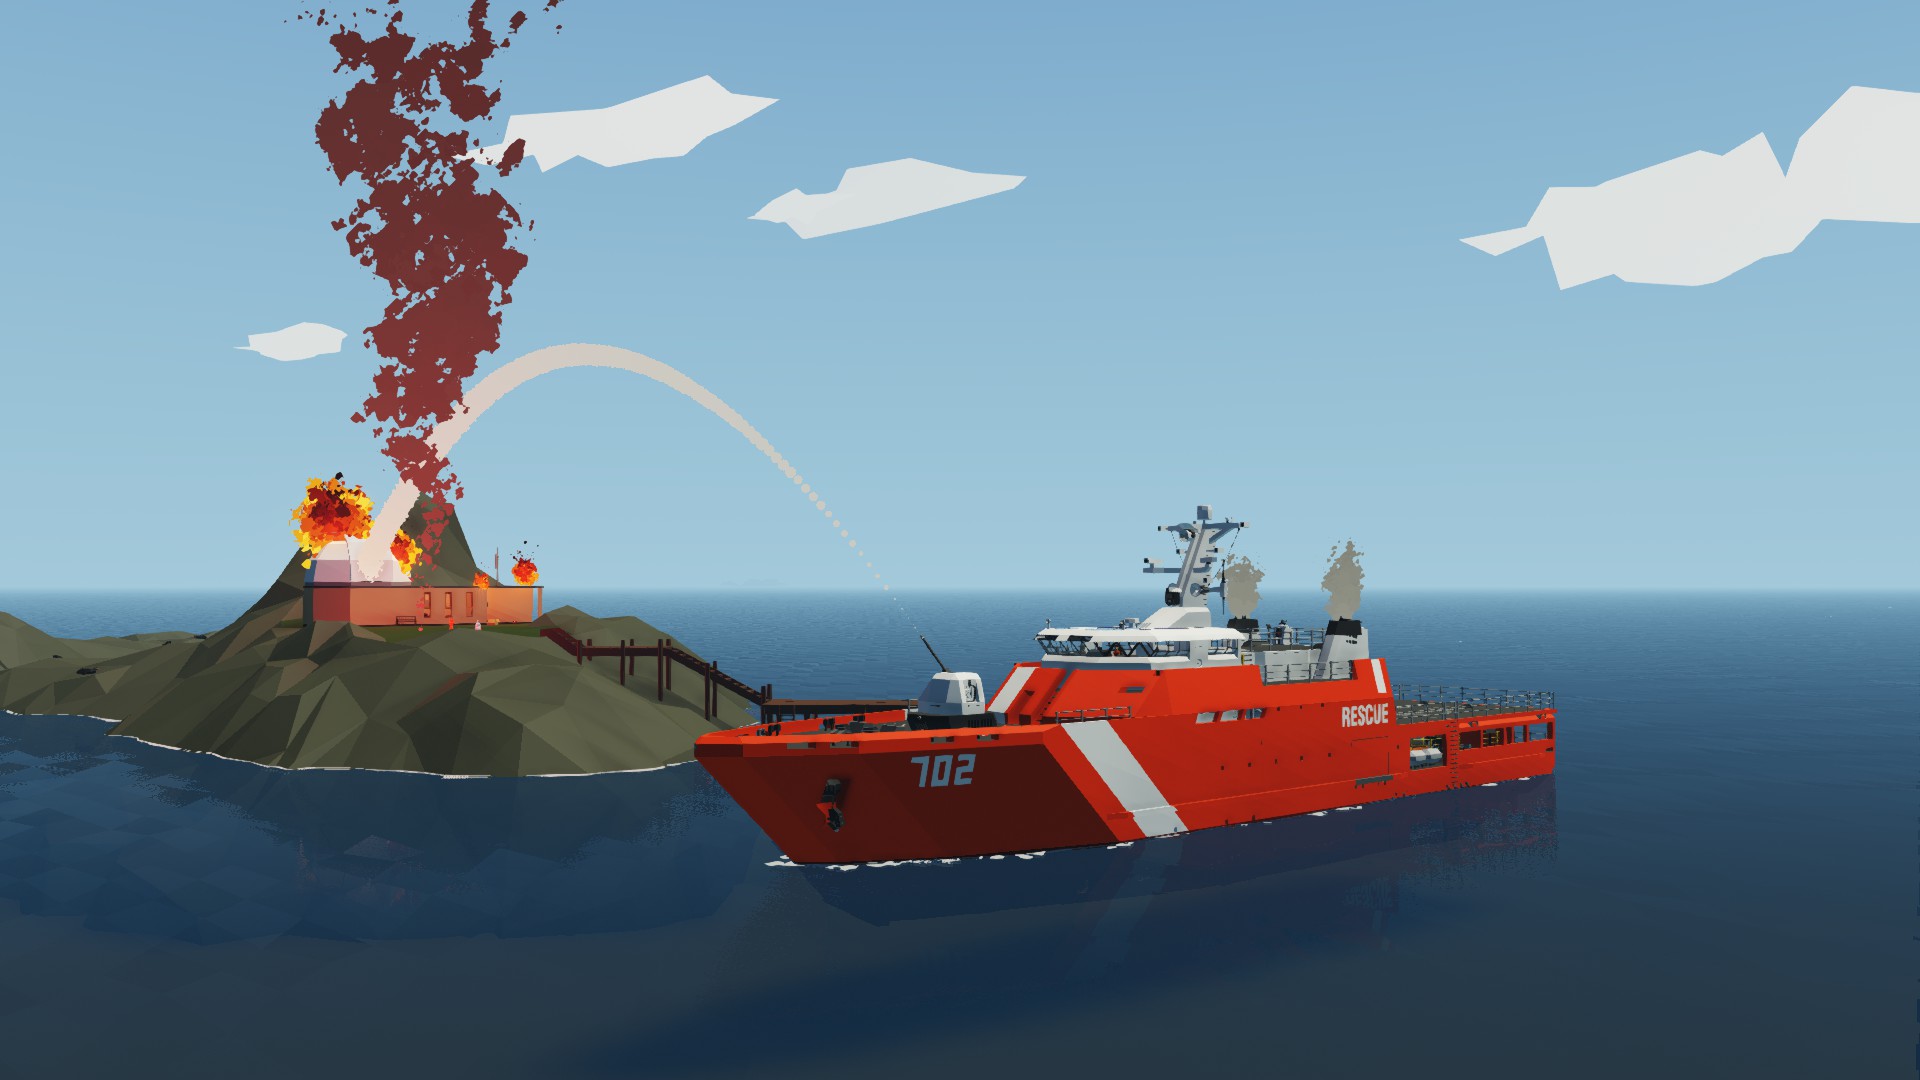
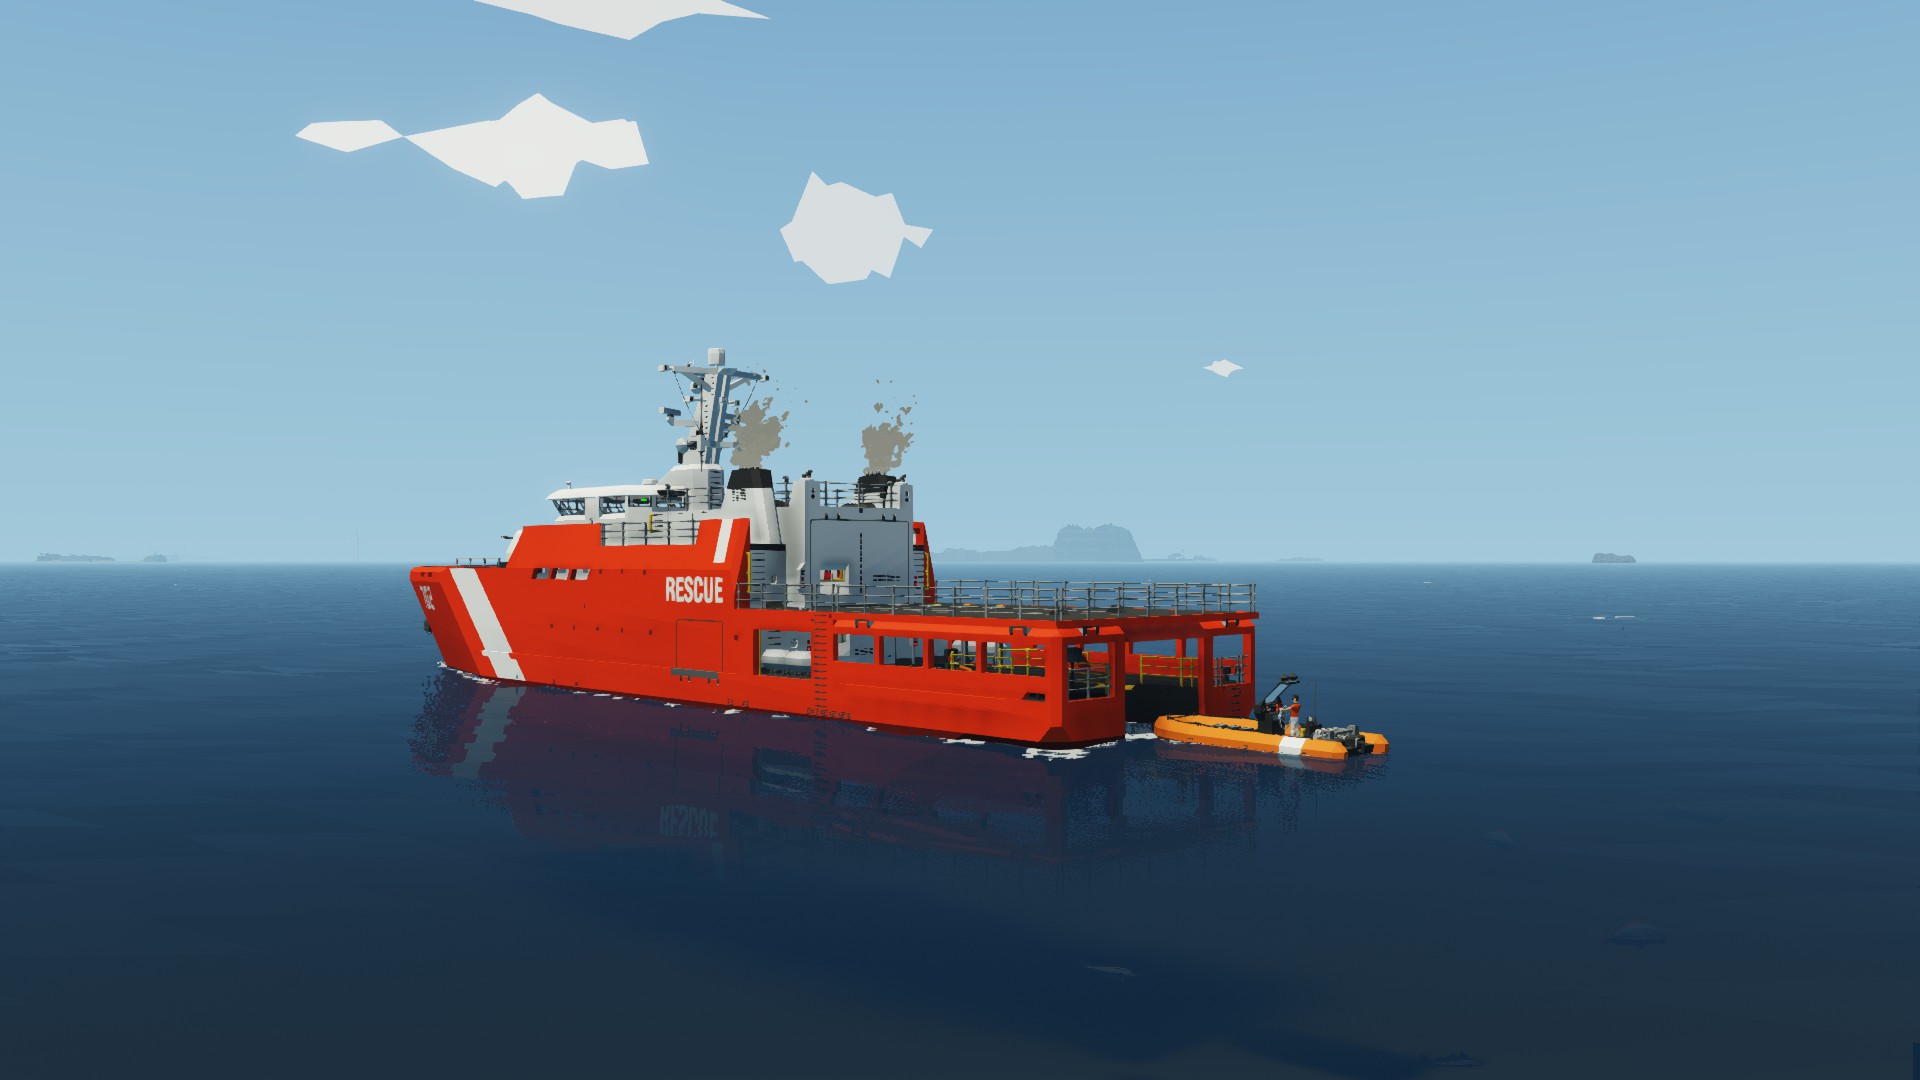
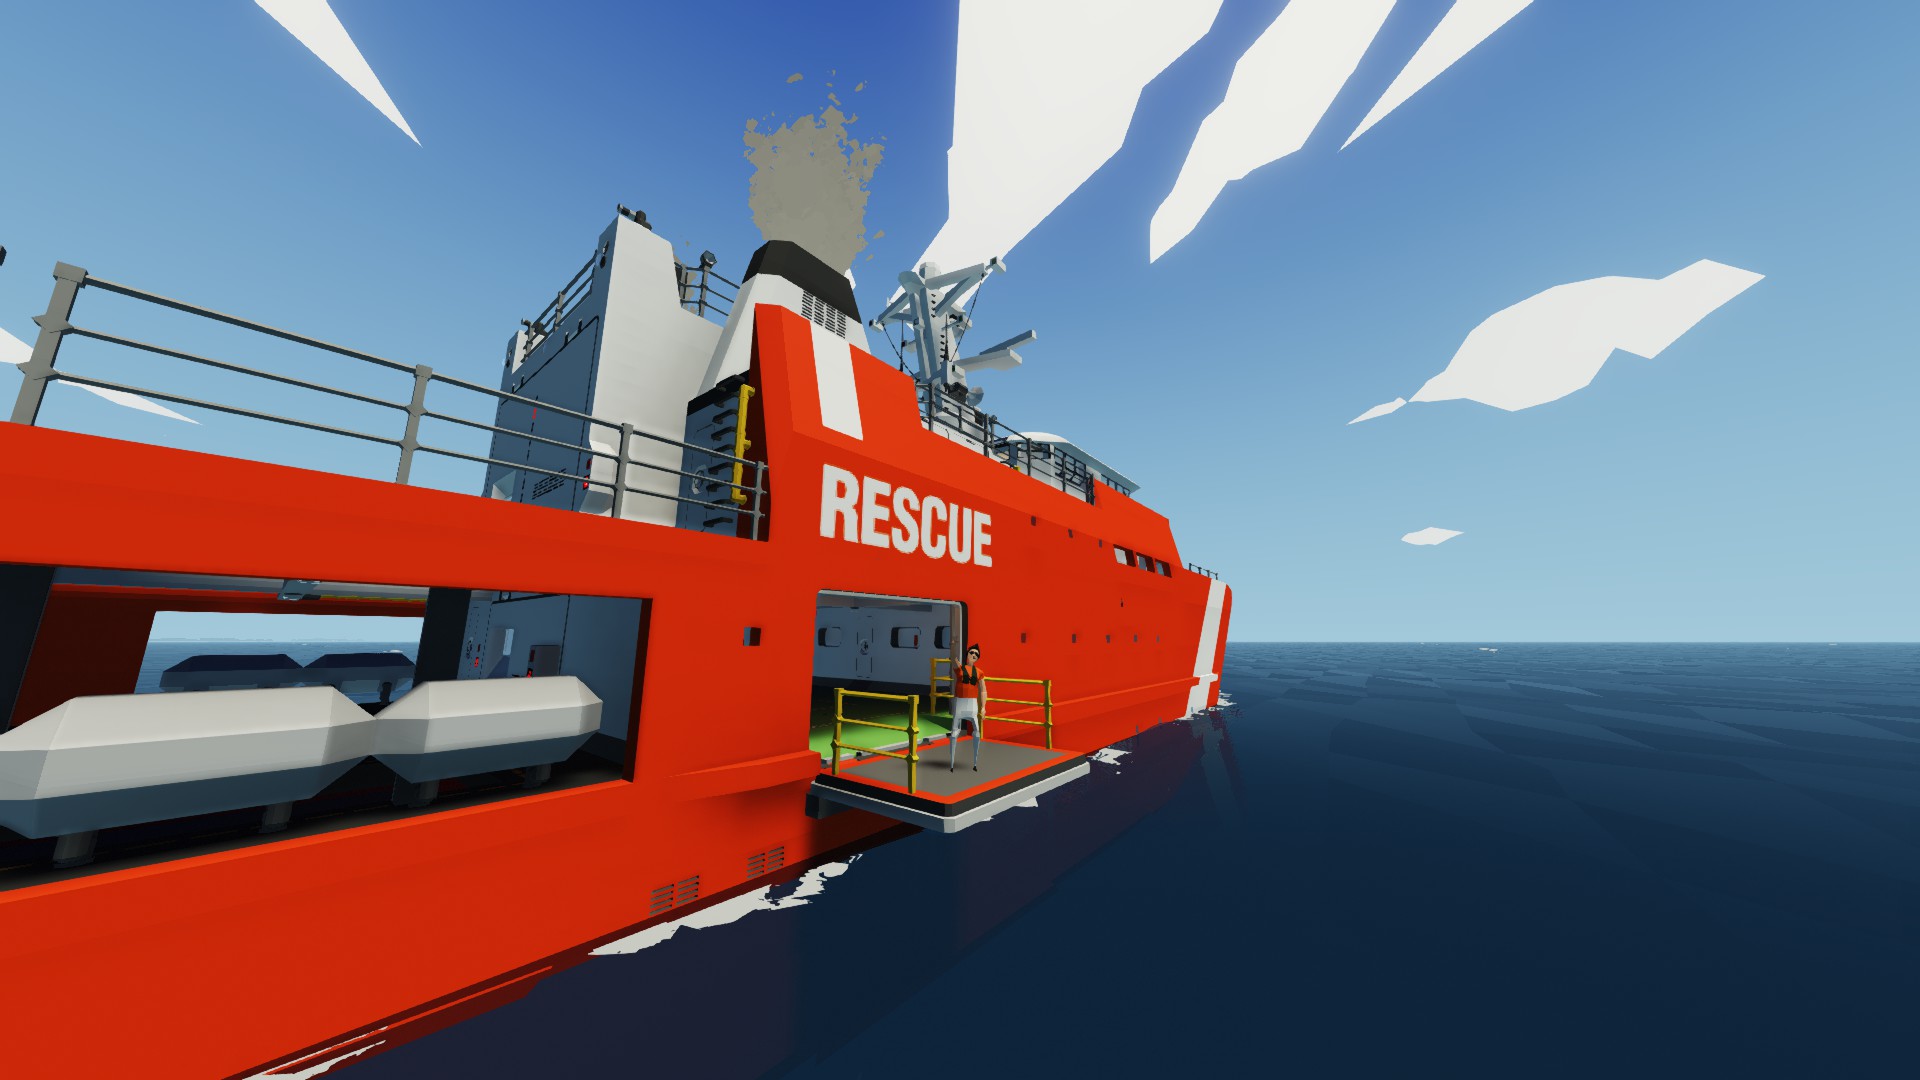
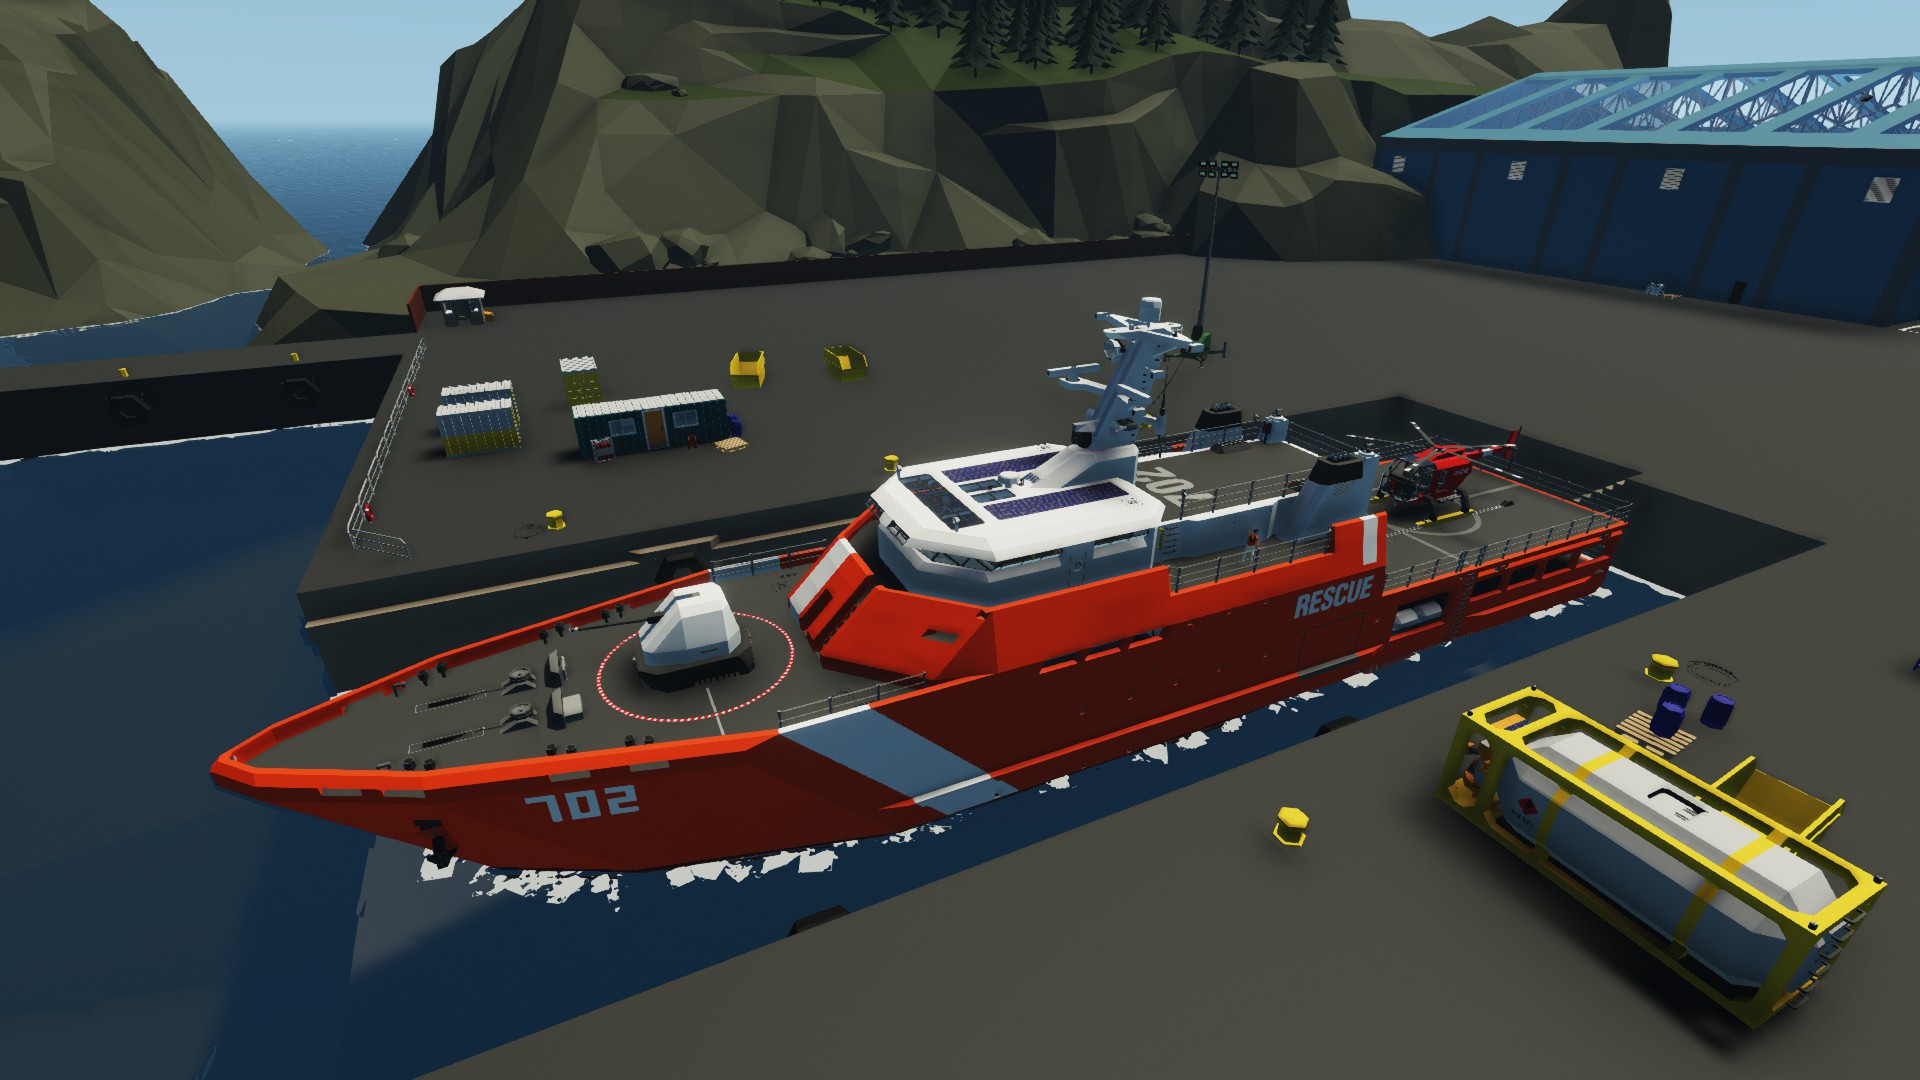
The OPV Condor Mk.I is the eight build in the Coast Guard / rescue response ship series.
At 55.5 meters long, it's the largest of the series and has all the necessary features of an Offshore Patrol Vessel. As with all my other creations, I like to keep my designs simple and practical for better FPS and to minimize lag!
UPDATED - 13th February 2021
1. Updated heli rotor ge...
Розробник: Spider
Дата створення: 8 Jul, 2020 @ 12:32pm
Оновлено: 12 Feb, 2021 @ 12:06pm
Підписників: 97925
Розмір (розпакований) : 17.610 MB
At 55.5 meters long, it's the largest of the series and has all the necessary features of an Offshore Patrol Vessel. As with all my other creations, I like to keep my designs simple and practical for better FPS and to minimize lag!
1. Updated heli rotor gear ratio and trim.
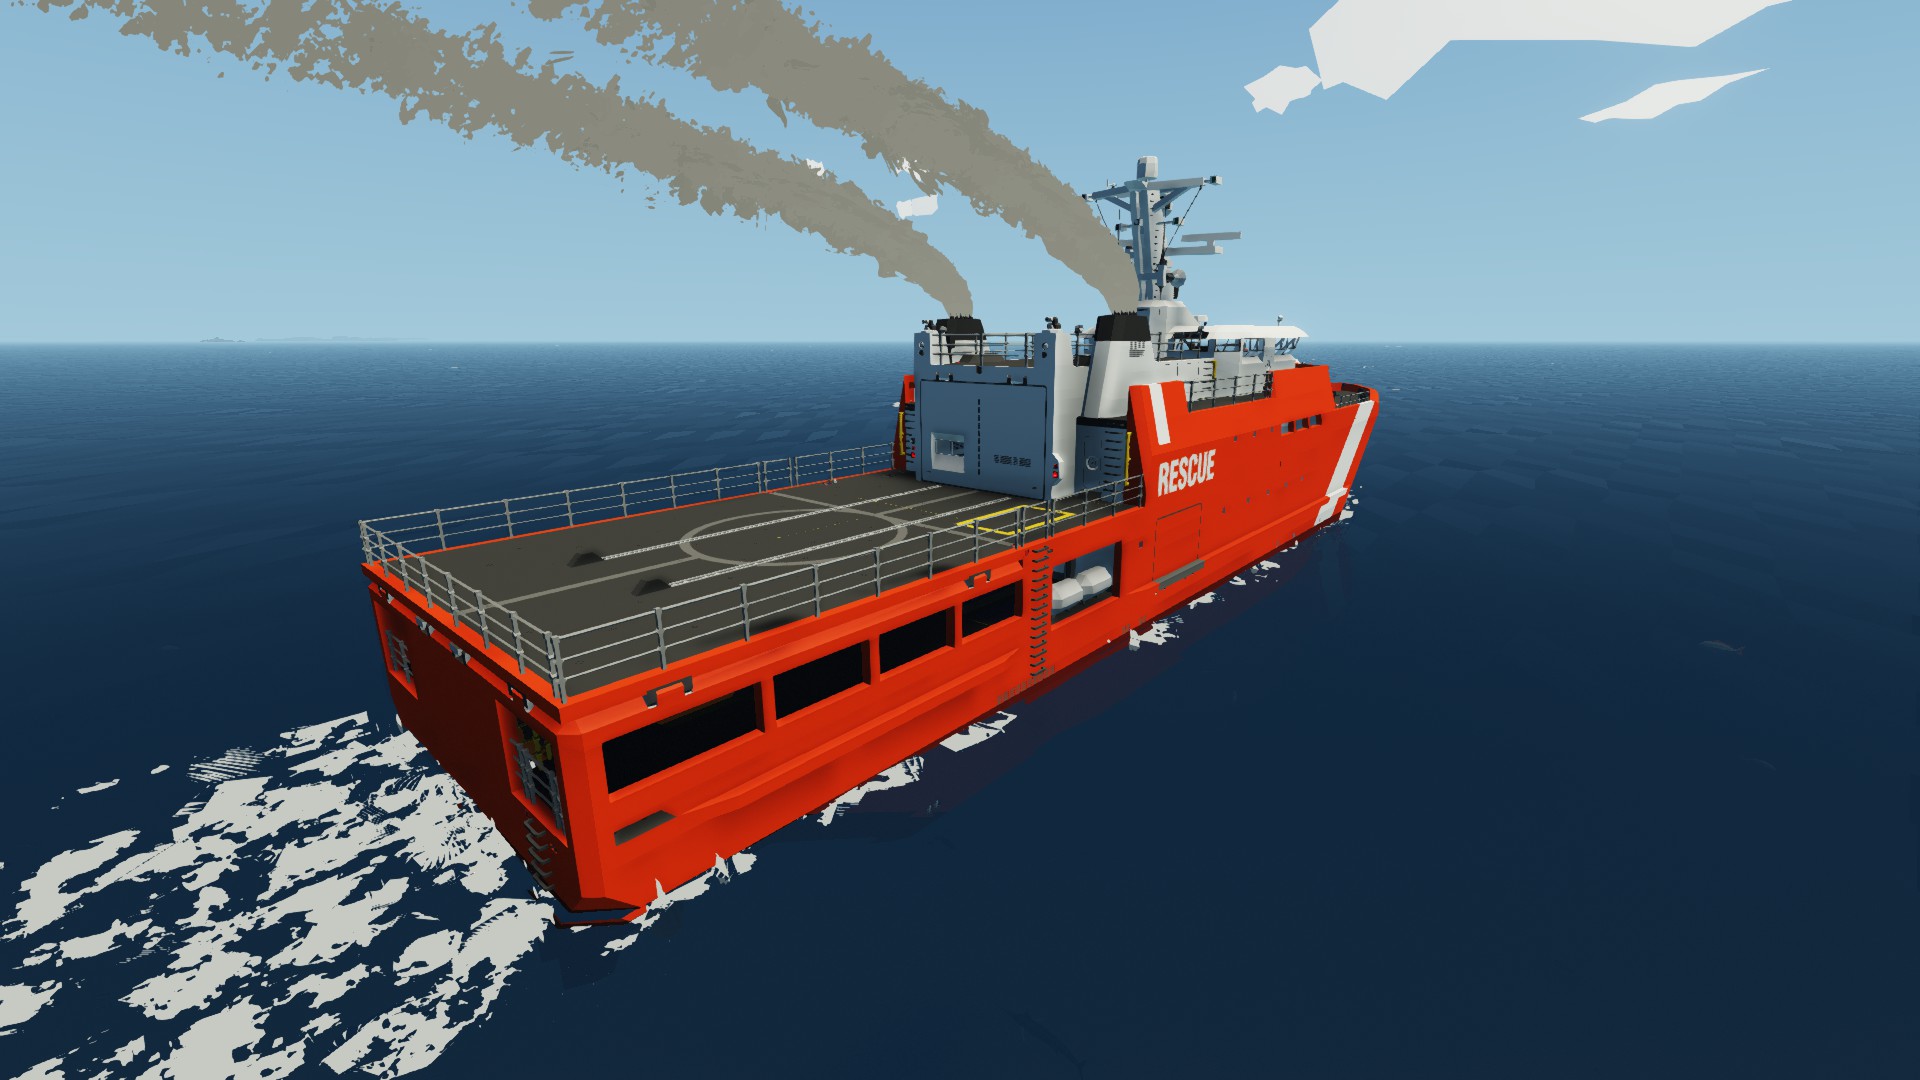
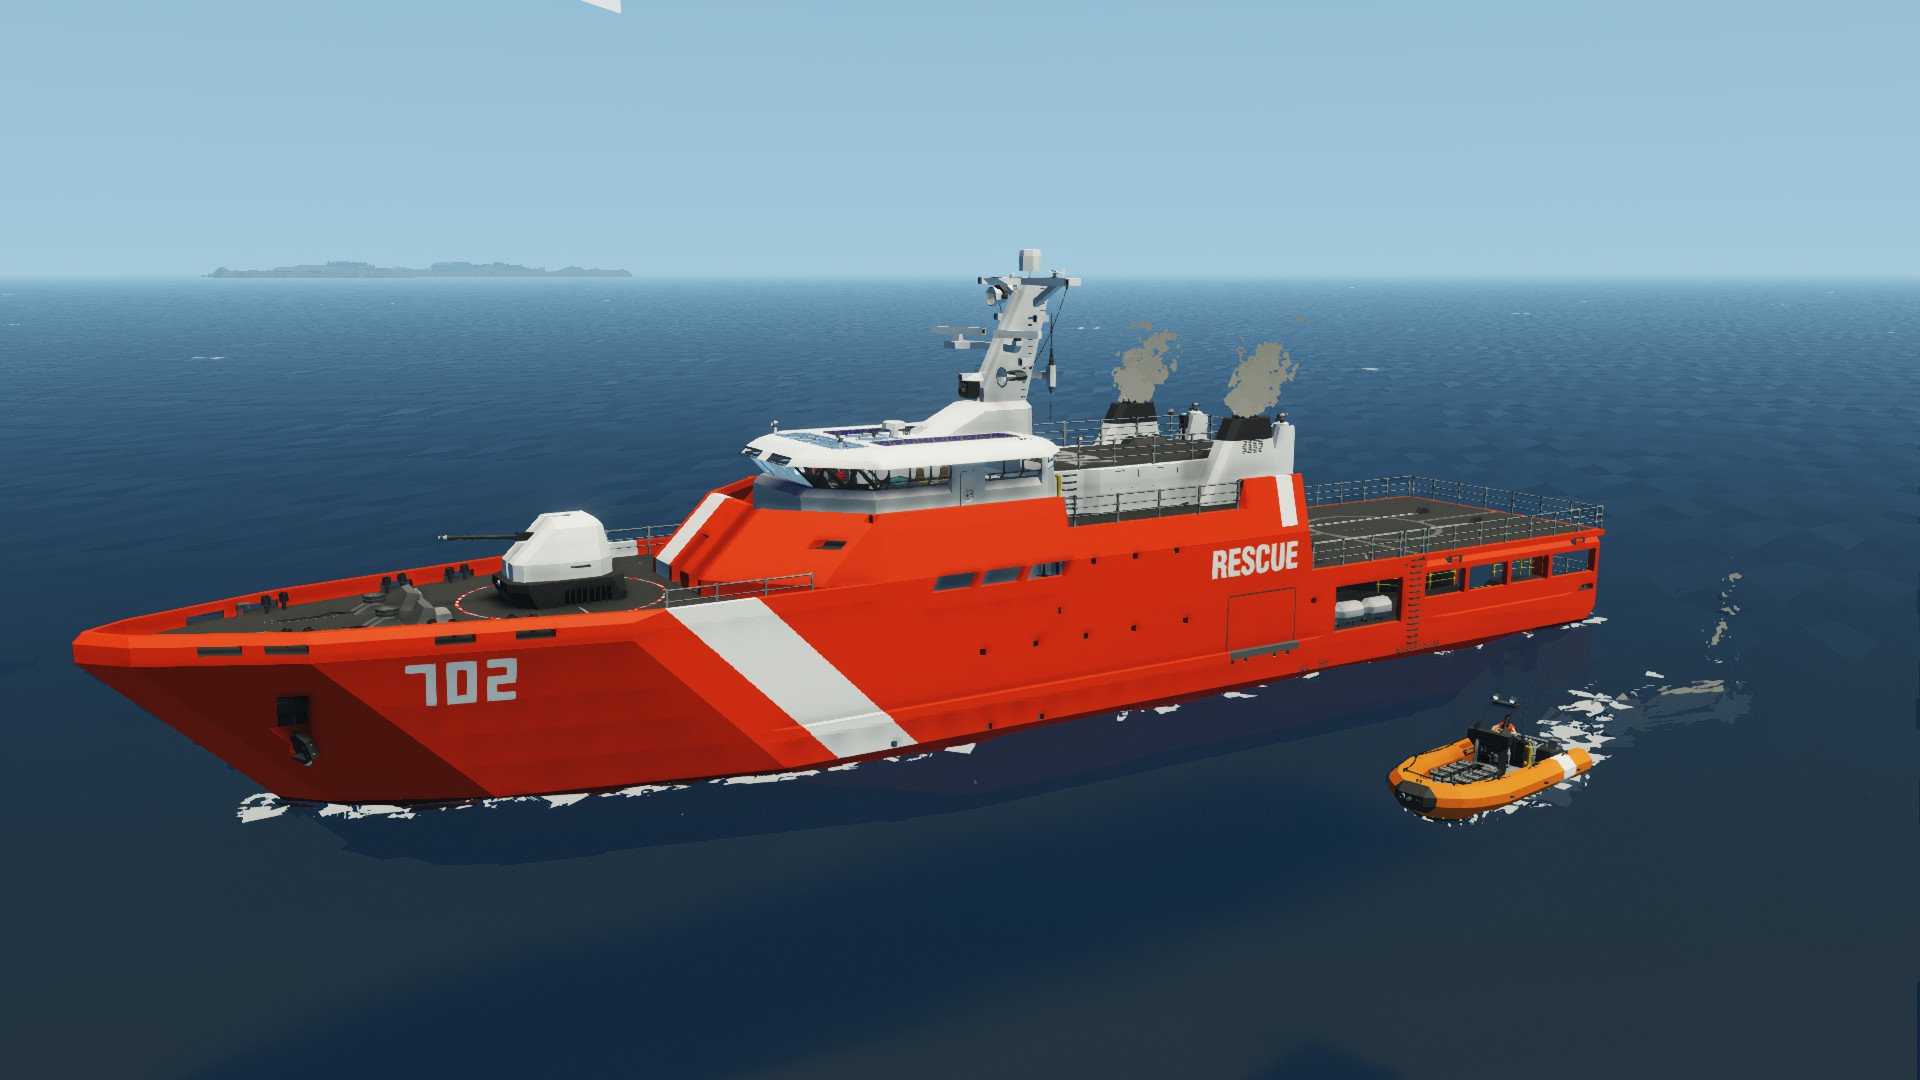
1. Three water cannons including main turret.
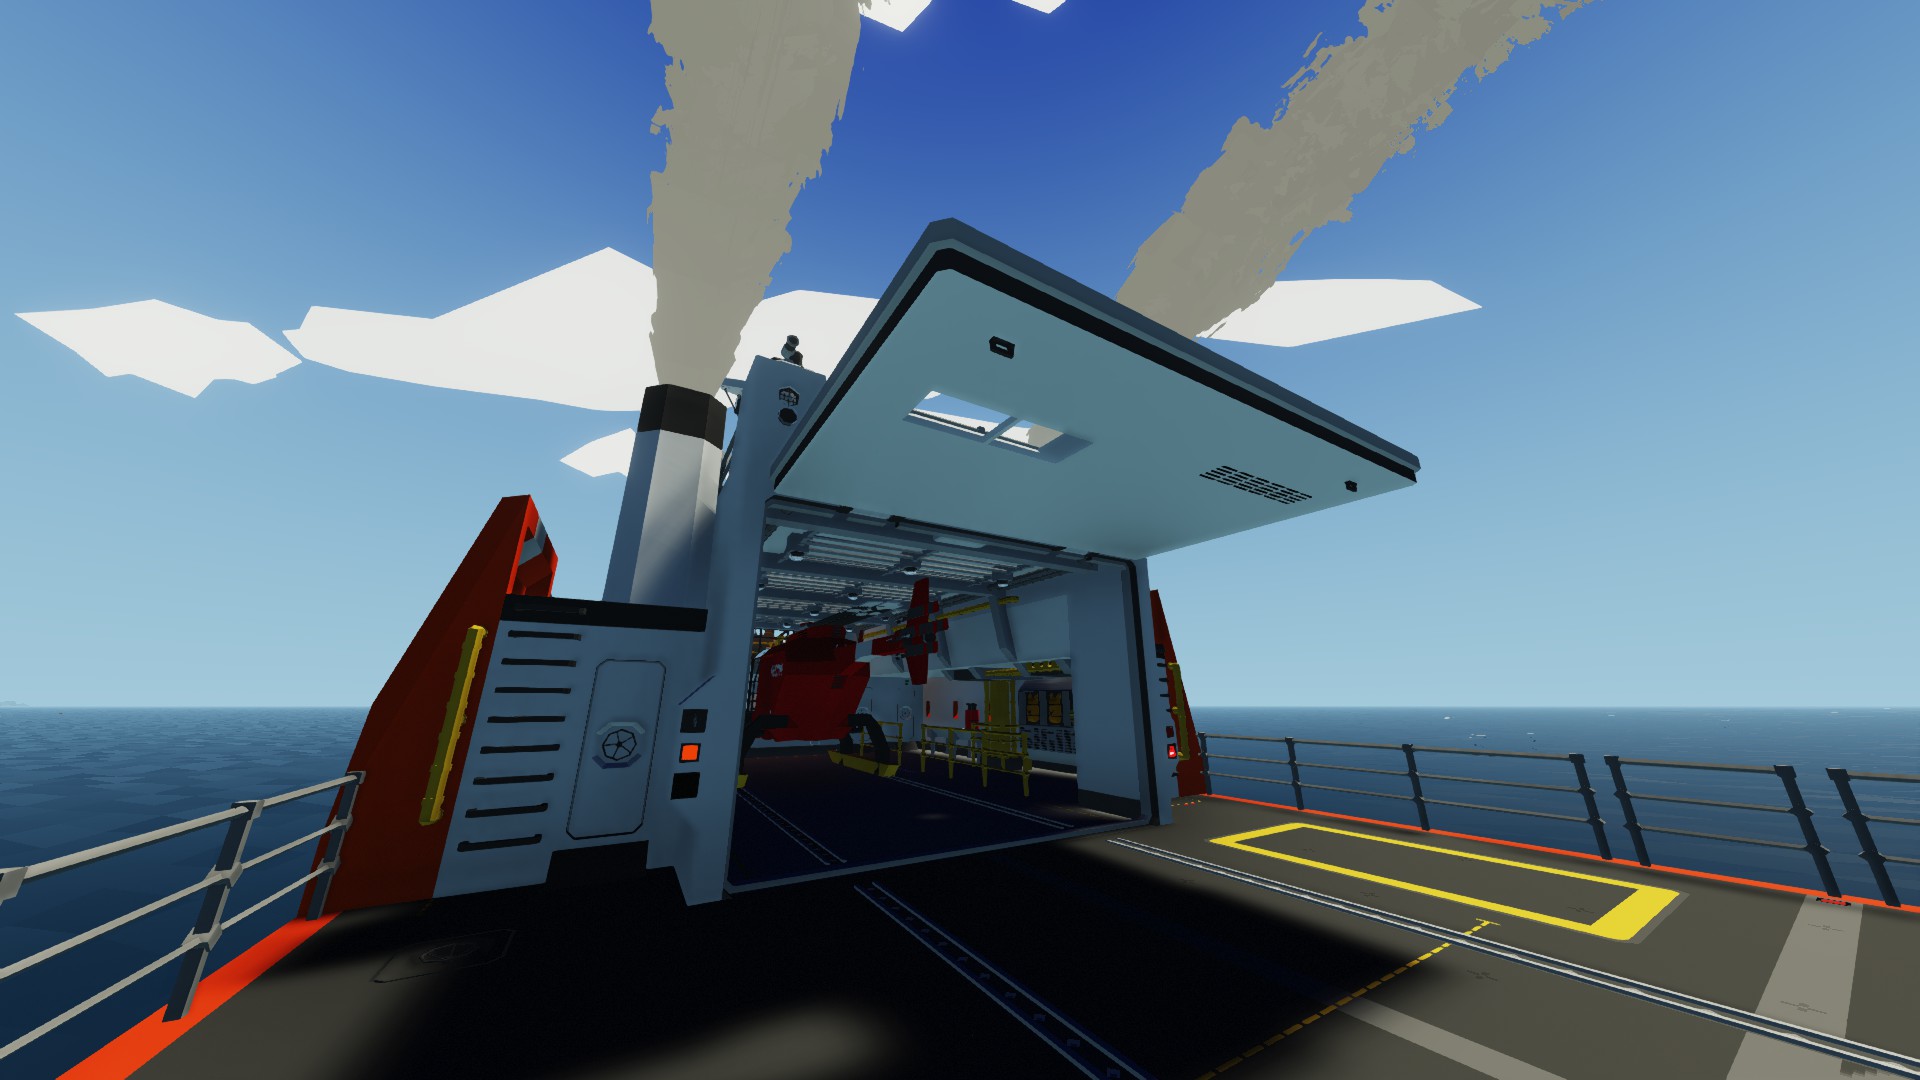
2. Helicopter.
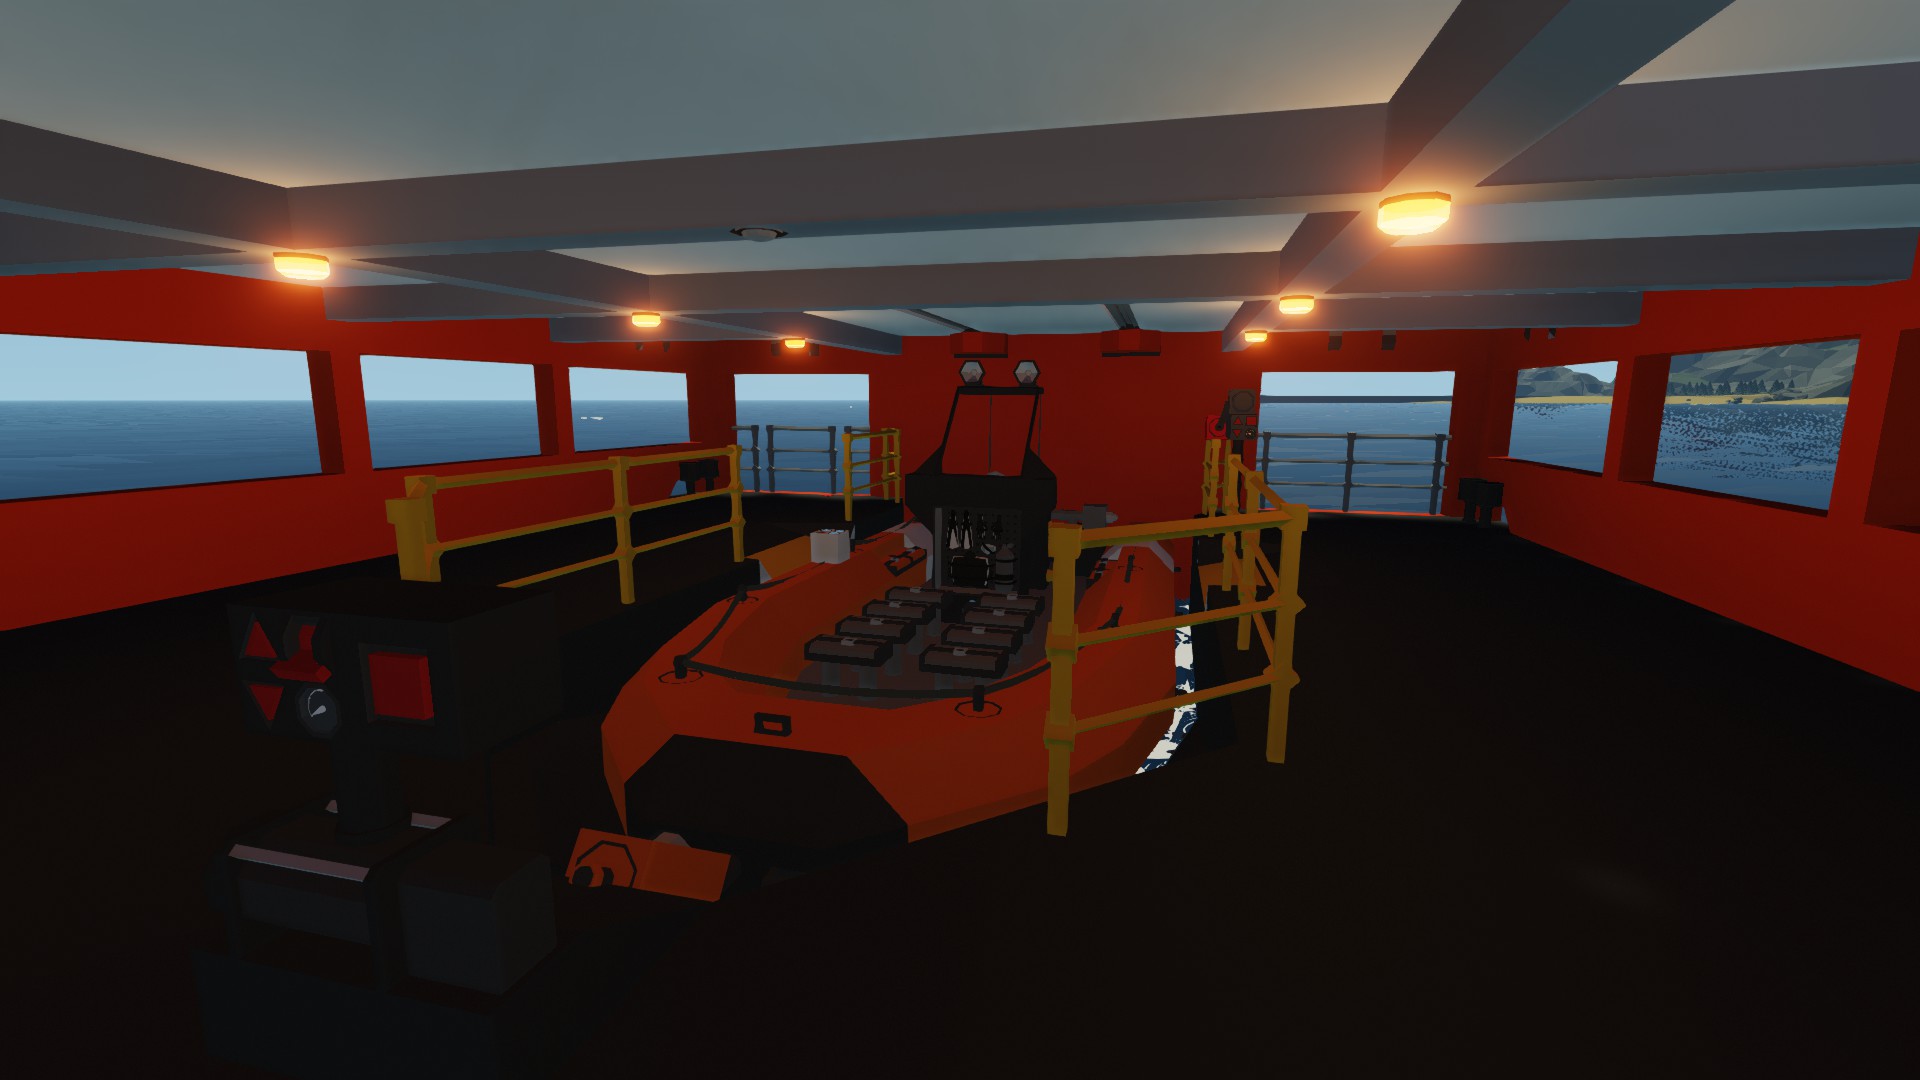
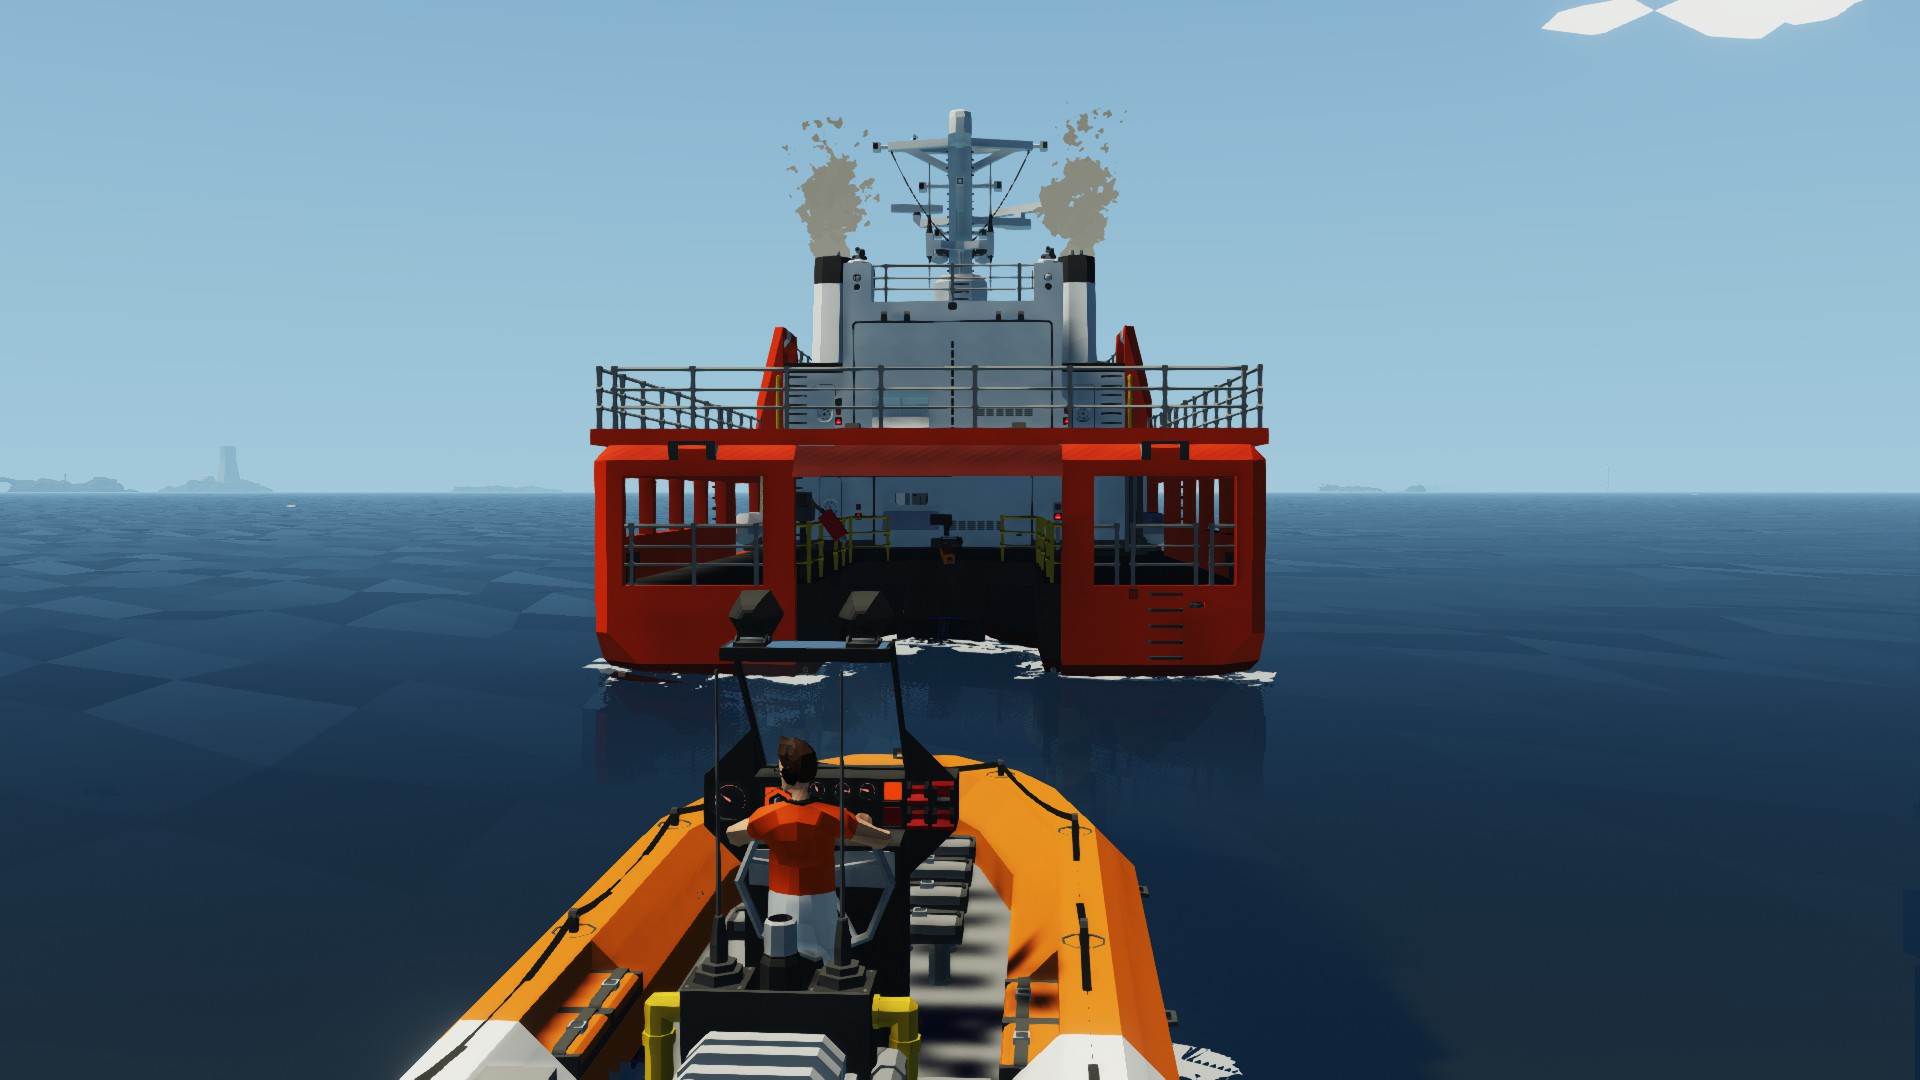
3. RHIB.
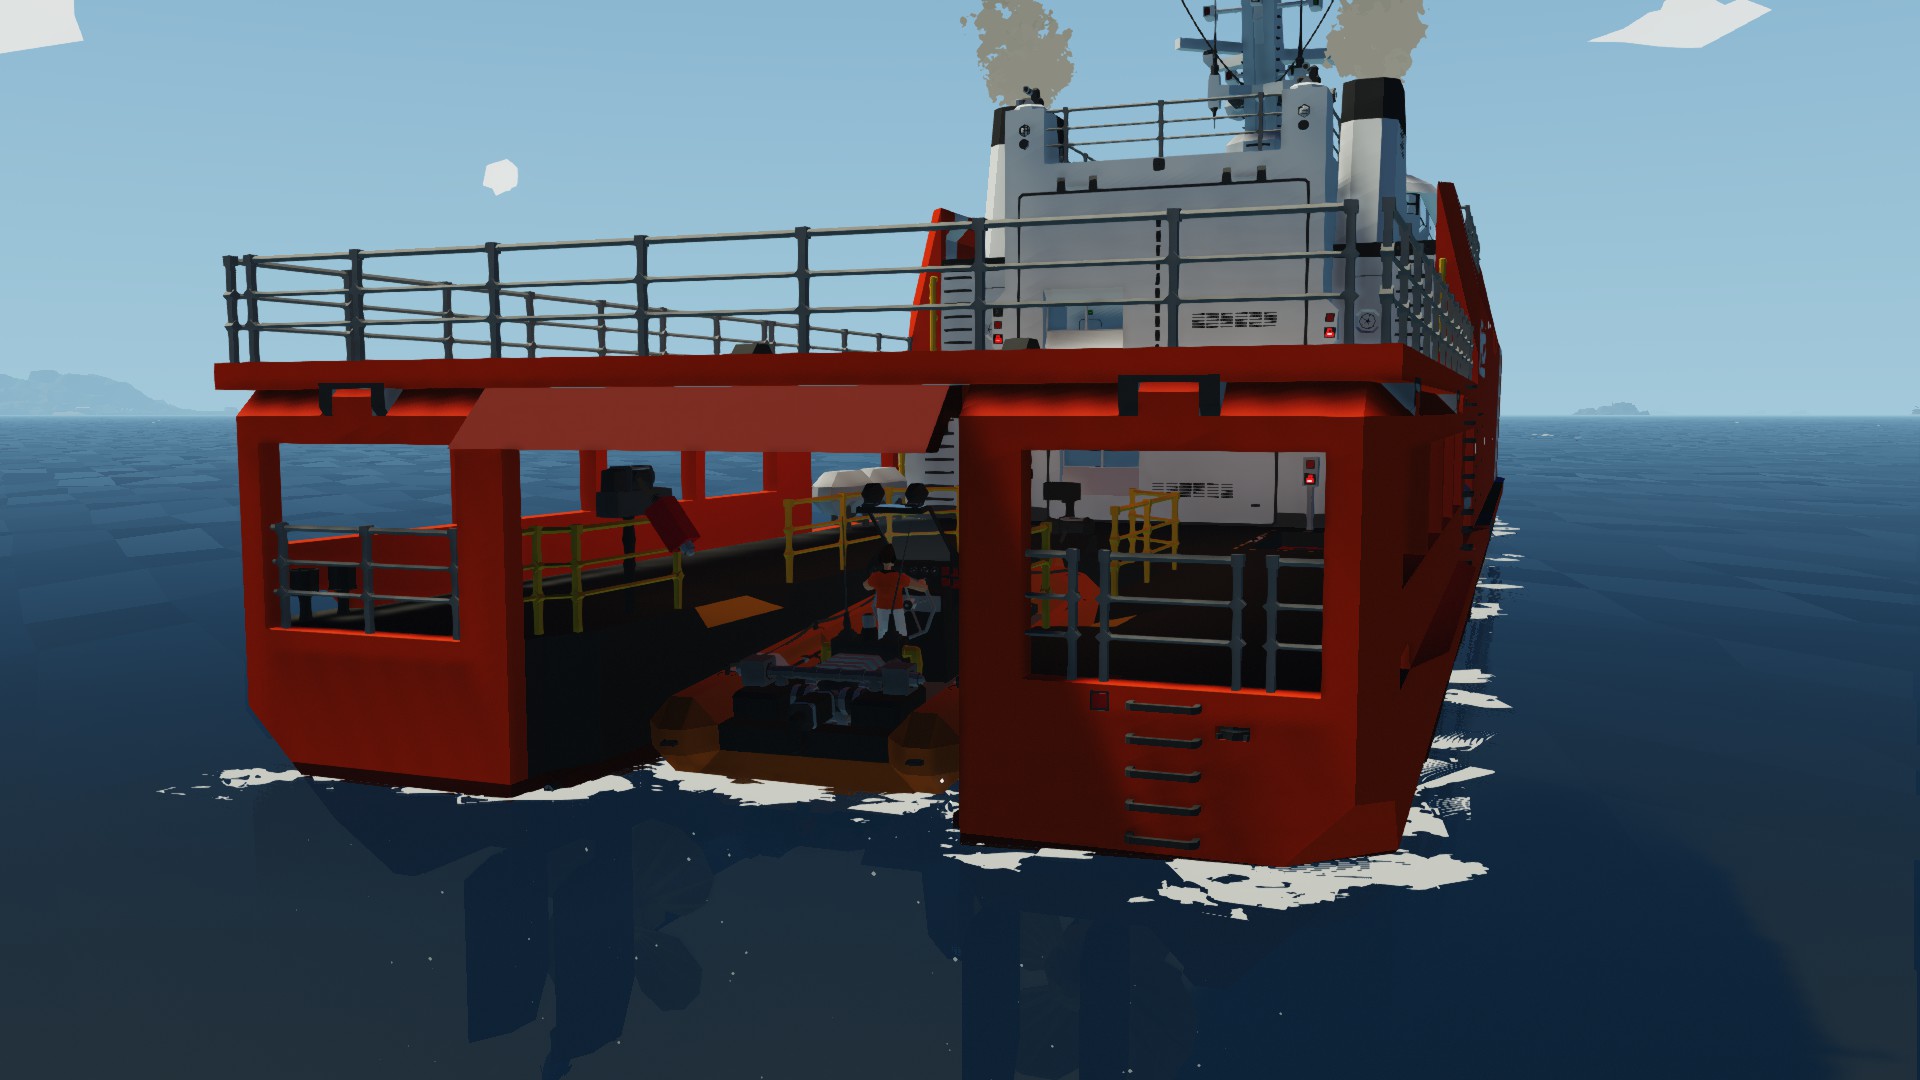
4. Diving compartment.
5. Lower deck cargo with elevator and side opening doors.
6. Auto stabilization.
7. GPS autopilot.
8. Bow collision warning (can be turned off).
9. Flares
10. Radar with variable range.
11. Map-to-screen monitor.
12. Basic FLIR HUD for better visibility in nighttime with heavy fog.
13. Solar panels for battery charging.
14. Heaters & clothing for Arctic missions.
- Length : 55,5m
- Beam : 10.75m
- Top speed : 32 knots
- Power : 8 large diesel engines
- Fuel : 134,720 liters
- Crew : 2 Officer's bunk, 8 crew's bunk (16 beds), 2 medical beds.
1. Turn on engine fuel.
2. Press engine starter.
3. Turn off clutch to move forward.
4. For reverse, set to neutral first or the engine will stop.
5. Engine throttle is clamped with min 0.1 and max 1. Meaning, you can start the engine at 0 throttle and it won't die. To turn off engine, just shut off engine fuel.
1. Fold main and tail rotor.
2. Open hangar door.
3, Walk up to the rope anchors and press e/q to detach.
4. Push helo into hangar by running into skids from behind.
5. Continue pushing till helo locks into place.
*WARNING*
1. When exiting the pilot seat in the chopper while the rotor is still turning, press ctrl-f which makes you duck immediately or else your head might clip through the roof and the rotor will instantly decapitate you.
2. The heli and RHIB have a limited range of 6.5km from the ship. Traveling any further will cause them to disappear. To avoid this you can remove the default heli and spawn in this heli separately instead.

1. Open rear gate.
2. Release connector and RHIB will slide down tracks.
3. Release tracks and you're good to go.
4. For recovery, turn off release connector and tracks button, drive the RHIB into the docking bay and use small winch to secure it in place.
1. GPS Autopilot - Taijin
2. Radar - Sengir_vampire
3. Fuel Time (modified) - Catmandoe1
 [www.buymeacoffee.com]
Please do not re-upload my creations under any circumstances. Making modifications to suite your own personal needs is fine but do not upload them to the workshop. It takes days, weeks and sometimes months to create a single ship or aircraft. Blatantly stealing someone else's work and uploading them as your own is NOT cool.
Як завантажити моди?
Натисніть на кнопку вище та завантажте обраний мод з файлового сховища.Як встановити мод?
Див. секцію "Як встановити".Чи безпечний завантажуваний файл?
Моди перезаливаються нами з оригінального джерела, без жодних змін. Ми лише запаковуємо їх в звичайний архів. Додатково можете перевірити архів на наявність загроз за допомогою будь-якого антивірусу або онлайн-сканеру на кшталт virustotal.com. Також рекомендуємо робити резервні копії ваших сейвів, про всяк випадок.
For vehicle mods
- Download the .zip archive containing the vehicle mod files.
- Locate your game's root folder.
- Navigate to
rom\data\preset_vehicles_advancedand extract the files there. - Rename both files to something recognizable, ensuring they share the same base name but different extensions.
- Launch the game and go to the Workbench's Presets tab to see the new vehicle mod.