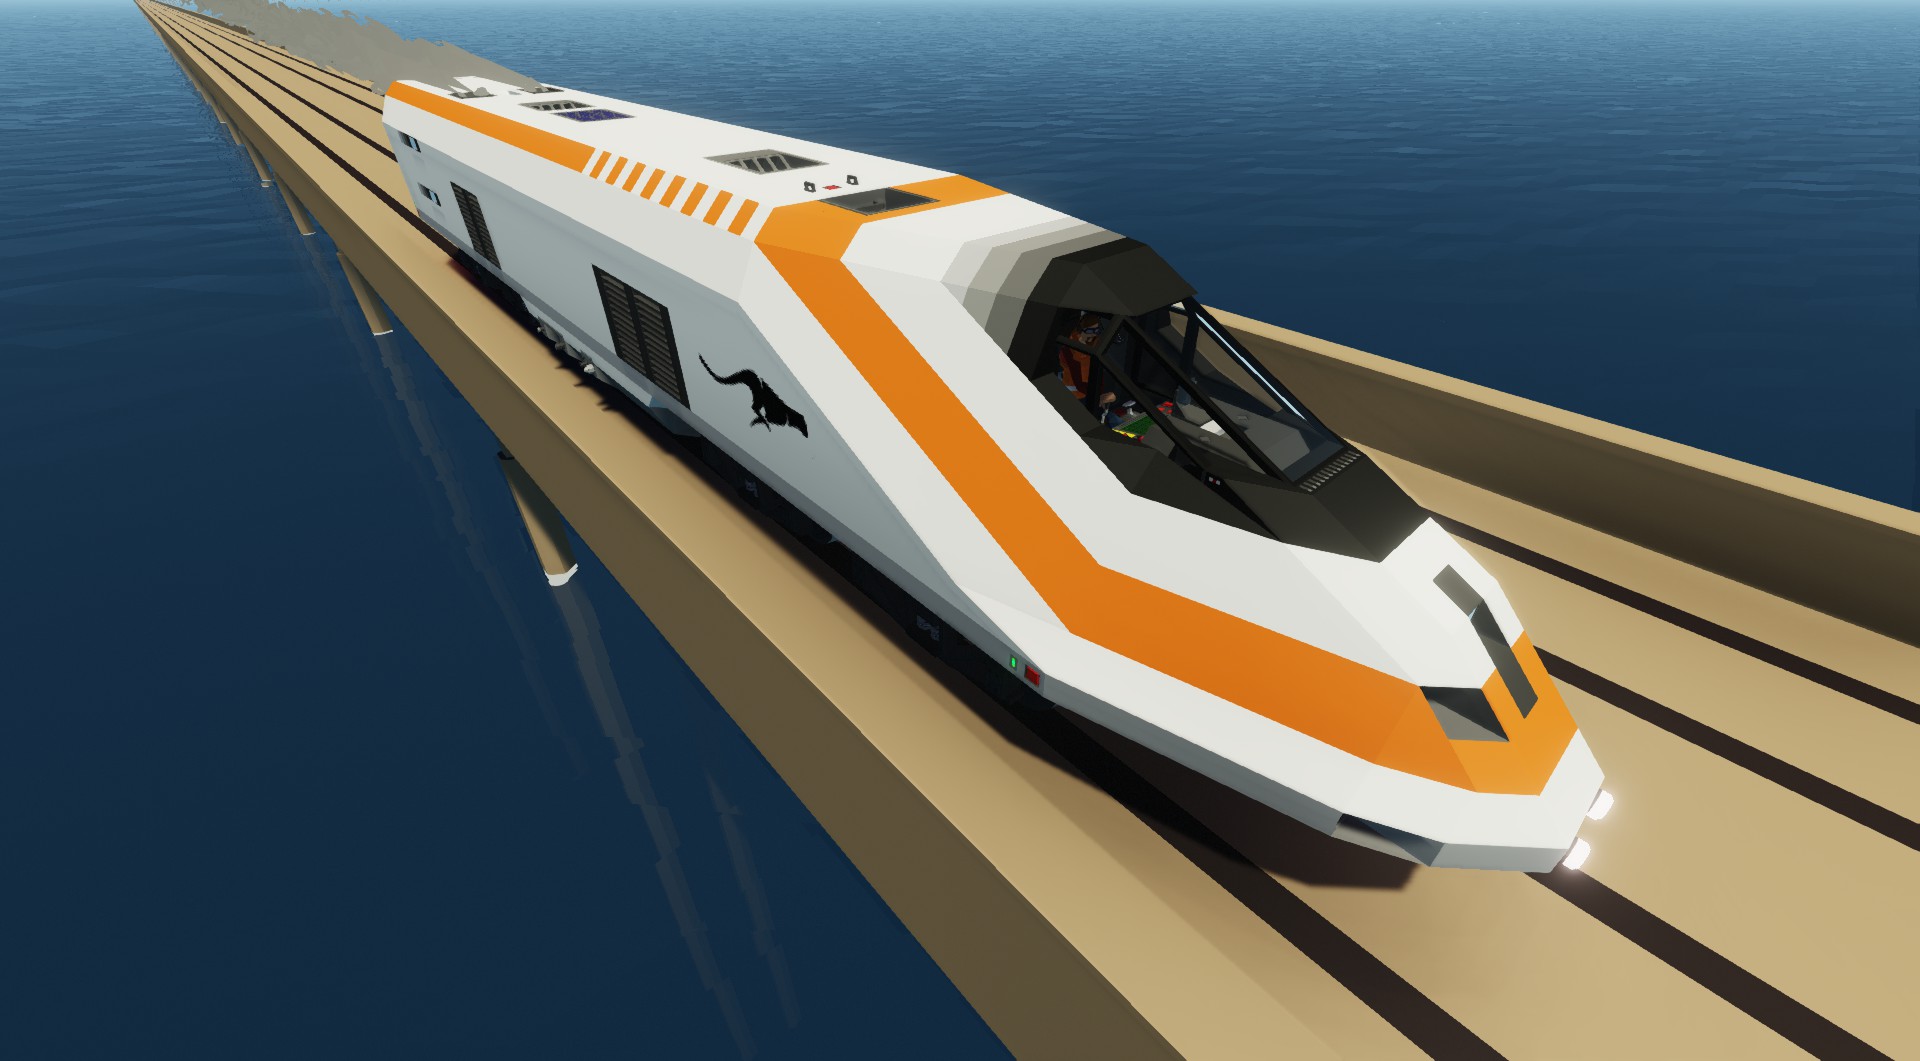
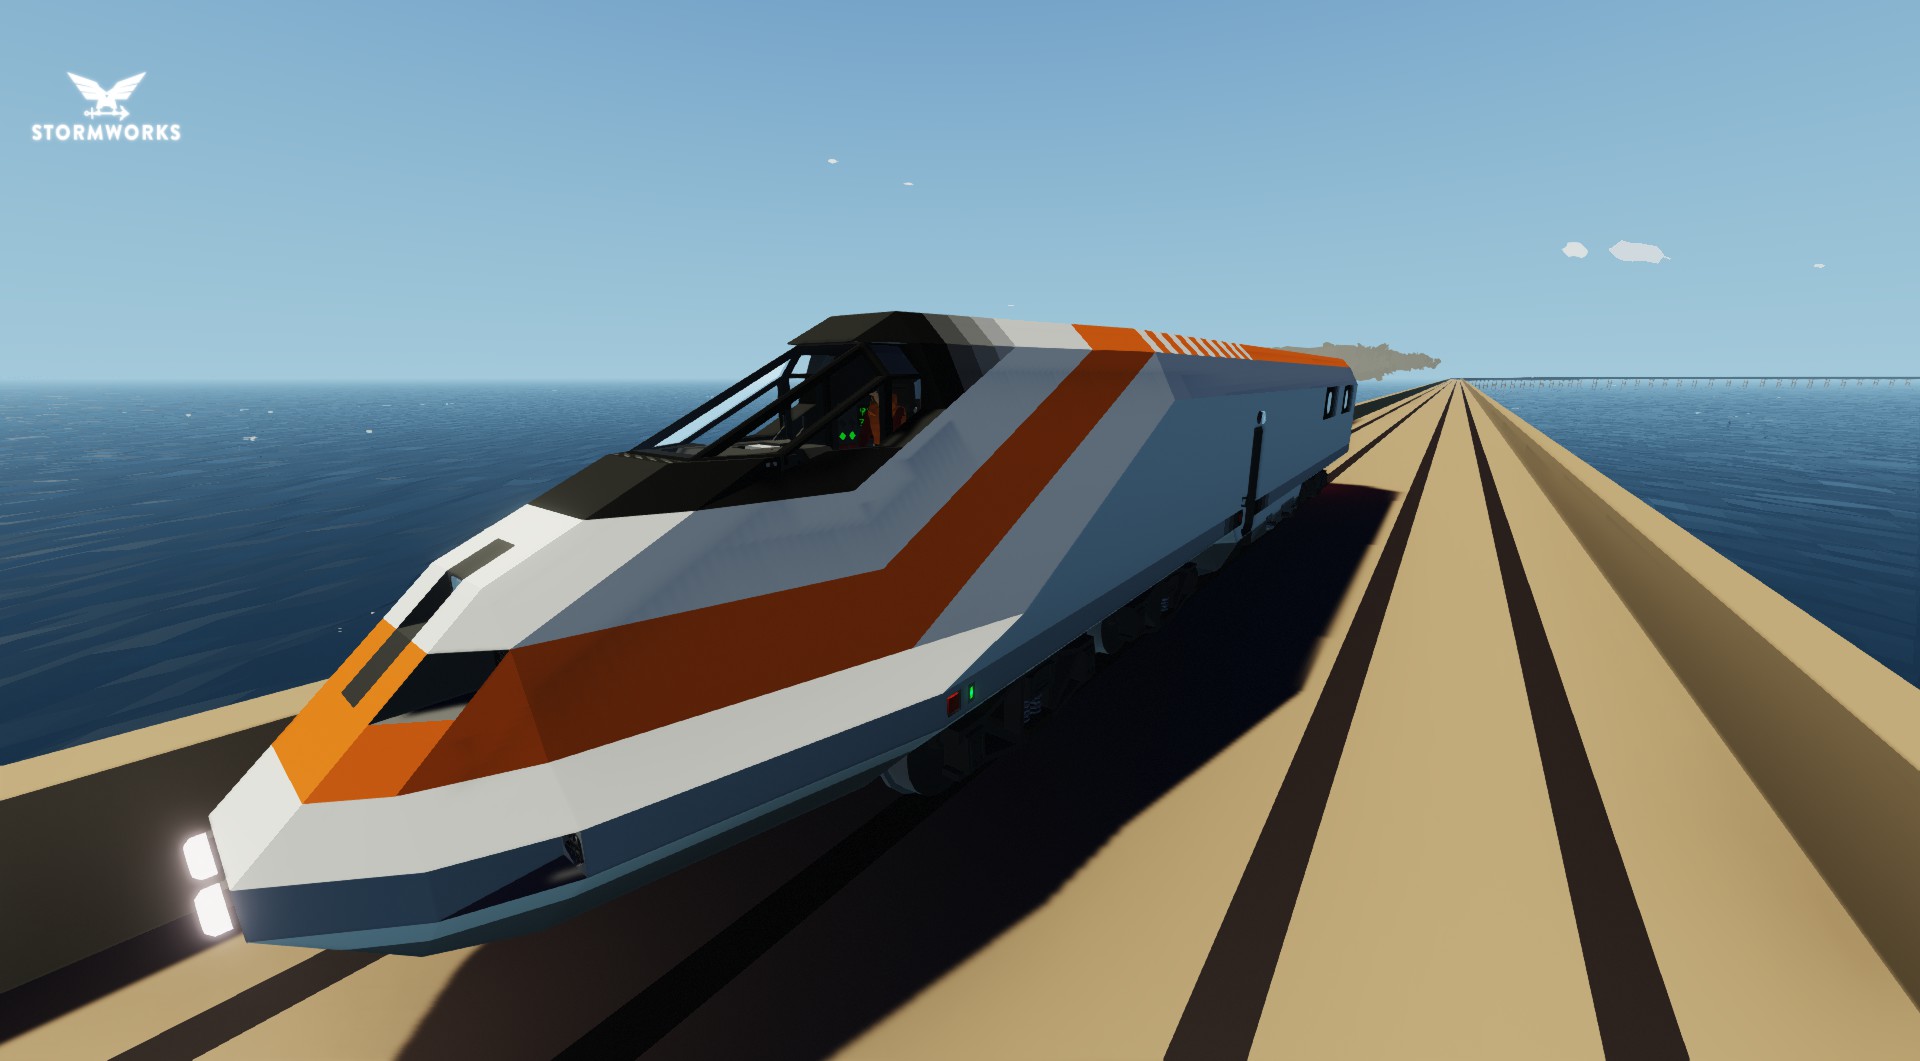

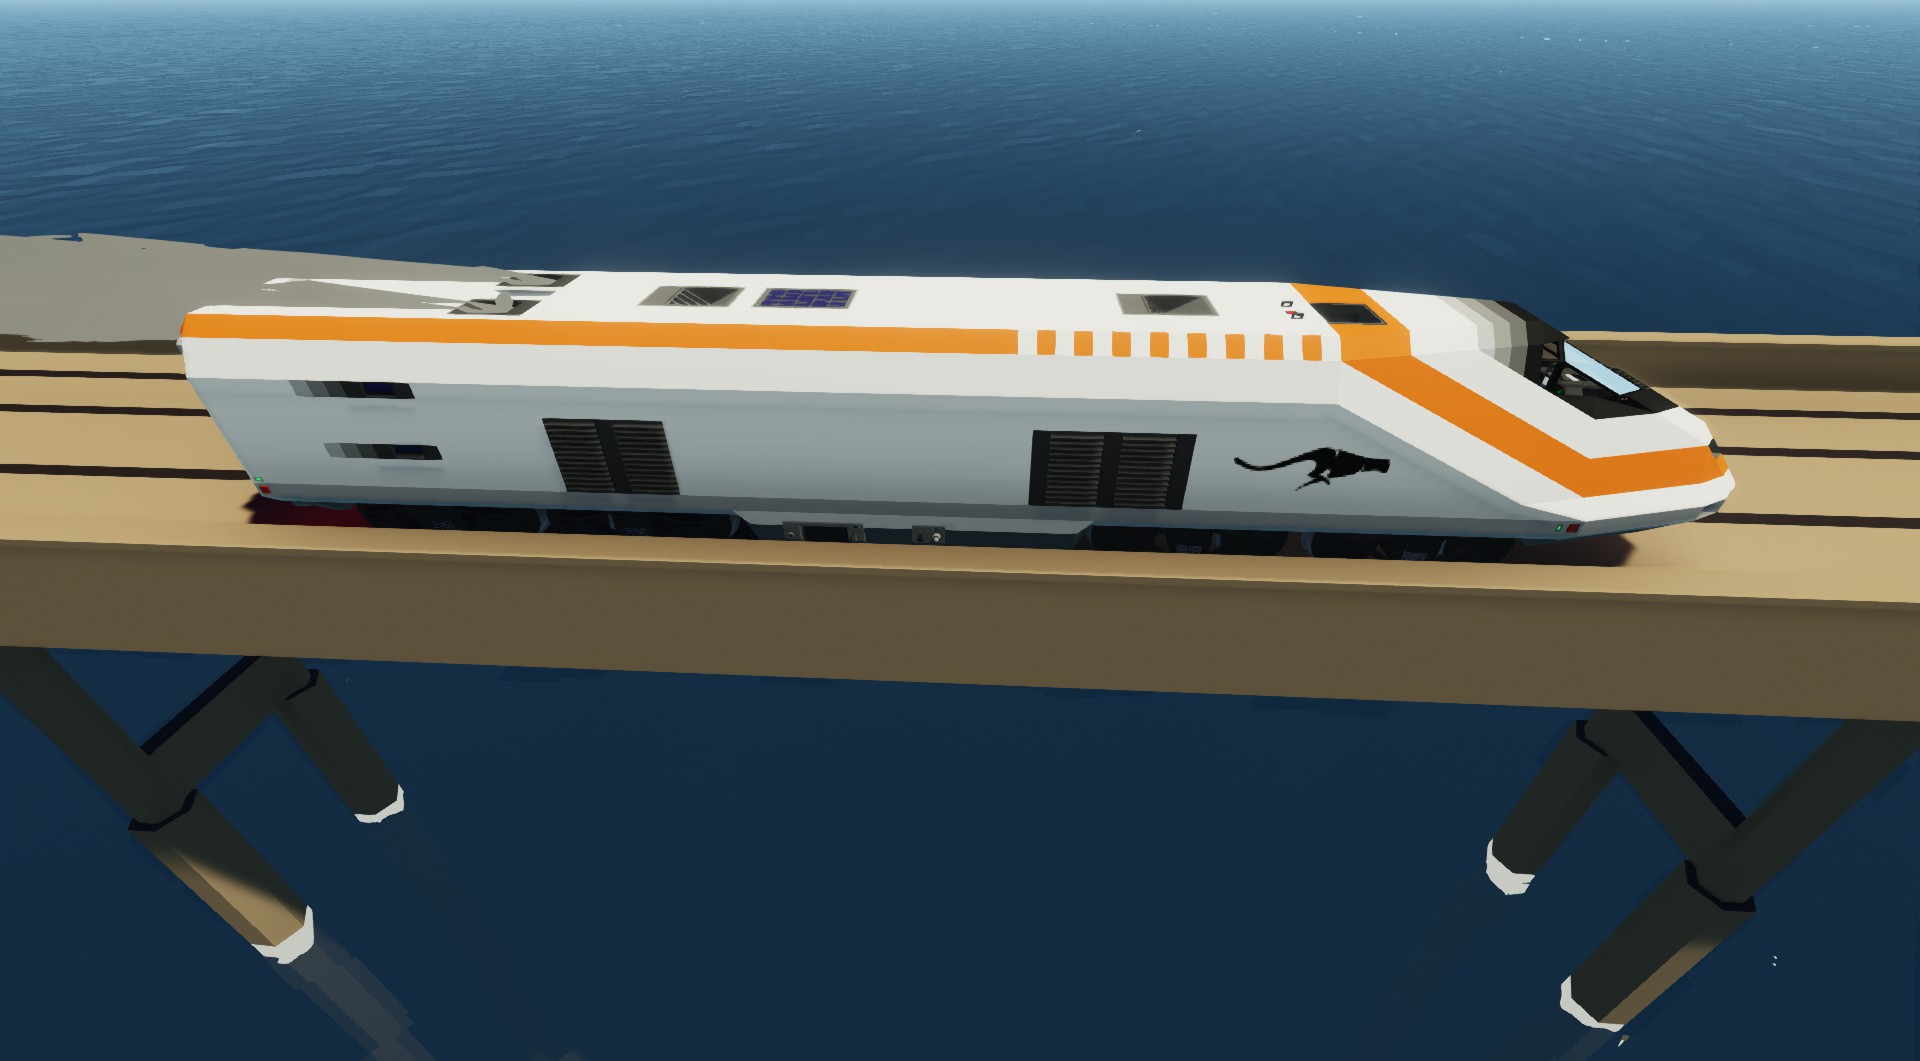


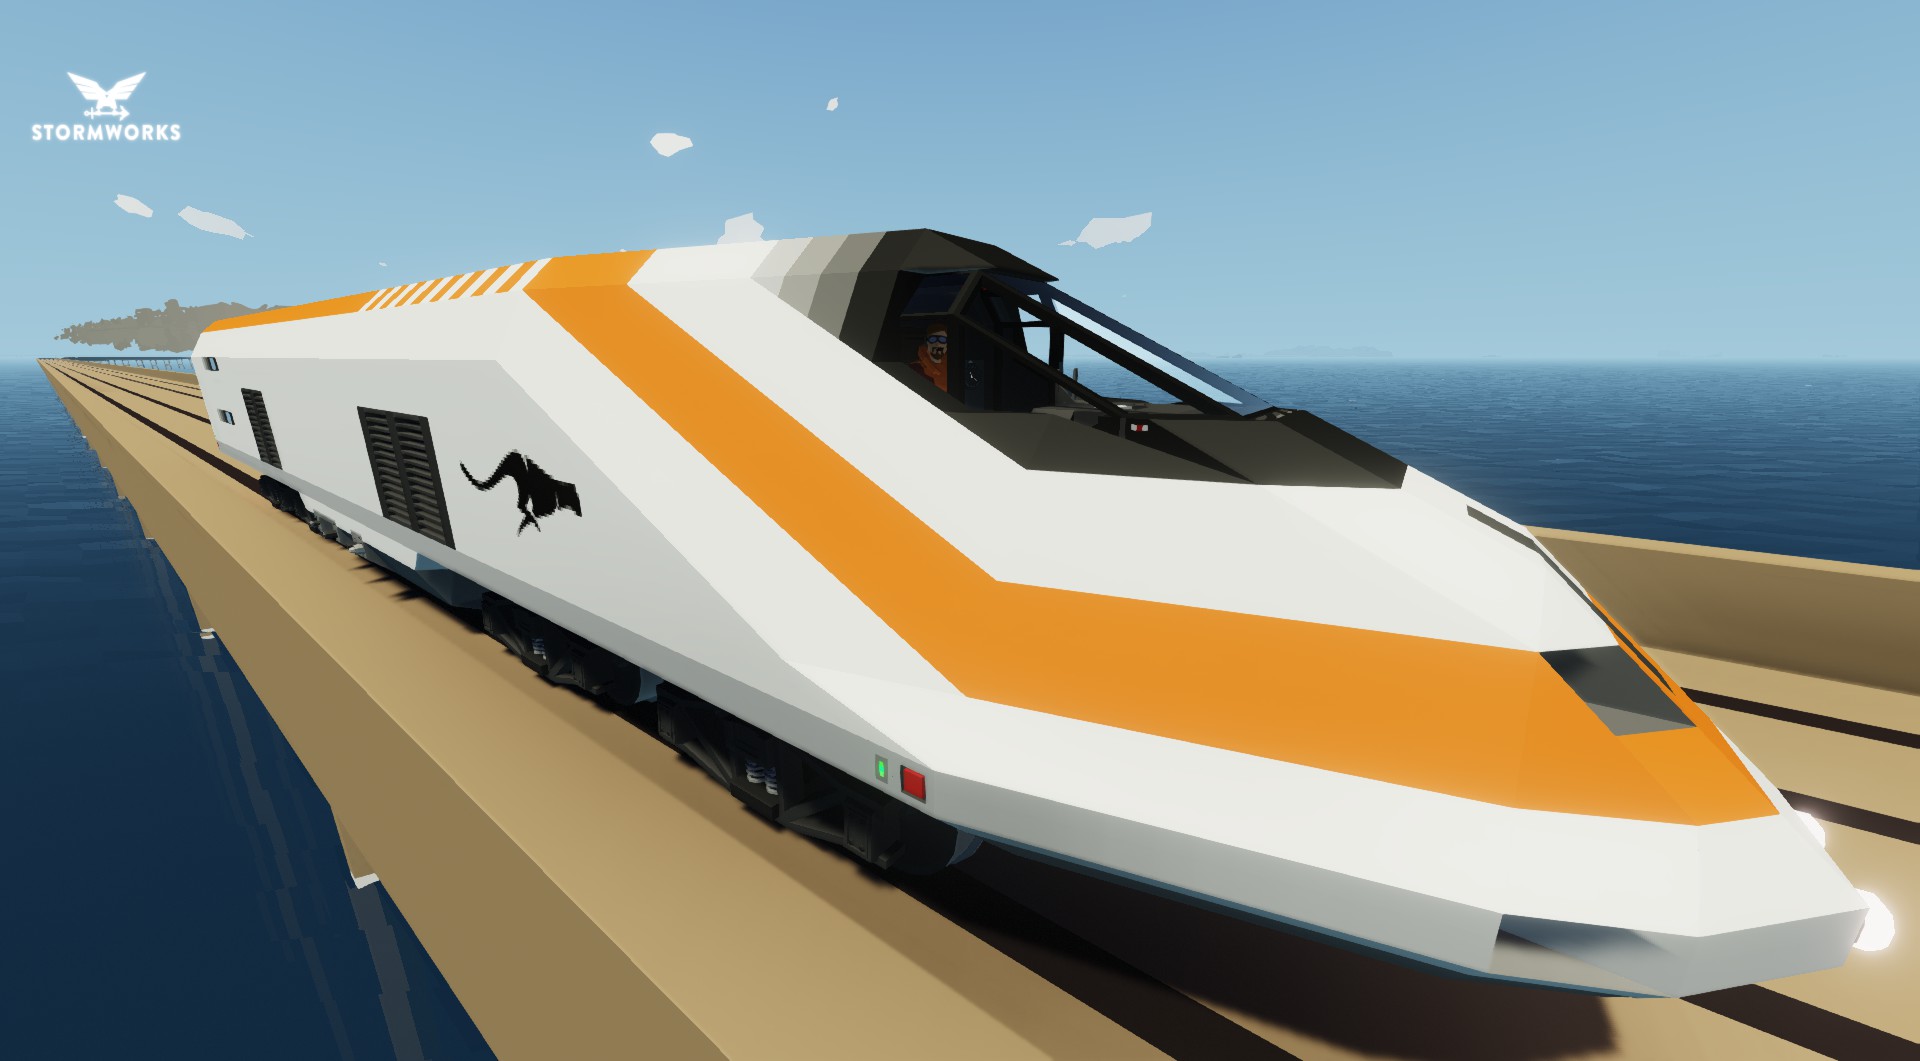


SBS PUMA Mk.I High Speed Train (LEGACY)
Vehicle, Exploration, Delivery, Technical, Creative, Land, Mechanical, Advanced, v1.5.5
SeaBoss Systems PUMA Mk.I High Speed Train - "Challenger Edition" (LEGACY)
***NOTE: A MK2 version of the PUMA HST has been created featuring a better modular engine, improved wheel slip and drive shaft torque and support for "Assist Motor" implementations on the newest version of the Passenger cars.
https://steamcommunity.com/sharedfiles/filedetails/?id=2841449190
LEGACY - NO F...
Розробник: ElfBossHogg
Дата створення: 6 May, 2020 @ 11:30pm
Оновлено: 18 Jul, 2022 @ 6:37am
Підписників: 38996
Розмір (розпакований) : 1.397 MB
***NOTE: A MK2 version of the PUMA HST has been created featuring a better modular engine, improved wheel slip and drive shaft torque and support for "Assist Motor" implementations on the newest version of the Passenger cars.
https://steamcommunity.com/sharedfiles/filedetails/?id=2841449190
LEGACY - NO FURTHER UPDATES. UPDATES WILL ONLY BE APPLIED TO THE MK2 VERSION MOVING FORWARD.
Entry for MrNJersey's High Speed Train Challenge.
NOTE: A Passenger Car is now available for integration with the PUMA
https://steamcommunity.com/sharedfiles/filedetails/?id=2105921338
A version of the PUMA placed going opposite direction is available...
https://steamcommunity.com/sharedfiles/filedetails/?id=2168624335
Supports the SBS Rail Replacement Add-On
https://steamcommunity.com/sharedfiles/filedetails/?id=2833100098
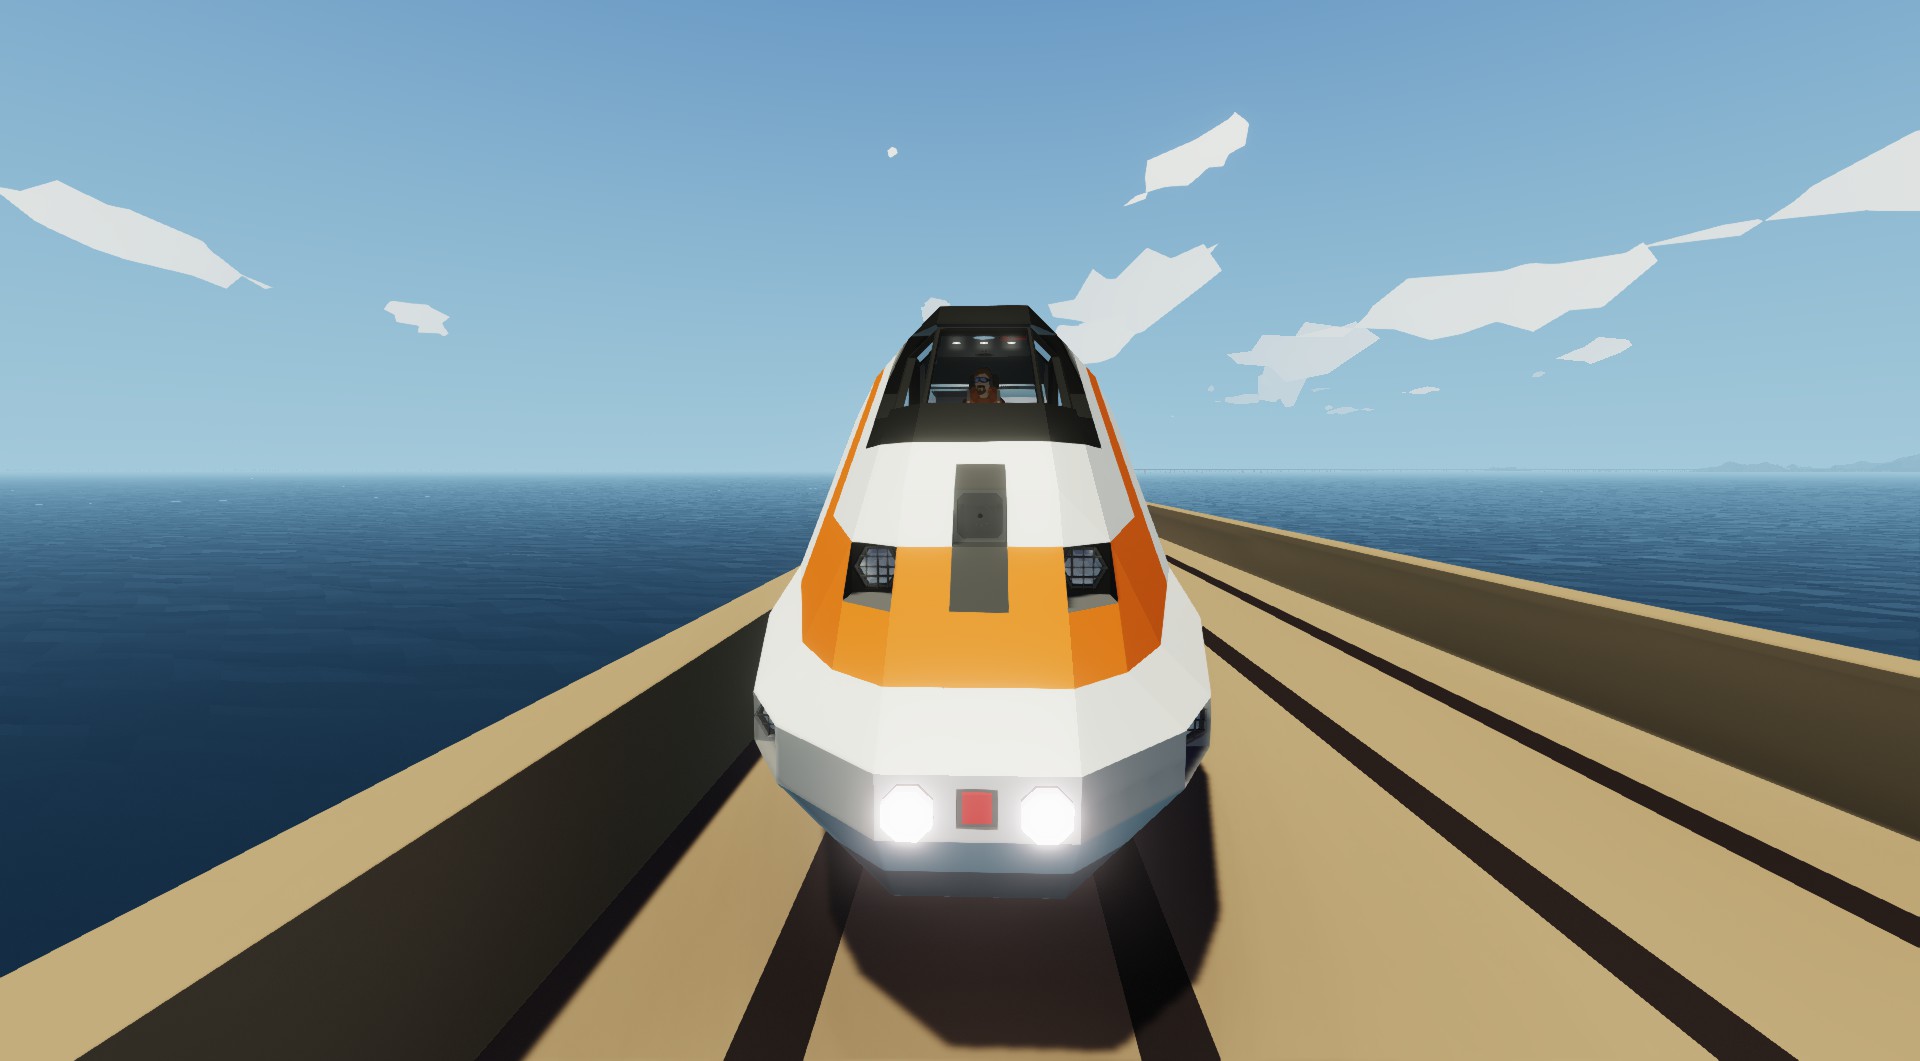
The first rail based offering from SeaBoss Systems the PUMA is a High Speed Train capable of speeds up to 200mph (321 km/h) unlaiden and 150mph (241 km/h) under medium load. At top speed the PUMA has a range of approximately ~400km (10k L Diesel Fuel Capacity).
Features Include:
- Switchable Sprint and Pull (Torque Priority) Modes. Sprint is for fast runs and Medium Loads. If more weight is required consider switching to Pull Mode (switch in Electric Motor Control Panel to front right of driver) to enable Torque Priority.
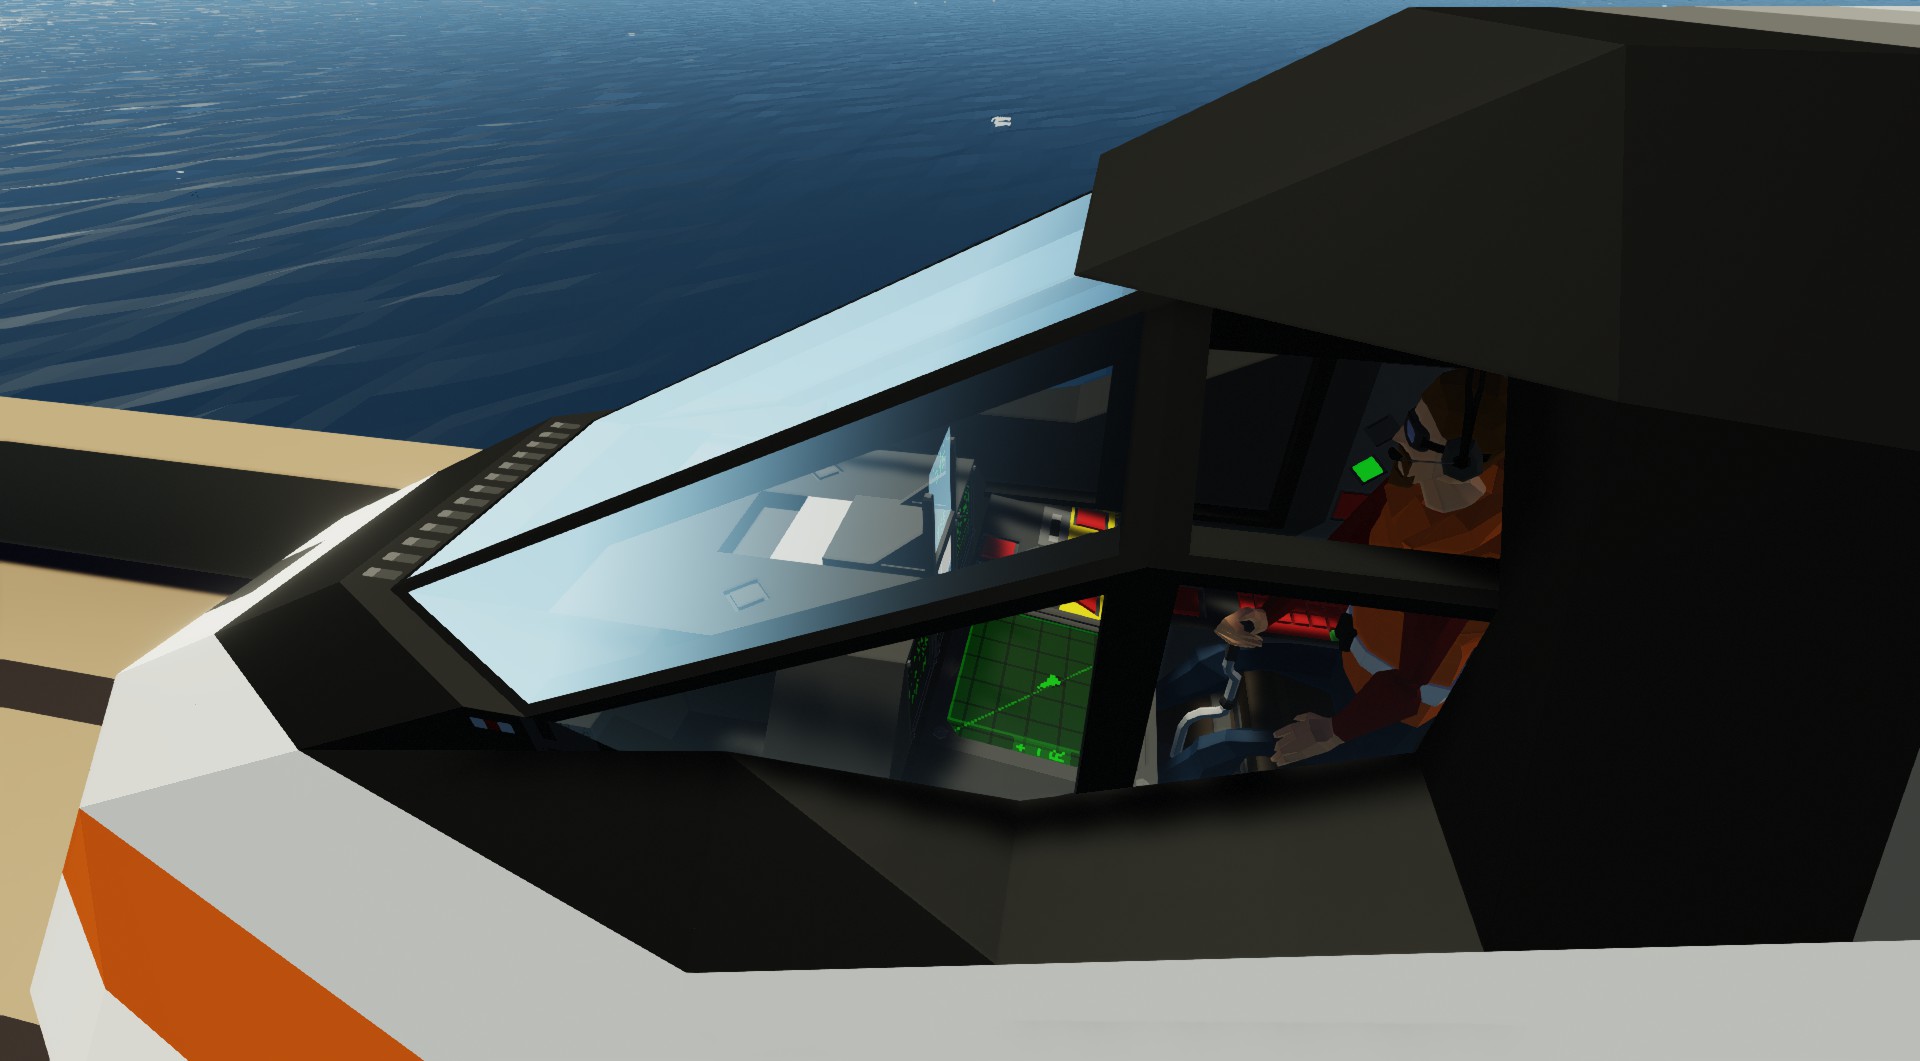
- 2 Dual Band Radio Sets (one in Control Cabin accessible to Pilot)
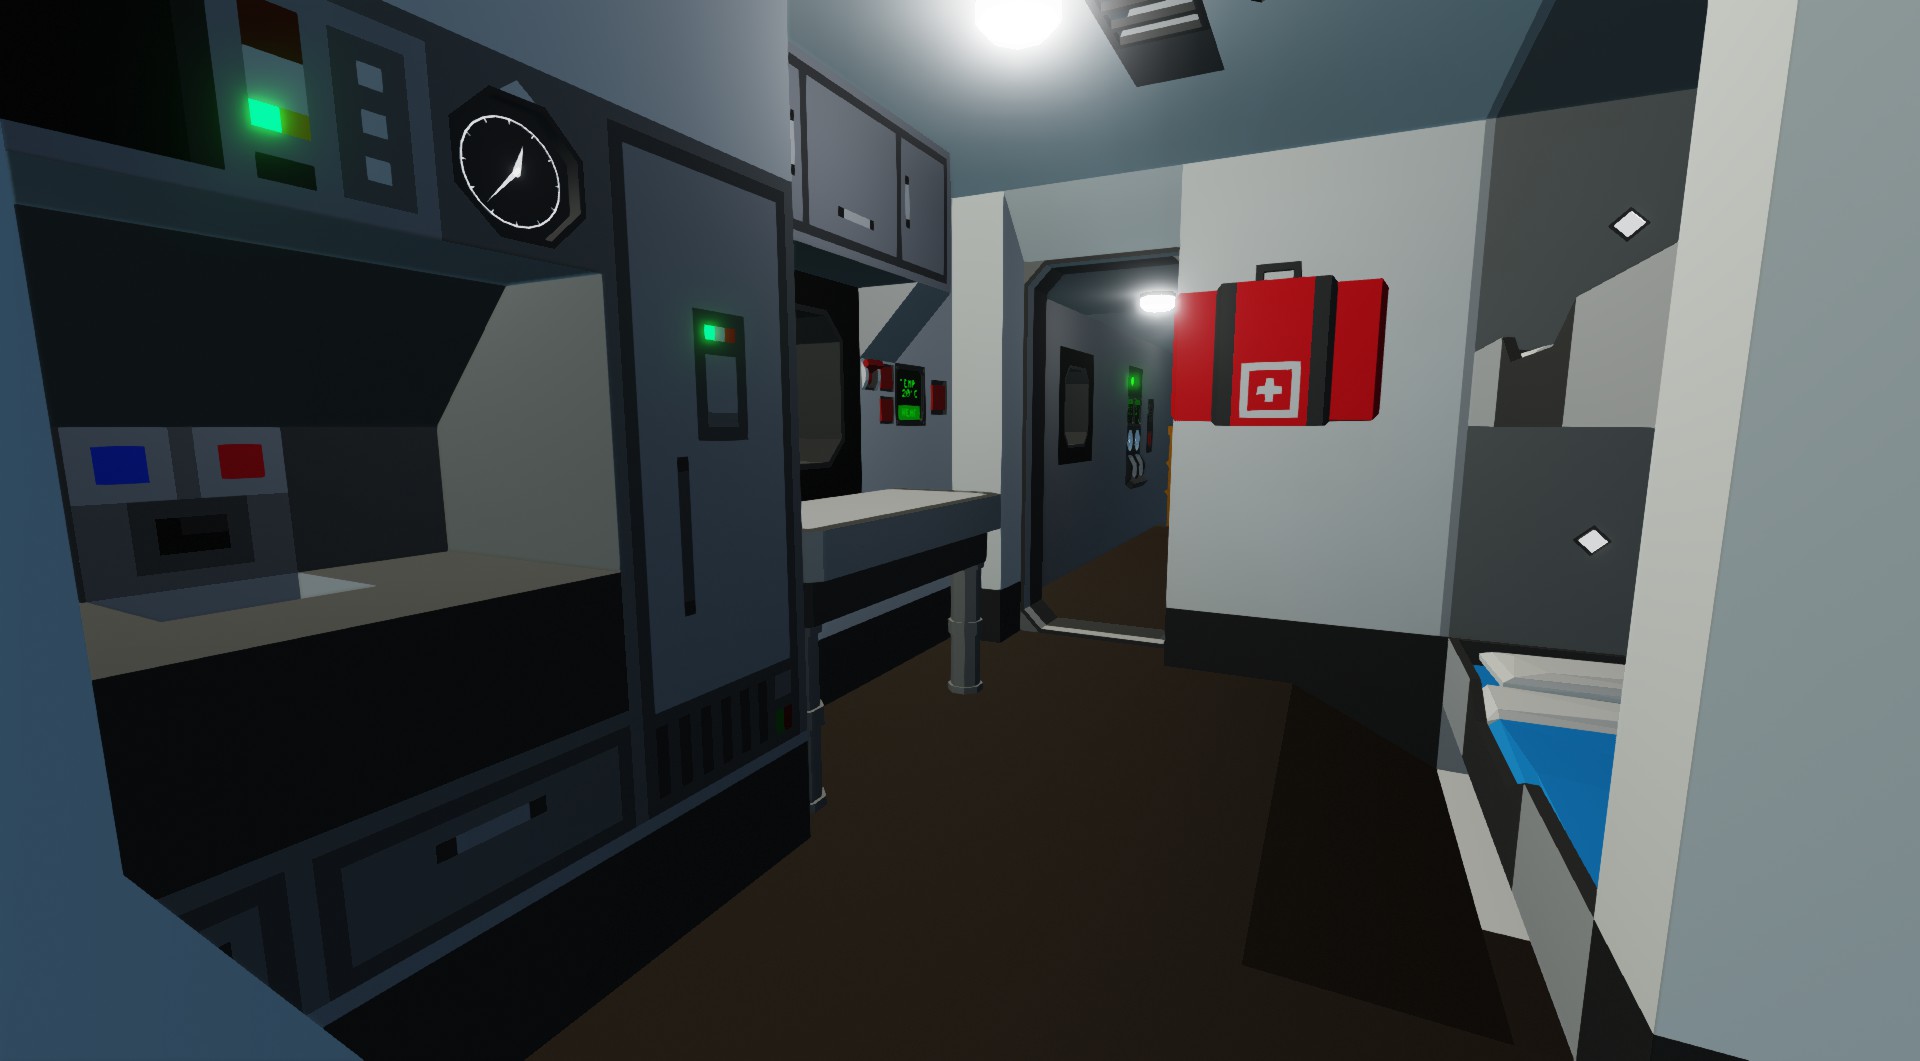
- Internal Intercom System with Terminals in Crew Lounge, Engine Room and Control Cabin
- Handheld Tools and Ropes/Hoses/Cables added relative to update V1.0
- Hidden Front Hitch that can be deployed from either the Cabin or front of train
- Emergency Brake - when activated it will shut off power to the drive motors, disconnect them from the bogeys and apply to Shaft Brake to immediately bring the RPS to 0. Prepare for lots of sparks. :)
- Track Change System integrated with my SBS Rail Signal Replacement systems. Display is on centre monitor in front of driver which will show arrows representing upcoming track change states.
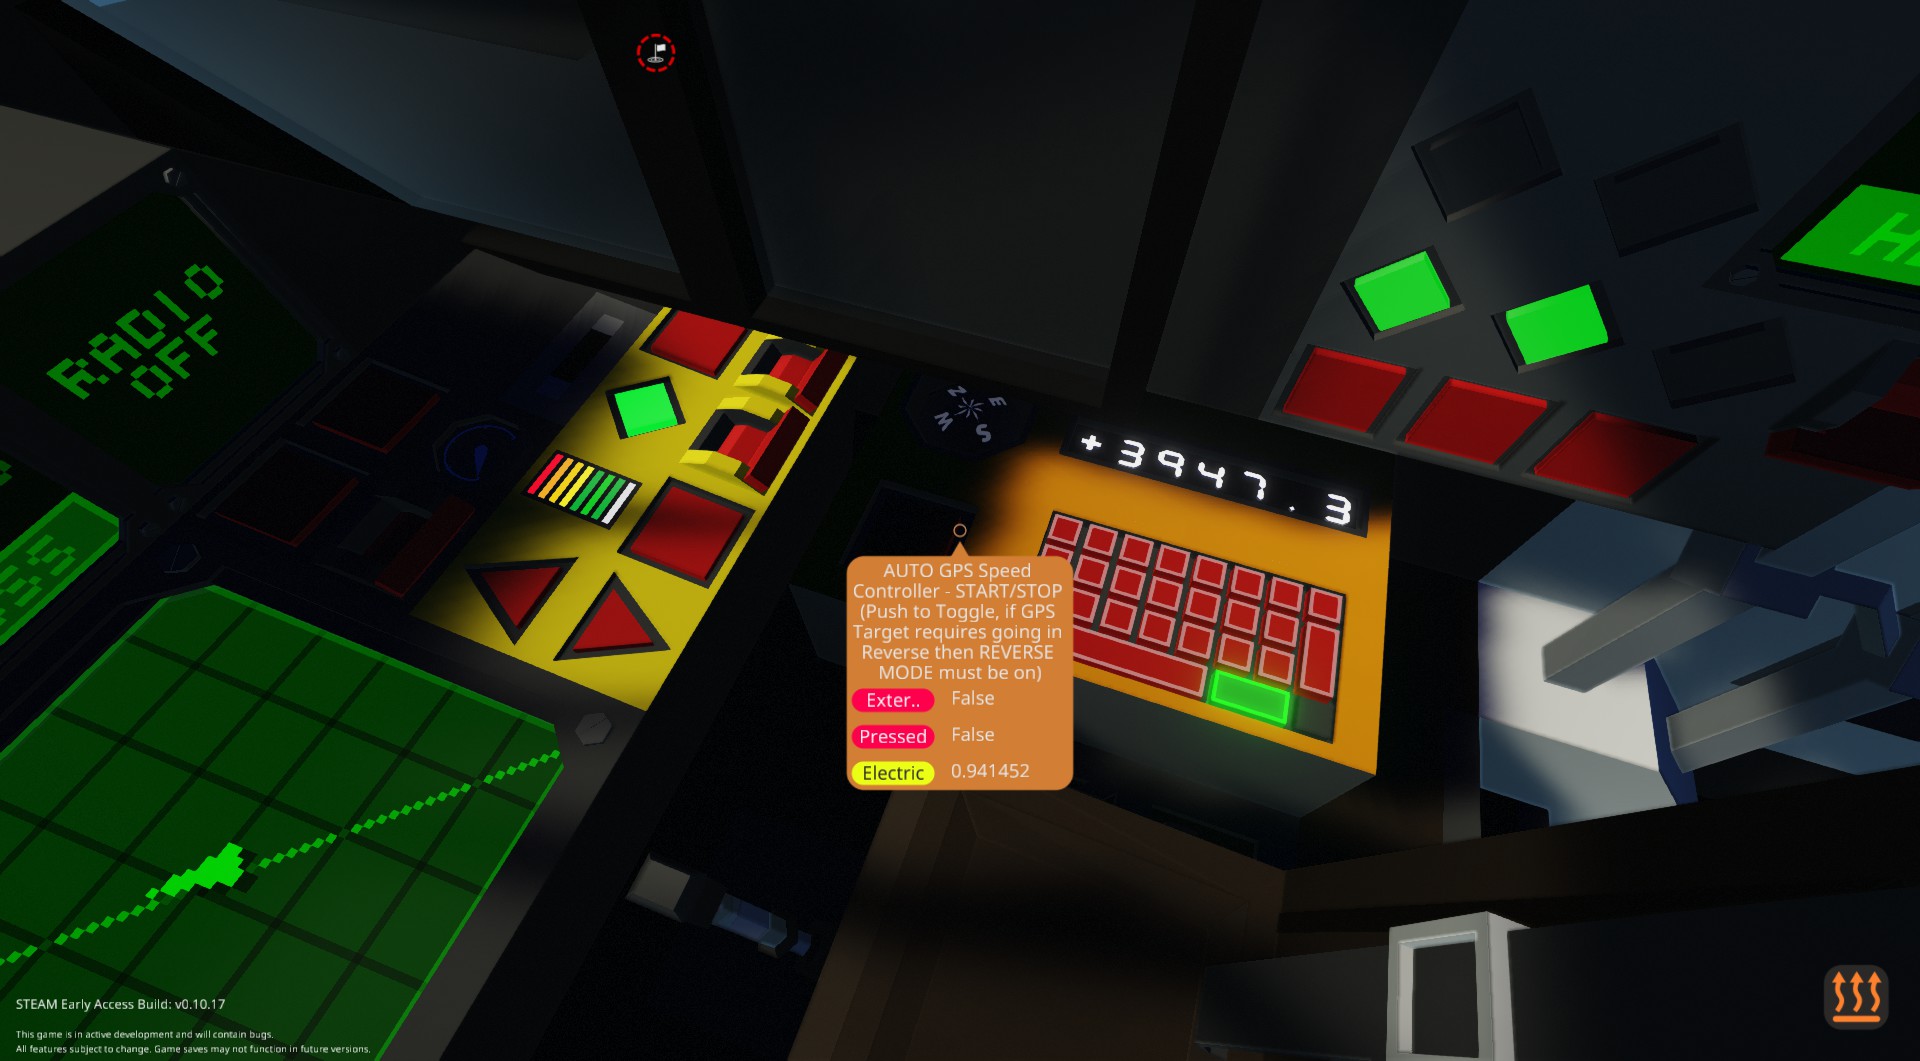
- Speed Controller with GPS Speed Controller. Plug in coordinates on the Keyboard to the right of the Driver and tap the START button to begin. *GPS* will now show up in the Speed Monitor. Once the train reaches the destination it will automatically turn off the controller and come to a stop. NOTE: If the GPS Destination requires the train to go in reverse you must activate REVERSE MODE in tandem for the train.
- Added a base Master/Slave system. To operate:
1. On both the Master and Slave Locomotives turn the key in the MSD Panel in order to enable the Master/Slave Director System. The system is set to disabled by default in order to reduce the amount of radio traffic in the air.
2. For the locomotive that will be operating as a Slave flip the switch in the panel to the left of the Driver where the clock was previously. SLAVE should now appear on the Speed Monitor. If there is a Master in range the signal strength dial should display a value.
3. If you locomotive is in reverse compared to the Master click the TRAIN IS REVERSE RELATIVE TO MASTER button.
4. There is an optional keypad below the MSD Panel that allows you to set a frequency for the command channel. If left alone it will default to channel 222.
5. With the vehicle set to SLAVE enter a locomotive operating not as slave that is tied to the same frequency as default or a frequency entered on the keypad. All Speed control, Horn and External Light commands will now be copied from the Master to the Slave with reverse orientation taken in to account if it was clicked.
Getting the PUMA started and moving...
1. In the Control Cabin there is an Engineering panel with numerous Breakers and Displays. The only thing of concern are two keys: ENG1 and ENG2. Turn both keys and ENG1 and ENG2 will automatically kick over to idle. The Diesel engines are used exclusively to power the Generators that charge the system. To the right of the keys is a Throttle control set to 100% by default. This value identifies the Maintenance Value that the Engines will automatically try to maintain for the Main Battery Array that drives the Electric Motors. For sustained Max Speed I would suggest keeping it at 100% as the extra SWATTs get pushed back in to the system and help with acceleration.
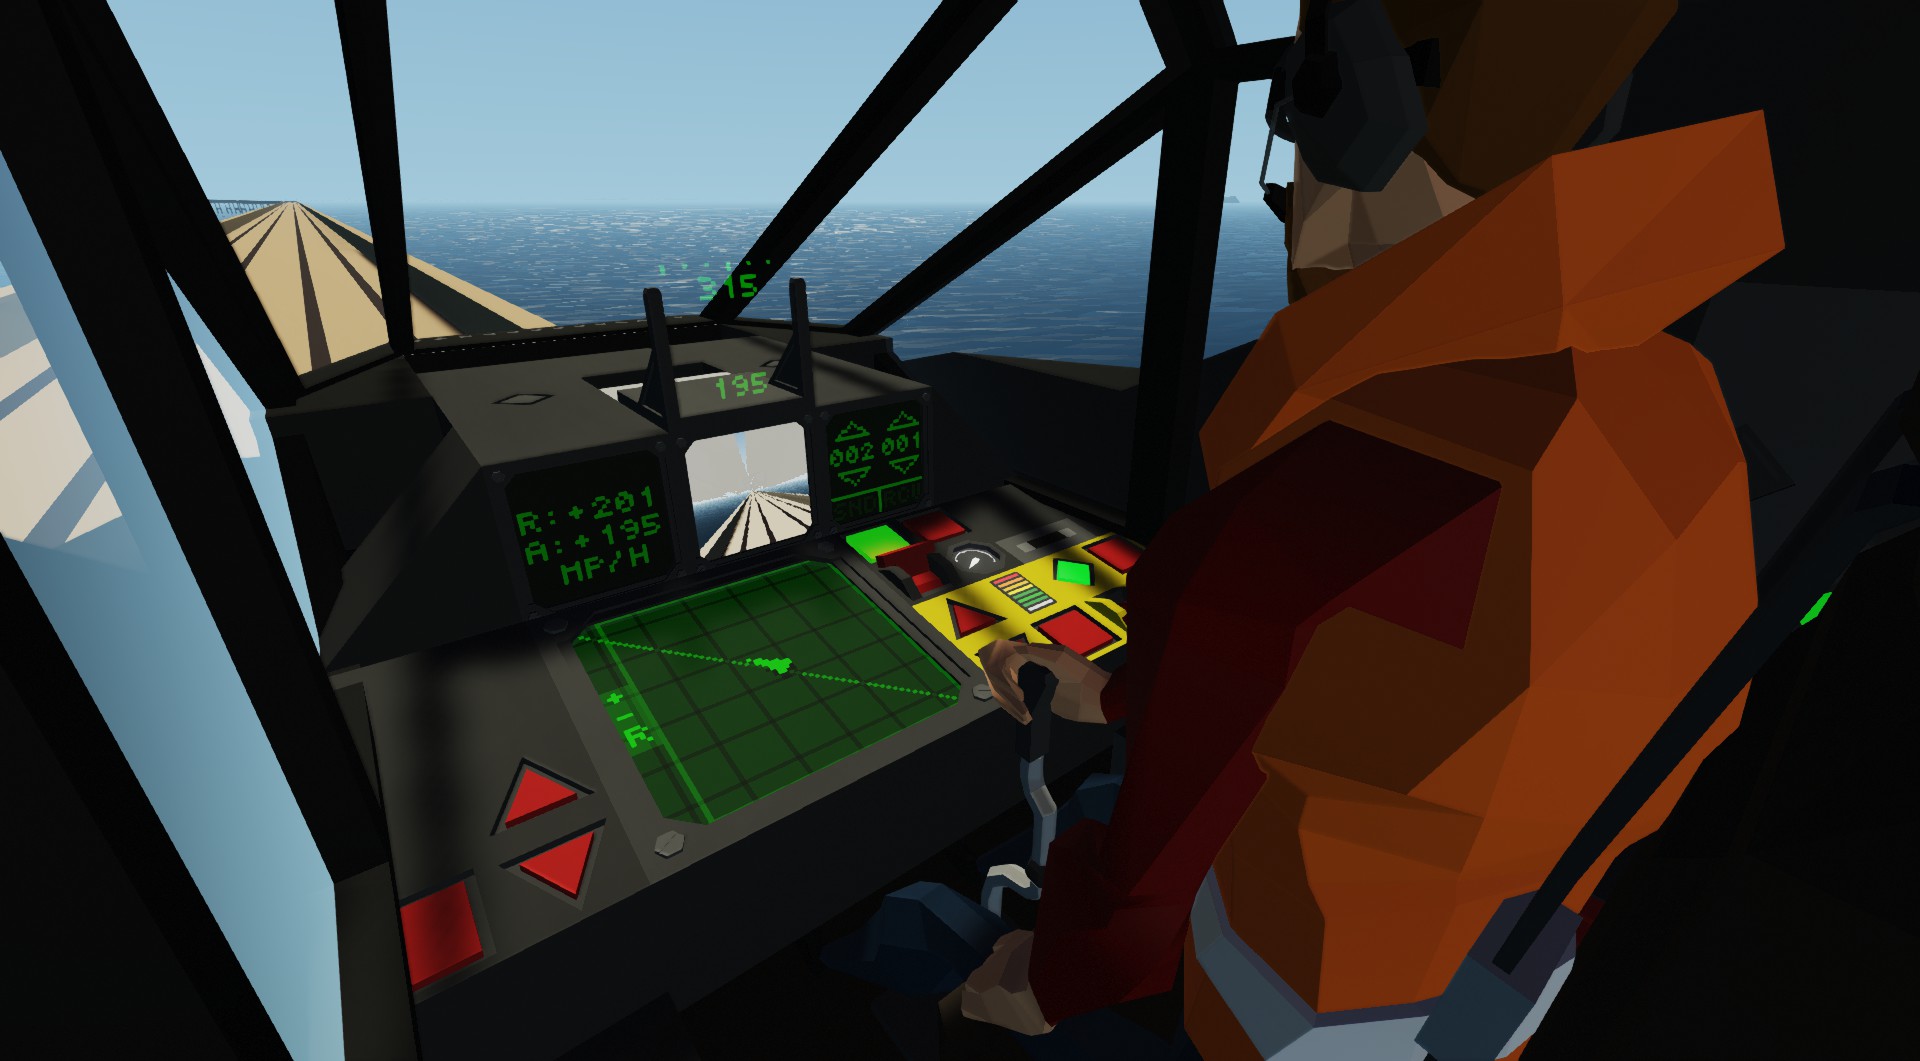
2. With the Engines running sit in the Driver's chair. The Electric Motors will already be on. NOTE: they can be toggled on/off using a switch in the Electric Engine Controls (Yellow Panel).
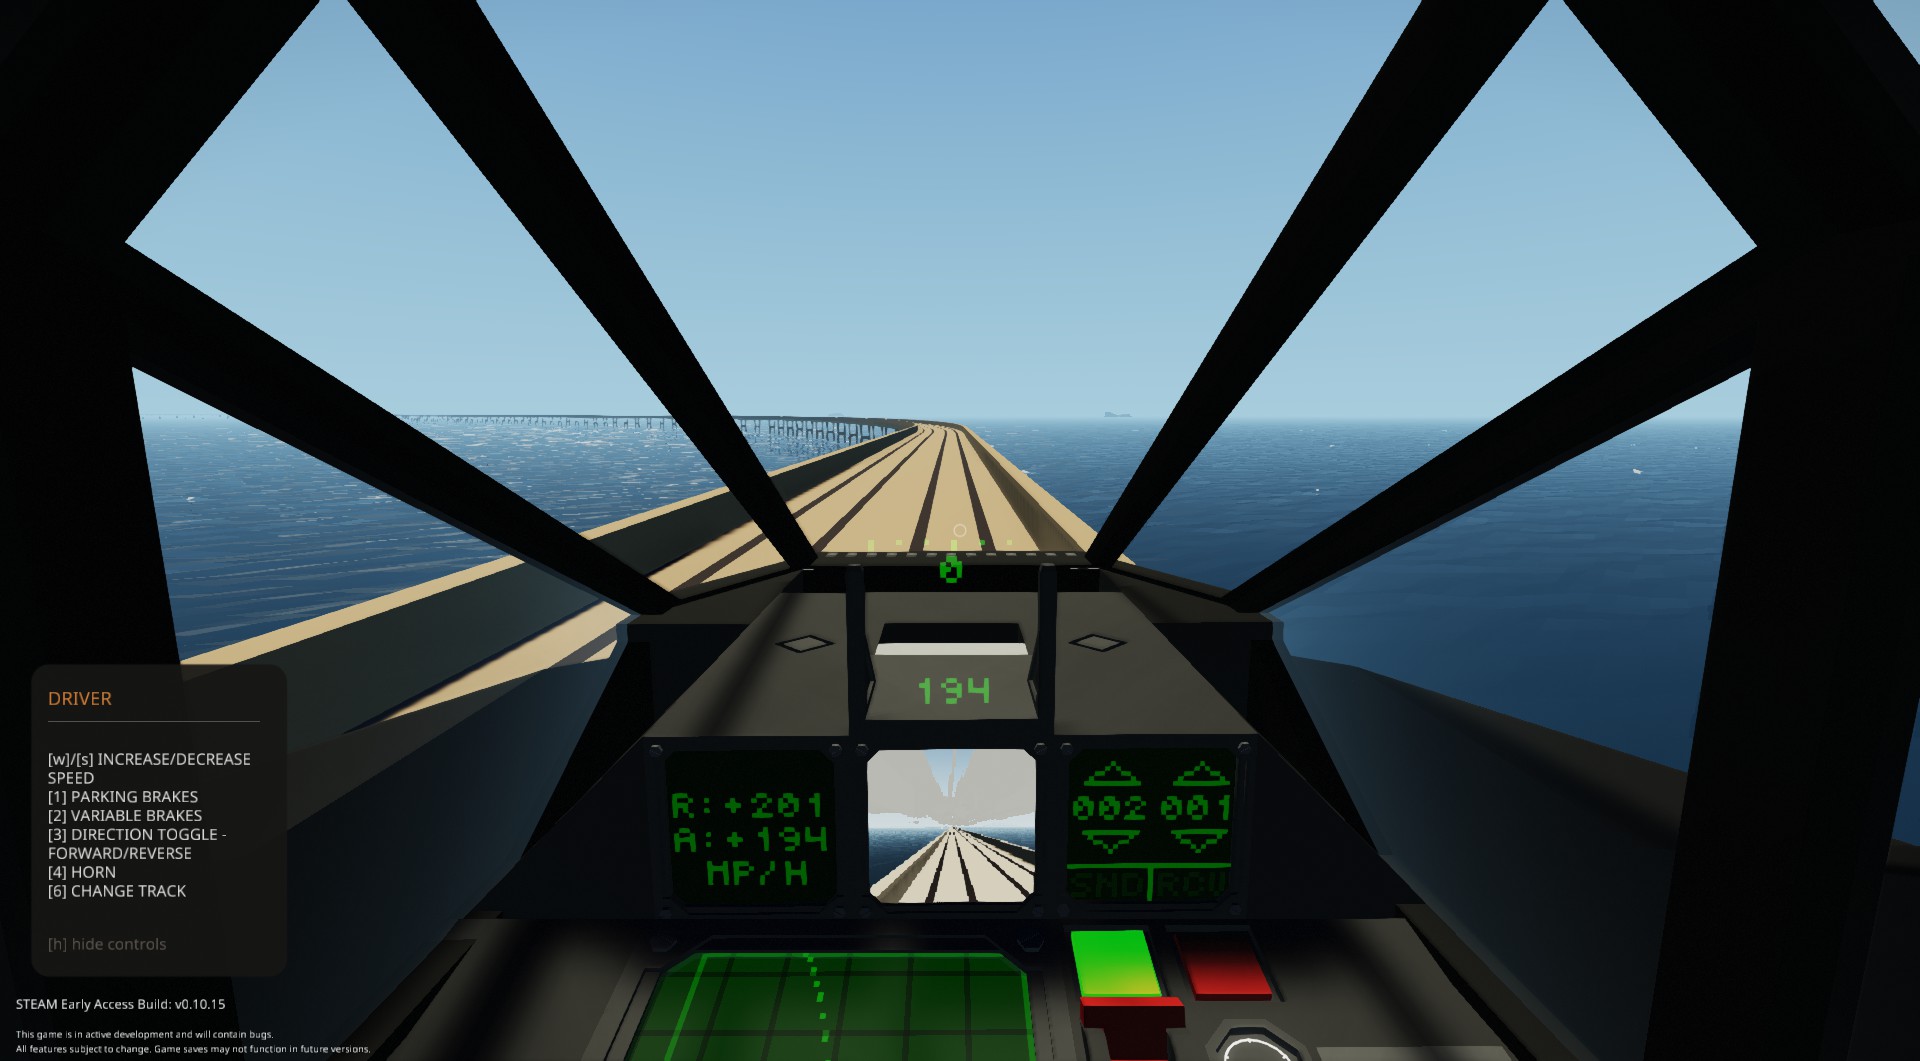
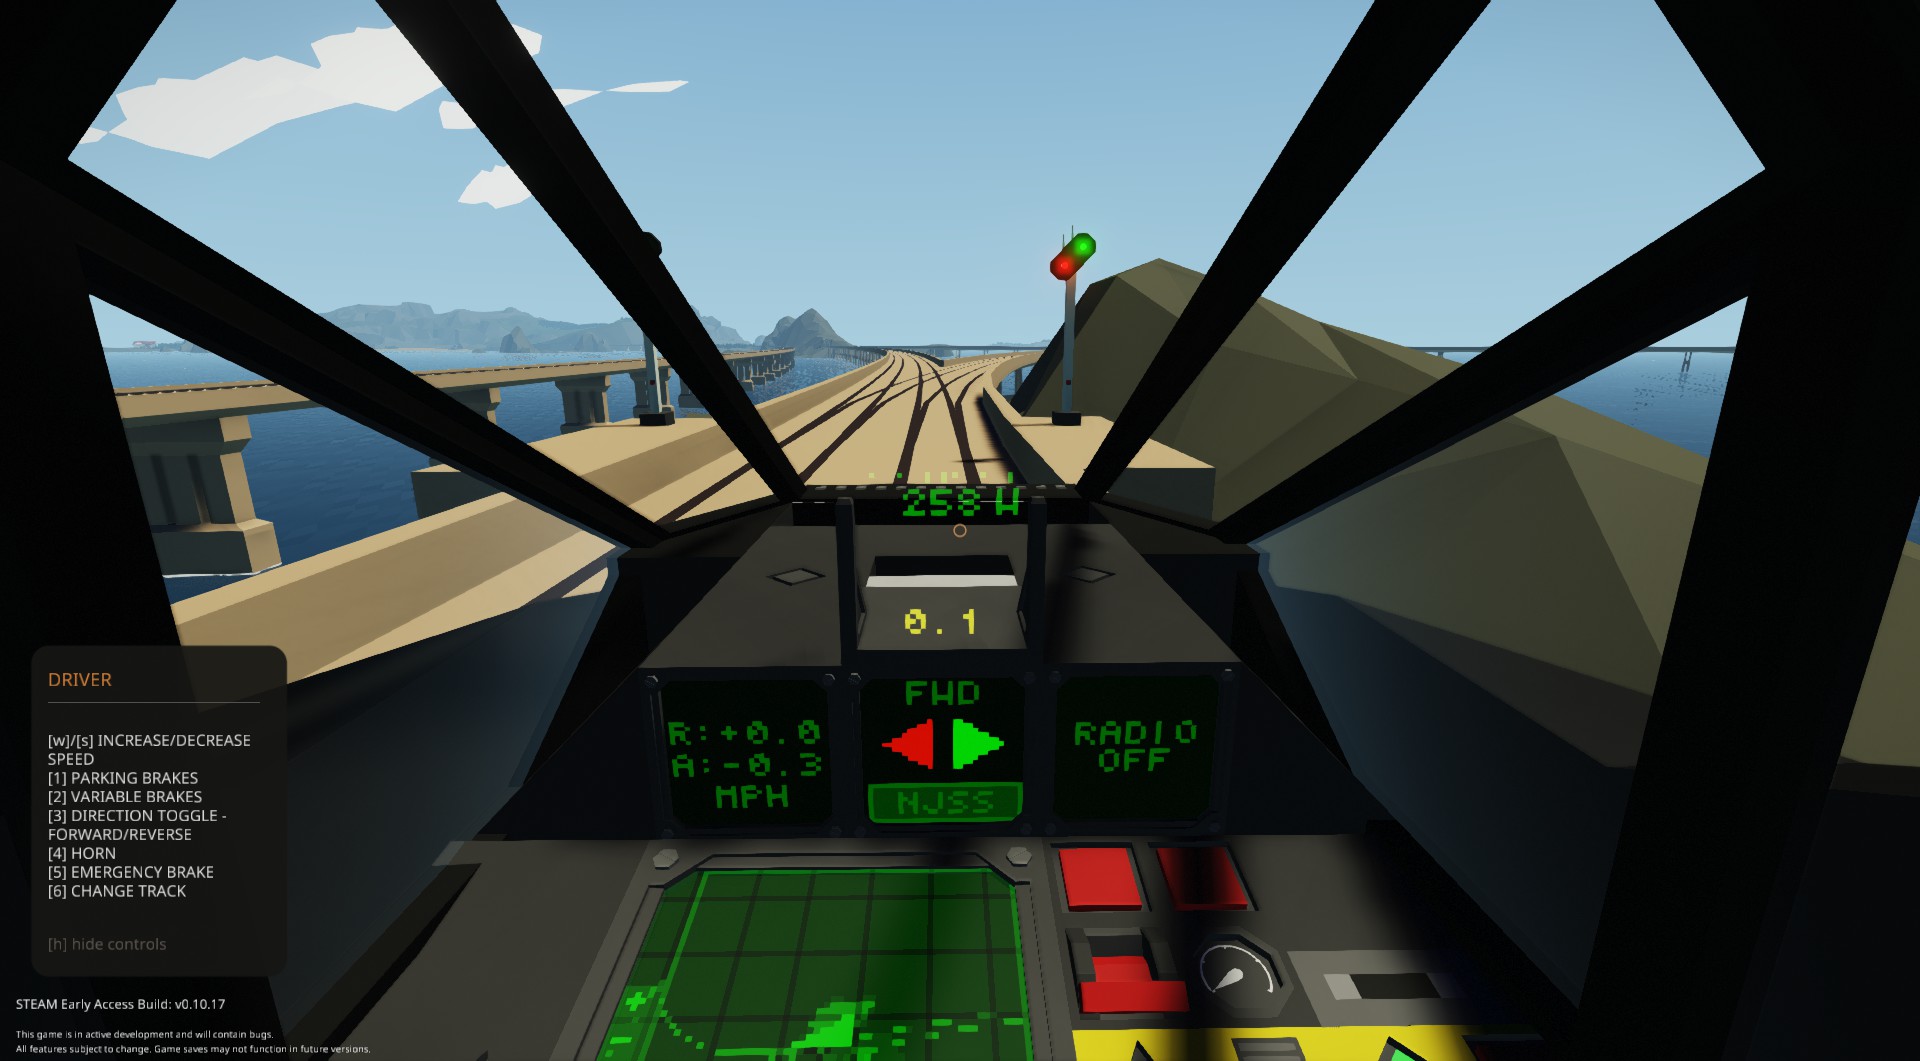
3. Hit the 1 Button in order to turn off the Parking Brake. *NOTE: *PRK* will be displayed in the HUD when the Parking Brake is on.
4. To increase the requested speed and go forward either press W or the UP arrow on the panel. The small display to the front left will show the Request Speed (R) increasing and the Actual Speed (A) should start to follow suit.To slow down press (S) or hit the DOWN Arrow. NOTE: Max Requested Speed is 200mph both in FWD and REVERSE. NOTE: You can change the units of Speed displayed in the monitor and the HUD by pressing anywhere on the screen of the Speed Display Monitor. It will cycle between mph, km/h and m/s.
5. In order to reverse you need to set the system to REVERSE MODE by hitting 3 or hitting the REVERSE button on the panel. An indicator light to the front left will turn red indicating you are in Reverse Mode. If you were moving forward the system will reset the Requested Speed to Zero and start to bring you to a stop. In order to increase your speed in Reverse press the W or Up Arrow (just like Forward) to increase speed. The INCREASE/DECREASE Speed is relative and is not directional, direction is determined by the mode that is active.
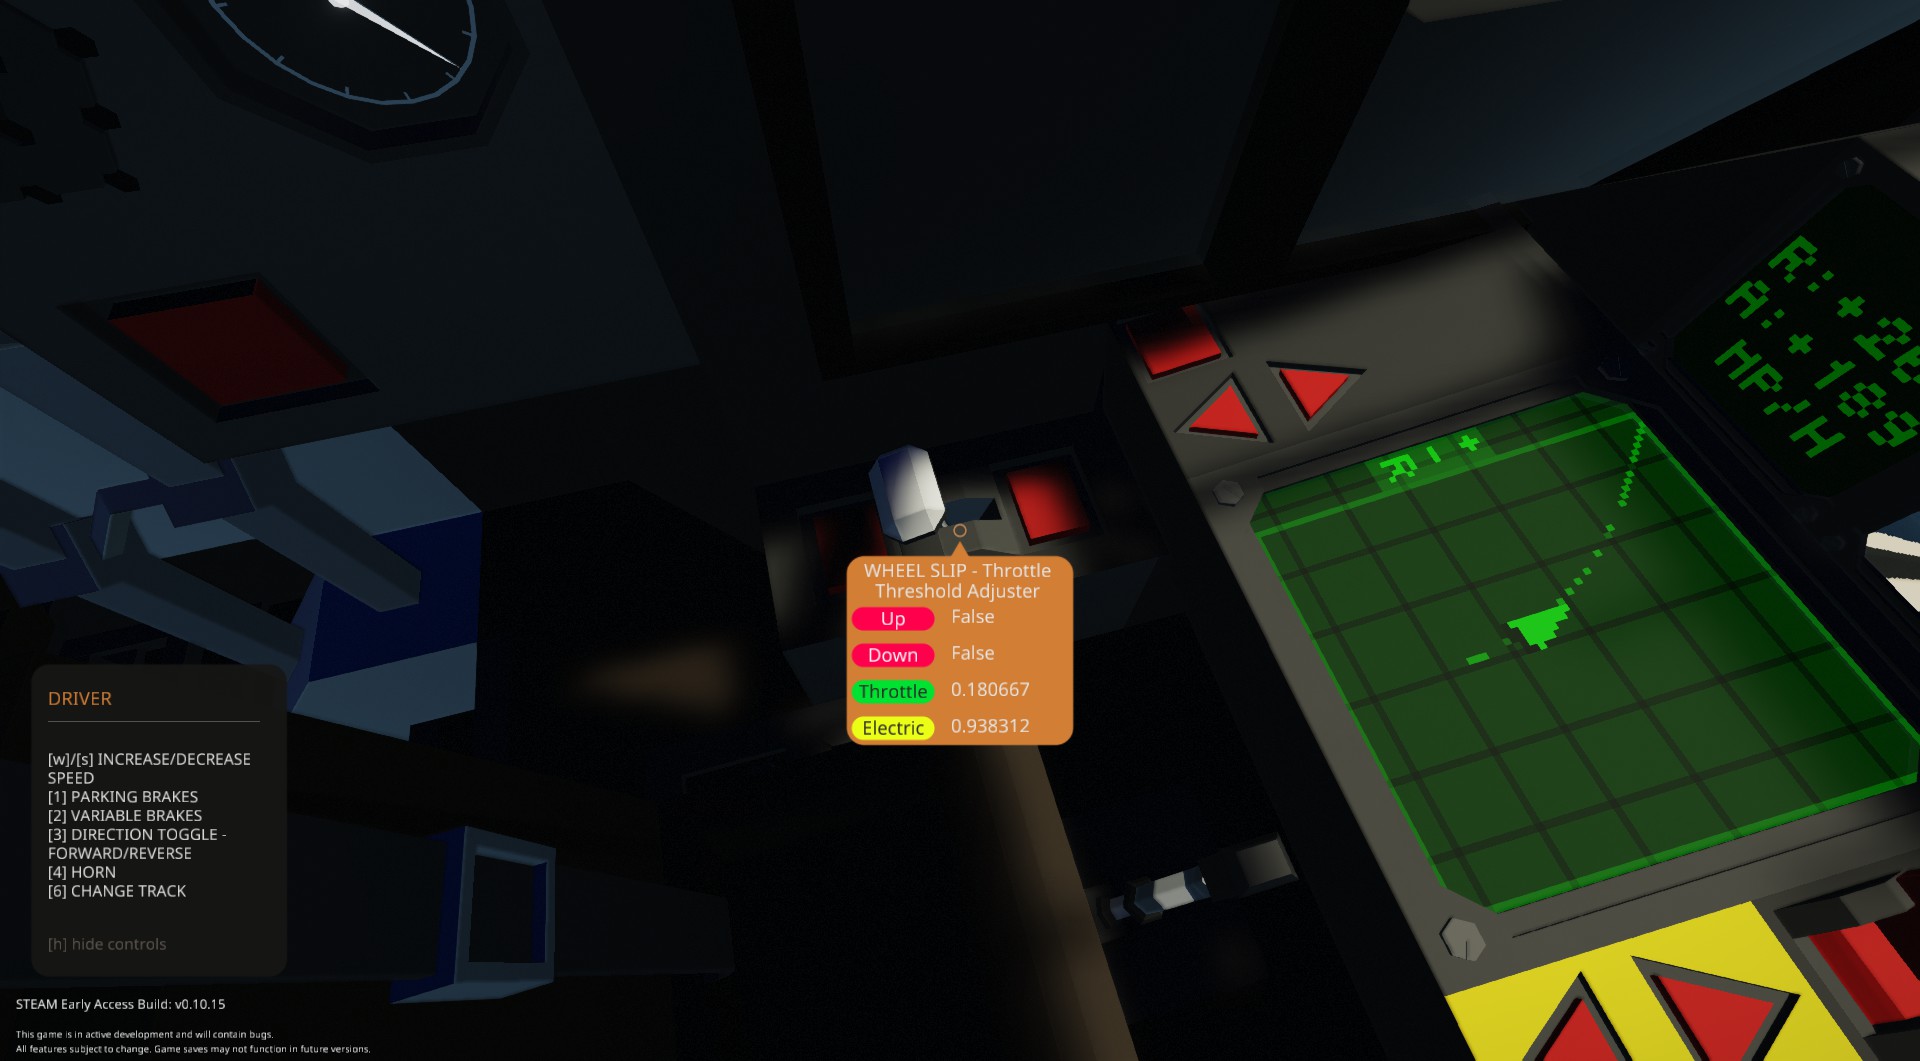
NOTE: In order to get MAX speed there is a Throttle Controller on the floor called "WHEEL SLIP - Throttle Threshold Adjuster" that you can play with. The throttle control assigns the clamp value for the Electric Motor throttle in order to prevent wheel slip. By default it is set to 0.178167 which will get you a MAX speed of about 197mph. The WHEEL SLIP control is useful in that it allows you to modify the clamp value on the fly in order to "push the limit". For example by pushing it to 0.215 you could get to 201mph but you are more susceptible to wheel spin in corners. When WHEEL SPIN is detected the speed reading on the HUD will be surrounded by astericks. There are plans to build a more dynamic wheel slip controller but in the interests of time I've implemented this system.
USED ITEMS:
3D MAP
https://steamcommunity.com/sharedfiles/filedetails/?id=1799889445
COMPASS BAND WITH TARGET INDICATOR
https://steamcommunity.com/sharedfiles/filedetails/?id=1748507638
CONSUMPTION 2x2 by krimwand
https://steamcommunity.com/sharedfiles/filedetails/?id=2036871644
Як завантажити моди?
Натисніть на кнопку вище та завантажте обраний мод з файлового сховища.Як встановити мод?
Див. секцію "Як встановити".Чи безпечний завантажуваний файл?
Моди перезаливаються нами з оригінального джерела, без жодних змін. Ми лише запаковуємо їх в звичайний архів. Додатково можете перевірити архів на наявність загроз за допомогою будь-якого антивірусу або онлайн-сканеру на кшталт virustotal.com. Також рекомендуємо робити резервні копії ваших сейвів, про всяк випадок.
For vehicle mods
- Download the .zip archive containing the vehicle mod files.
- Locate your game's root folder.
- Navigate to
rom\data\preset_vehicles_advancedand extract the files there. - Rename both files to something recognizable, ensuring they share the same base name but different extensions.
- Launch the game and go to the Workbench's Presets tab to see the new vehicle mod.